In my “Bronco Buster” post, I mentioned some scrap pieces that might be useful for making follow on puzzles.
Puzzle with scraps.
The skinny scrap was used to make a puzzle for a customer that wanted something to remind her of the beach. So, I made a template of a beach sandal (flip flop depending on where you are from).
Template
Next was to cut the outline.
Outline of sandal
And, finally, cut the puzzle.
Front of cut puzzle
Back of cut puzzle.
This puzzle has 49 pieces. The customer has received it and is happy with it.
With the second scrap, I attempted to cut a bird’s eye view of a flower. I am not really happy with the results. I do not really like “push fit” puzzles in general but thought I would try one. This was not even really visually appealing.
Push fit flower puzzle
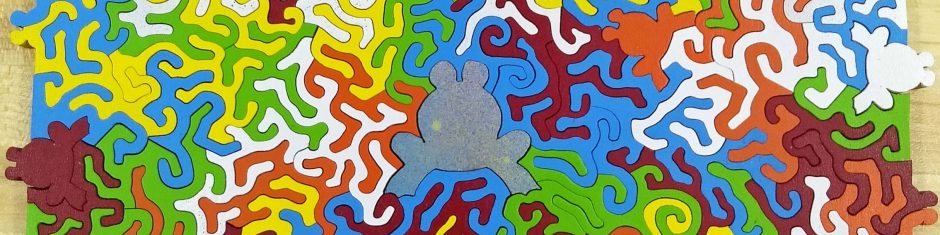
However, if it is flipped over, it looks better. Imagine the flower petals stained or painted with different colors. Then imagine the scrap from the scrap trimmed and glued to a backer board. This now turns into a roughly six-inch diameter 56-piece push fit tray puzzle. You’ll have to imagine your own stain or paint as it sits right now. I can pretty much guarantee this little puzzle will take an inordinate amount of time to assemble.
Possible tray puzzle
It is not yet completed. I need to peel the sunset image from the original puzzle off the backside and mount the outer tray to a backer board. And then I need to decide how to finish it: painted or oil stained. If it is oiled, that will leave the wood grain as an aid to assembly. If it is painted, wow! Very challenging, I think.
This has taken a back burner to some commissioned puzzles and getting ready for the 2024 Puzzle Parley puzzle exchange. I was considering this as a prototype for the puzzle exchange but decided against it. I want people to look forward to my puzzles, not dread them! I will get around to finishing this probably later in the summer.
This post is about a custom puzzle that highlights a number of difficulties I ran into while cutting it. I had previously cut a puzzle that was cut into four sections and each section had a different piece style. Meeting of the Minds. I made a blog entry about that puzzle and shared the link on various Facebook puzzle groups.
Not long after, I was contacted by a customer interested in a puzzle cut in a similar fashion. Over several days and emails, we settled on an image of a painting she had commissioned of a beloved cat. The cat’s name is Audrey, and the painting was by “Silver”, and the customer had the artist’s permission to use it however she liked.
Audrey, painting by “Silver”
I received the digital scan in the middle of November. I printed it and mounted it on a 13″ x 19″ piece of 1/4″ cherry Appleply. The plan was to start cutting it the day after Thanksgiving.
Well, man’s plans do not always survive reality. My shop is heated by a wood stove. We often have burn bans forced on us by the county due to atmospheric conditions that hold wood smoke in the air. One of these bans was placed in effect the morning I started cutting. If I sound annoyed, I am. We live outside of city limits and houses are spaced fairly far apart. My address is just inside the burn ban area. My immediate neighbor to the south of me is not. I could be standing outside breathing smoke from his place, but I cannot burn my own.
This is a common wintertime problem for me. And, actually, when it gets too cold, I cannot cut even with the wood stove burning. The shop has some insulation but is hard to get above 45 or 50 degrees if it is colder than about 15 or 20 outside. I can put on thermal underwear and thick coats, but my fingers need to be warm to cut well.
After a week and a half of forced delay, I was able to get started on cutting. We had decided on three sections of different piece styles. One side of the background was to be a swirly type of piece. The other half of the background was to be composed of the dragon tails style of pieces. The cat herself was to be cut with my normal piece style.
Sectioned puzzle. This is actually the second attempt. Read more below to learn about that.
Color line cutting of the cat was time consuming. From my notes, it took about an hour and a half to get to this point. This includes cutting the edges of the puzzle, the four cat figurals along the top, and color line cutting the three sections.
Closeup of color line cutting around the tail
Up to now, everything was going great. I started next on the left-hand section for the swirly cuts.
Swirly cuts
I started to have some adhesion issues with the image lifting from the wood after cutting. It was not a problem with the paper separating. Something happened to make the adhesive fail. I was spending large amounts of time regluing individual pieces of image back to the wood. Looking at the above picture, you can guess how frustrating that was to get everything perfectly aligned until the glue set! Finally, the worst happened. One of the pieces tore. It is pictured below.
Torn piece
I tried to glue it, but the results were horrible. It was at this point that I threw in the flag. I contacted the customer and apologized for the delay. This was the first week of December, and I just had to walk away from the project to decompress a bit. The picture below was as far I had made it. I ended up cutting a couple of the wood comparison puzzles during this time before I felt motivated to resume this project.
First attempt
I reprinted the image the day after Christmas. Abraded the back with 220 grit paper to roughen it up for the adhesive to stick. Wiped it down with rubbing alcohol to remove any greases, oils, or other residues that might have been on the printer paper. Did the same with the piece of wood. Cooked it in the press.
Down to the shop I went. Cutting started well and ended up with the three same sections as shown above. The top and bottom sections of the puzzle were rounded, so I had some cut offs to examine. And I’ll be darned if I did not have more adhesion problems! What the heck!
Adhesion issue, again!
I was in a quandary at this point. I finally decided to check the operation of my dry mount press. Oh, boy, did I find a problem! I took the heat probe from my smoker and put it in the press. The dial on the press was set at 200 degrees, the temperature gauge on the press was indicating 185 degrees, and the smoker probe was indicating only 171 degrees. This probe is guaranteed accurate to within 2.7 degrees for this temperature range. The adhesive I use needs a minimum temperature of 170 degrees to properly activate.
So, I brought the mounted puzzle back up to the house and recooked it at a measured 180 degrees. From this point on, I had zero problems with any paper lifting! I will be writing a post about dry mount press issues and maintenance in the future.
What I did have a problem with next was my saw! I was two thirds of the way done, and the saw started to sound like a meat grinder or tree shredder. My trusty DeWalt was shaking and vibrating like crazy. What does this puzzle have against me?
I shifted over to my Hawk and resumed cutting. I had to change the type of blade to do this. The Pegas MGT blades I like to use with the DeWalt tend to exhibit rough cuts on the puzzle surface with the Hawk. I discussed this in an earlier blog post. The Hawk is a great saw for many things, but it is not my preferred saw for puzzle cutting. Actually, I should say that I am unable to use my preferred saw blade on the Hawk while cutting puzzles. If I use a different blade, it works fine, I just have more tear out on the bottom side.
Fortunately, I had placed an order for a new saw the prior week. I knew the DeWalt was going to need some work. Also, following my saw comparisons of the prior summer, I wanted to try one of the Pegas style saws. I really like the DeWalt but wanted to have the adjustability of getting rid of as much blade movement as possible. I had not found a used one in my area, so ended up buying my first brand new saw. I went with a Seyco ST-21. The wait for it to arrive incurred another short delay. The new saw actually arrived pretty quickly. (As a side note, I am really impressed with Seyco’s customer service. When I called to order the saw, he was on vacation skiing with his family. He took my order over the phone, and I received the saw within ten days. This was even including a multiday delay caused by my bank because I had not made a large purchase on this card before. Delivery was further delayed by winter weather somewhere in Montana.)
I assembled the new saw and immediately started cutting on this puzzle again. (Discussing this saw will be another future blog entry.) I finally finished cutting this puzzle on the 19th of January. I finished the back with Danish oil and shipped it out on the 26th of January. Once the adhesive issue was resolved and a working saw obtained, this was a fun puzzle to cut. I had the feeling this puzzle had special meaning for the customer, so that made it a joy for me to complete it!
I guess you can say it is a very unique puzzle, as there are probably not many puzzles cut using three completely different brands and two types of cutting action scroll saws! The cut size is 15 1/4″ tall, and 12 1/2″ wide. There are 221 pieces with seven figurals. Plus, the four figurals from the original destroyed puzzle were fine, so they were included for a total of 225 pieces. Four of them just don’t fit! Pictures of the finished puzzle follow.
Finished puzzle front.
Back of the background sections.
Back of the cat.
Closeup of the figurals. Love that stained cherry.
Pile of pieces
There were a lot of delicate pieces and sharp points, so I took extra care in packing this puzzle. Thanks to frequent Amazon boxes crossing our threshold, I have a lot of neat packing material I can reuse instead of throwing in the trash.
Extra care in packaging delicate pieces.
Two months from inception to completion. That is nuts! The customer appears to be happy with it now that she has it. I waited to post this until I was sure she had a chance to complete it. Her review of it is here: Rebecca’s Wooden Jigsaw Puzzles: Silver, Audrey
For that size of puzzle, some viewers may think that 221 pieces is not enough. However, the swirly and dragon tails styles of pieces take up a lot of space. If I cut them too small (i.e. thin), they become very delicate. Additionally, they take a lot of time to cut, and so the costs go up even though there are less of them.
I will be fixing the DeWalt saw at some point. There are a lot of how-to videos on YouTube University. That is pretty low on the priority list though. Looks nice lined up with the others!
Saw line up.
As always, please contact me directly if you are interested in a custom puzzle for yourself. bob@fivefrogswoodworking.com
And check my Etsy store to see if anything interests you. I promise that big leaf puzzle will not bite you! FiveFrogsWoodworking – Etsy
I have a gorgeous photograph of a sunset I took in the Powder River country of southeastern Montana on a cold November evening in 2013. We were driving back to our camp, and it was getting dark. The colors were striking, and I had to pull over just to sit there and enjoy it. Fortunately, I had a tripod and digital SLR camera in the truck with me. I hopped out and set up my equipment and captured this view. I took several shots, but this ended up being the one with the best colors. Unfortunately, the headlights of another passing car somewhat detract from the overall image.
Powder River sunset
So, what can I do with that image? I have always admired some of the bronze work of the artist Frederick Remington. I am amazed by the detail he was able to include in his castings. I found a public domain downloadable photo of “The Broncho Buster” at the Metropolitan Museum of Art website. They also have a second version of the casting. It was made years after his death and does not include nearly as much fine detail as this one. And, yes, a century ago an “h” was often included in the word. If you want to waste a little bit of time on internet rabbit trails, you can go google “broncho vs. bronco vs. bronc”. His bronze is technically named with the “h”, but I choose to drop the “h” in my puzzle name.
“The Broncho Buster” by Frederick Remington
I used software to convert this to a black and white image and printed it onto a piece of 13″ x 19″ printer paper to use as a pattern.
Black and white image
Next, I adjusted the digital sunset image for a vertical portrait composition while trying to keep the black horizon as level as possible. I printed the result on photopaper and mounted it to a 13″ x 19″ piece of cherry Appleply.
Print adjusted to portrait
I cut out the black and white image and adjusted it on my sunset print until it was where I wanted it. I obviously needed to avoid the headlights, and I wanted the black portion to be the ground the horse’s hooves were on. I would have gone a little bit higher but was running out of room for the hat. I could have made the black and white image a little smaller, but I wanted it as large as I could get it.
Ready to cut the outline.
Next was to tape it down and cut the outline. I drilled the holes for the dropouts first and then cut the dropouts. (If you read my earlier posts on scroll saws, I used bottom feeding for the internal cuts.) The last little bit I cut was the outside edge of the dangling rein. A couple of things are not exactly clear on the finished outline. First, the far side front hoof appears to be integral to the horse’s mouth and nostrils. Also, the two little dropouts between the front legs and the horse’s neck might be hard to interpret. Here is the result.
Ready to cut puzzle!
The next step was to pick some figurals that go with the cowboy. I felt a thrown horseshoe and a coiled snake ready to strike would be perfect for the ground. Higher up, a cowboy hat profile and a soaring eagle. A Colt Single Action Army revolver by the cowboy’s holster, a boot by the stirrup, a bison, and a long horn steer head would also be appropriate. Oh, and a steam locomotive with its tender. And, of course, the signature frog piece.
Here is the cut puzzle front.
Front of cut puzzle
The back was finished with two shades of Danish oil.
Back of finished puzzle
A closer view of the collected figural pieces.
Figural pieces
This puzzle is already sold. If you are interested in your own copy of this puzzle, please contact me direct via email (bob@fivefrogswoodworking.com) to discuss options.
The widest width of the puzzle is about 12.5 inches, and the height is 14.5 inches. It ended up having 123 pieces. You can tell there is a lot of scrap material cut away for this. I cut a smaller version of this puzzle a year or so ago from an 8.5″ x 11″ print. I traced that smaller puzzle on a sheet of graph paper and counted squares to determine the area. That smaller puzzle had roughly 24.5 square inches. Scaling up to this size, this puzzle has roughly 79 square inches. A 13″ x 19″ print has 247 square inches of area, so almost 70% is waste material.
I have a couple of larger pieces of scrap from this. I have a customer who wants me to use them to make her some small puzzles. The longer skinny piece (about 3″ x 8″) will be a beach flip flop, and the squarish piece (about 6″ x 6″) might be a flower of some sort.
This is the first puzzle I have cut using my new scroll saw. I recently purchased a Seyco ST-21 to replace my broken DeWalt. Well, I guess this may technically be the second puzzle I have finished with the new scroll saw. The DeWalt failed in the middle of my last project. I ended up cutting that puzzle with three different saws: the DeWalt, my Hawk, and finally the new Seyco. So, this is the first puzzle entirely cut with the new Seyco. I will have an upcoming blog post to discuss the Seyco and how it compares to my other saws, but that will be after I do more cutting on it.
There have been numerous postings about boxes on several puzzle related Facebook groups. Some people insist that custom puzzles deserve a wooden box, others detest wooden boxes. One fellow indicated that if the puzzle comes in a wooden box, he throws the box away and puts the puzzle in a box of his choosing. Some people indicate they do not like puzzles to come in a bag of any sort. Most people agree that the puzzles should not be in airtight plastic containers to prevent mold growth. Some people do not like cheap boxes, which I can truly understand. (I guess I use somewhat cheap boxes.) But, for every person who expresses an opinion one way, there is someone else who likes the opposite. As a puzzle cutter, I read these discussions with interest. I do need to keep my customers satisfied, after all. I had toyed with the idea of making wooden boxes until I saw how many negative comments there were about wooden puzzle boxes.
One set of Facebook comments concentrated on what the puzzle box should be able to withstand. One criterion was to be able to support 75 pounds of weight. I cannot argue for or against this seemingly arbitrary number. I shudder to think of a shelf of puzzles that have 75 pounds of weight on the puzzle boxes. My puzzles are usually under 2 pounds in weight, so that would be a stack of more than 38 puzzles piled towards the ceiling. Alternatively, I would hope that no one is keeping their dumbbells or curl bar on top of expensive puzzles!
The comments also indicated the lid should be firmly attached in a manner that is easy to get off but does not fall off easily if the box tumbles on the ground. Who wants to play 336-piece pickup keep away with a puzzle while there are two dogs in the room?
This particular discussion really piqued my interest. How much weight could one of my boxes endure? Would the puzzle box fly open when dropped? Are my boxes horrible? I set out to find some answers, which has led to this blog posting.
I use folding boxes that I buy through US Box. Here is an example of a box as it is received. The size of this particular box is 8″ x 8″ x 3″, which is my medium sized box. I also use 6″ x 6″ x 3″ and 10″ x 10″ x 6″ boxes of this same style.
Unbuilt box
These boxes are easy to assemble. First, you open them up.
Building the box
Next, you start folding the bottom flaps down.
Folding the first set of bottom flaps
Folding the second set of bottom flaps
I have not done so before now, but I am going to start using a hot melt glue gun to glue these flaps together as I build the boxes. I have been applying a piece of packing tape to the inside flap. I will keep doing that as well.
Inside of the newly built box
For my first test, I am going to use this newly assembled 8 x 8 x 3 box. I am not going to tape it or glue it together, just put the lid on it. I am going to leave it empty, so the contents do not provide any structural support. And then I am going to start stacking known weights on top of it until it starts to deform or collapse.
I have a number of heavy boxes full of cast iron and lead. I use these to apply force to newly mounted puzzles while they are cooling down from the dry mount press. I weighed these individual boxes with a postal scale and then started stacking them on my empty puzzle box. This was the first box. This one is a cast iron vise that will be installed on my in-house work bench when I finish building it.
11 pounds and 12 ounces of cast iron
This next set of boxes weighs 21 pounds and 11 ounces. On the right side of the picture, you can see the first box above is stacked on the puzzle box.
21 pounds and 11 ounces of lead
This continued until I noticed deformation of the box. This was the last picture I remembered to take before it started to collapse, but it does not stop here. At this point, it has 67 pounds and 11 ounces piled on it. The box still looks nice and straight and square all around.
67 pounds and 11 ounces of cast iron and lead
I continued stacking more boxes until the puzzle box started to fail. At this point, the box is supporting 124 pounds and 10 ounces of cast iron and lead. The stage before this one was 113 pounds and 2 ounces. So, these boxes do meet that arbitrary criterion of supporting 75 pounds.
124 pounds and 10 ounces of weight
Here is a side view of the collapsing box.
Close up of box deformation
Another view.
My box is bent!
With everything removed and the lid off, here is the inside of the box.
Inside view of bent box
The next criterion was to not fall open and spill its contents when knocked off the counter. I took another new 8″ x 8″ x 3″ box for this test. I filled it with the multi-age unicorn puzzle from my last blog entry. It had been previously stored in a little plastic rubber maid container and needed an upgraded home. I decided it could be a potentially sacrificial test subject. It was already missing one piece, so….
Preparing for next test
As you can see, the box is only about one half full. That is a complaint I have noticed in the Facebook groups. People do not like it if the puzzle rattles around too much in the box. That is one of the nice things about these folding boxes. You can custom fit them to the size of the actual puzzle it is being used for. In this next picture, I am trimming the box to fit with a straight edge and a razor. (You can see the bent box from earlier, too.) When doing this, you do need to remember to leave room for tissue paper padding and whatever brochure or other paraphernalia you might enclose in the box with the puzzle.
Trimming box to fit
I taped the bottom flap of the box like I have been doing with my puzzles up to this point.
Taping box flap
I like to use a couple of sheets of tissue paper to line the box.
Tissue lining
Next is to fill the box.
Fill the box
Fold the tissue paper over.
Fold the tissue paper
Next was to put a lid on it and smack it off the counter!
Box with lid
The first hit was not very hard. It only flew a couple of feet.
2 feet from counter
Not very exciting. I then smacked it harder, and it flew about 6 feet across the room. It would have gone farther, but it hit a metal stand that was in the way and fell to the floor early.
6 feet from counter
I tried it upside down as well.
Upside down test
It still stayed together. Pretty boring test.
Upside down box 3 feet from counter
How about if we put it on its side and make sure it tumbles as it falls?
Sideways box
This one had some different results! The lid came off the box.
Lid came off the box
Side view of the above situation
I kind of pinched everything together and lifted it all up onto the counter. No pieces fell out onto the floor as I did this.
Picked up box on counter
I gently opened the tissue paper, and shook everything, and the pieces all fell back into place in the box! Put the lid back on, and it is good to go! Wrapping it with the tissue paper helps to contain the pieces if the lid comes off. Some people put their pieces in a nice velvet/felt bag, which would be nice as well.
Restoring the contents
I ended up knocking the box on the floor 10 times while doing all this, so the box was starting to look a little rough at the end.
Box corners after 10 hits on the floor
So, my cheap little boxes stand up pretty well. Are they the best thing? Of course not! I would love to use some nice sturdy boxes. On several occasions over the last 10 years, I have spent hours searching for a source of rigid stand up boxes that does not break my bank account or fill my space with empty boxes. Unfortunately, most box vendors want you to make a minimum order of 500 boxes. If you cut different sizes of puzzles, you would then need to order and stock maybe 3 sizes of boxes. 1500 boxes stored in my basement workshop! Or the guest room? Not happening! As one person has noted, I am not a prolific cutter of puzzles. I think the greatest number of puzzles I have cut in one year is on the order of 25 or so. With that many boxes and my low production rate, my future heirs would be dealing with stacks and stacks of empty boxes.
Furthermore, buying 500 boxes does not really make the empty box affordable to me. I have been quoted up to $20 a box, plus shipping! $10,000 (or $30,000 if you get three sizes) in boxes that my heirs can fight over! And, if it is a $200 puzzle, you just added 10% to the price of the puzzle.
I can buy a fairly decent box at the local Hobby Lobby for around $6, but they usually only have a couple of them in stock. If you need one for a small puzzle, the box will be a cube shape, which I do not care for. And, when I go back to get more, the box has somehow changed its shape. Or it now has polka dots and stripes. I really would like my boxes to be consistently colored and shaped. I think the white box with green lid is fairly recognizable to a few people.
I buy these boxes in three sizes, 50 at a time. They store flat other than the lids. The lids do take up space, but they can kind of accordion together and fit in a relatively small space. The ones I have been working my way through had green lids, but those are no longer available from this vendor. Future lids will be the same color of white as the boxes themselves.
Box storage
I could rattle on about boxes. I have played with making wooden boxes. I have used little jewelry boxes for small puzzles. But this blog article was really about the boxes I do use and how they stand up to some torture tests. It has gone too long as it is.
I saw a Facebook post about a puzzle cut to entertain different age groups. It reminded me of an old puzzle I cut over 20 years ago before I decided to start a small business making jigsaw puzzles. I thought I would try to find it and share it here.
As a little background, when we lived in Nebraska while I was still in the Navy, we were expecting our third child. Our two daughters were told they would have to double up in one bedroom instead of each having their own room. To soften the blow, we offered to paint their room the way they wanted. They chose pink and white. I may be wrong, but I think the bottom half of the walls was white, and the top half was this bright pink. Maybe it was the other way around. Oh my gosh. When we were done, you had to wear sunglasses to enter the room! It was the brightest pink I have ever seen. I did not know pink could be so bright! And the white was a glaring gloss Arctic white of some sort.
To try to soften the effect, we had applied a wide wallpaper border to the paint line where the pink and white met, and a matching skinny wallpaper border where the wall met the ceiling. Two months after our third child was born, the Navy in its wisdom moved us early! Fortunately, we did not have a problem selling the house, but I was concerned.
We had leftovers of the wallpaper border that we moved with us. A few years later, I decided to use some of it to make a puzzle. This puzzle is about 20 inches long and 8 1/2 inches tall.
Puzzle made with unicorn wallpaper as the image
This puzzle was used quite a bit through the years. I dug around in the storeroom and found it to put it together for pictures for this blog post. I was rather surprised to find that only one piece was missing. Other than the missing piece and one piece that was chewed on, it has really worn well.
Here is a picture of the left side, showing the large pieces for the youngest to work.
Left side of puzzle with bigger pieces
Here is the right side, showing the smaller progression of piece size.
Right side with smaller pieces
Even then, I was employing a little color line cutting.
Color line cutting
I personalized it by cutting the initials of each child’s first name (H, E, and B).
Here is the backside of the puzzle. The wood grain is readily apparent, so it is not Baltic birch. I believe it is a cabinet grade 1/4″ birch plywood. You can also see I was not signing or dating any of the puzzles I made at this point. I really have no idea how many puzzles I made and gave away before I started keeping track.
Backside of puzzle
Here is the back side of the color line cutting on one of the unicorns. The mangled piece on the left of the leg has clear tooth marks in it from somebody chewing on it.
This is shared as an example of a puzzle cut from something different: wallpaper!
Happy Puzzling!
Bob
Posted inOld project|Comments Off on Multi-age puzzle
This is a continuation of my last blog post. This project is taking longer than expected. I have cut seven of the different wood samples. I will post my findings of these seven, as I am not sure how long it will take me to get to the rest of them.
I decided to make these test puzzles as close to the same as possible. So, I cut them all using the same saw, the same brand, size, and style of sawblades, and the same puzzle piece style. These are all 8″ x 8″ blanks (except for one I will discuss when I get to it). I cut the puzzles using my DeWalt scroll saw with Pegas 2/0R MGT blades. I cut them in what I call the dragon tail piece style. They all seven have roughly 40 pieces (except for the smaller one).
Seven dragon tails puzzle cut from seven different varieties of plywood
The samples I have managed to cut at this point are the five varieties from the Boulter sample pack, a piece of cherry Appleply, and the piece of MDF core with maple face veneer. I also cut additional puzzles from the extra sapele, okoume, and meranti blanks. These three additional puzzles are not the dragon tails style of puzzle piece.
Okoume, sapelle, and meranti with other piece styles
I share below my experiences with these woods. As always, these are my personal experiences. Others may disagree with me, which is fine. Some of the pictures you will see are greatly magnified to better show what I have learned. I took these magnified pictures with a Carson xOrb Digital Viewer which magnifies 68X on a 27″ monitor. They do not look as drastic in real life as some of these photos might indicate!
Carson zOrb
Meranti
I started with the meranti. It intrigued me due to its rather neutral look. It is not bland like Baltic birch but has a very consistent looking grain structure. It was lighter than some of the other woods. The piece on top in the below picture has Danish oil on it to bring out the grain.
I did discover that the surface was what a wood worker would call an “open grain”, which means it was rather porous. Open grain woods do not typically take stains very evenly. Even uncut and sanded, this surface was rough looking. This photo taken with my cell phone while I was sitting at the saw shows the open cell structure of the meranti wood.
Meranti surface
I found this wood to splinter rather easily. I could see pieces flaking off along the grain as I was cutting it. This was on the top surface as I cut, which is where the teeth of the blade are pressing down into the wood. You often have splintering on the bottom side, but this was happening on the top side. The below photo was taken with my cell phone camera while cutting. This was the worst of all the woods tested for this.
Top side splintering
The backside was much worse, with entire pieces being torn out. The picture below shows the worst incidence of this with a .5 mm mechanical pencil for comparison. Photo taken with zOrb.
Back side tear out
Of the seven varieties discussed here, I feel this was the second weakest as far as structural strength. The first thing cut with these puzzles is the edge all around the puzzle. I tested all of the edge debris, and this was the second easiest to break. This was obviously not scientific with gauges and meters and such, but I did this to all seven plywood varieties using several pieces of debris from each puzzle.
Testing wood strength
This puzzle I opted to finish with acrylic spray paint. You can see how the grain structure did not allow for a very smooth surface. I do not think this hurts the puzzle but gives it maybe a rustic appearance.
Also, the weakness of the wood was proven when removing the pieces from the sacrificial cardboard used while painting. One of the pieces broke! You can see it in the below picture as well as the above picture. I have glued it back together. It is probably stronger than it was but will always be a little weak. I will be listing this puzzle for sale on Etsy but will point out the broken and mended piece. It will be shipped with the adjacent piece inserted for support.
Broken piece reglued
I was disappointed with the other puzzle I cut from this as well. The below picture is a little out of focus, but you can see all of the tear out from the bottom.
Tear out
Here is a closeup some of the tear out.
Close up of tear out
I find this to be unacceptable. I have not made up my mind on what I will do with this puzzle. I have done nothing to finish it yet. It may just go in the kindling pile.
I personally will not buy any more meranti plywood for making puzzles.
Okoume
Next was the okoume. At 7mm, this was the thickest of the Boulter samples. The piece on top in the below picture has Danish oil on it to bring out the grain.
Uncut panels
This wood was subject to a lot less splintering than the meranti was.
Minimal splintering
Here is a close up of the worst spot I could find on the top, with a .5mm pencil lead for comparison.
Top side close up
The bottom side was fuzzy, like most wood is after being cut with a saw.
Bottom side close up
Below is a picture of the edge cut done at the beginning of any my dragon tails puzzles. For this wood comparison test, I was breaking these in multiple locations to get a feel for the strength of the plywood. The okoume was as good as any of them.
Edge cut
I did find one location with a small void.
Void in the okoume
Here is the finished and painted puzzle. This puzzle will be listed on Etsy.
Okoume painted dragon tails puzzle
You can see the grain structure through the paint on the okoume as well, but it is much less severe than the meranti or the sapelle. Here is a close up.
Okoume paint close up
I did a second puzzle with the okoume. It was cut in my usual piece style, but with a small frog border.
Second okoume puzzle
This puzzle I opted to finish with 5 different colors of Danish oil finish. This puzzle will be listed on Etsy.
Finished frog puzzle
I felt this was a decent plywood to work with for puzzle cutting. I have not found it locally, and I like the Appleply I have been using, so I probably will not be making many puzzles from it. If it was sourced locally, I would use it.
Sapelle
Next came the sapelle. The piece on top in the below picture has Danish oil finish applied to bring out the wood beauty.
Uncut panels
This wood splintered on the top as it was cut, but nowhere nearly as bad as the meranti. The picture below shows one such location on the right by the .5mm pencil lead. It also shows a tip blow out on the left. Remember, this was taken with the zOrb device, and does not look bad to the naked eye.
Top side splinter and tear out
The backside had some as well.
The finished puzzle is fine. You can see more grain structure than with the okoume, but less than the meranti.
Sapelle painted dragon tails puzzle
Here is a close up.
Sapelle close up of painted pieces
The other panel, I cut differently and coated it with just a neutral Danish oil finish. I will probably list this on Etsy, but I am tempted to keep it for myself. I was unable to capture it with my photographic skills, but that piece shimmers in the light as you move it around. It is just flat out gorgeous in its iridescence.
Danish oil on sapelle
I do notice with this wood that it is very difficult to pick this puzzle up to flip it over. There is almost no friction between the pieces and if you pick it up, it will fall apart. I have to use two pieces of cardboard to sandwich it to flip it over.
Like the okoume, I would not hesitate to use this in the future but would not go out of my way to obtain more.
Boulter provided cherry single ply core
This wood was extremely frustrating to me. I love cherry and had high hopes for this stuff. Like the previous wood selections, the top panel below has a coat of Danish oil finish on it.
Uncut panels
This wood is very thin, and very light. It offers almost no resistance to the blade as you are cutting. It was almost like pushing through water or something. I found it to be uncontrollable. I could not spin the wood around the blade without over running my target. I ruined the first panel and tossed it in the fire. I started the second panel and gave up early. I could not even cut the edge of the puzzle off, much less attempt to cut the more challenging dragon tail pieces. I ended up cutting a chunk off to remove the evidence of my efforts.
I moved on to the Baltic birch. As I was cutting the Baltic birch, I decided to give this cherry another shot by using a dull blade. I cut in the Baltic birch until the blade was bending quite a bit from pushing hard enough to get it to cut. I then switched to the cherry and cut the entire puzzle (now smaller than desired) with one extremely dull blade.
Cut but unfinished puzzle
I found that it did not have any splintering problems. Here is a representative picture of the top side taken with the zOrb showing the quality of the cut.
Representative cut on the top side
The backside was typically fuzzy.
Close up of backside of cut
I finished this puzzle using Danish oil.
Finished puzzle
The puzzle looks great. However, I find the wood to be very weak. The strength test I described above showed the wood to break with almost no effort at all. In fact, one of the pieces broke while I was just rubbing a little finish on it.
Broken piece
Yes, I can glue it, but I think it is symptomatic of problems the entire puzzle will have. I do not think I will list this for sale. I think it will be a loaner demo puzzle until it is nothing but splinters and toothpicks.
I found this wood to be unacceptable for my puzzle purposes.
Baltic Birch
I have used a lot of Baltic birch in the past and will use more in the future. It seems to be easy to find locally and is usually of fairly good quality.
Uncut panels
One of the issues with Baltic birch is that sometimes it has a surface patch on it. The picture below is an example of such a patch. It is not shown in the above photo, but one of those panels does have a surface patch.
Surface patch
This sample of Baltic birch splintered quite a bit more than I expected it to. I have noticed this is becoming more common with the Baltic birch I have been using. A couple of other puzzle cutters have commented on this issue in a Facebook puzzle group I am a member of. This is one of the reasons I have been looking for a different wood to use. In the picture below, you can see the splintered wood laying on the surface, and to the left and slightly below that you can see the divot it came out of.
Splinter with divot
Here is the cut puzzle.
Cut but unfinished puzzle
Since this is pretty boring wood, I opted to spray paint this one as well. You can see the grain lines show through the paint with this wood as well.
Painted Baltic Birch dragon tails puzzle
Here is a close up of the painted wood. Some of the grooves are natural to the wood, and a couple are from the missing splinters.
Close up of paint
Here is the surface patch.
Surface patch
I have no problem using Baltic birch but was really looking for something better.
Cherry Appleply
This brings us to the cherry Appleply sample. This was top of my list going into this, and it has pretty much stayed there.
Uncut Appleply panel
This stuff is a joy to cut. There is really no splintering top or bottom while cutting. This is the worst spot I could find on the top of the panel. Remember, this is magnified something like 60 times by the zOrb.
Top side splintering
This is the worst spot I could find on the bottom of the panel. All of those whiskers go away with a little bit of sanding when done cutting. No divots or grooves left behind.
Bottom side splintering
Here is the cut but unfinished puzzle.
Cut but unfinished puzzle
I opted to finish this with 5 different shades of Danish oil. This picture does not do it justice.
Finished puzzle
Once the Danish oil finish has cured, this will be listed on Etsy. It is cool in my workspace right now, so it is taking longer to cure than I planned for.
MDF core maple panel
This was the big surprise for me. I tend to sneer at MDF for certain things, such as skinny puzzle pieces. This actually is a good product worth looking for more of. I apparently failed to get a standalone picture of the uncut panel, but here is the cut puzzle.
Unfinished MDF core maple veneer panel
This stuff cut beautifully. It seems to be as strong as the majority of the plywood samples. It did produce much finer dust than the rest of them. Like the Appleply, splintering was basically non-existent. Here is a view of the top side.
Top side splintering
And here is a view of the backside.
Back side splintering
Light sanding after cutting removed all of the little whiskers.
Once again, I opted to finish this with five shades of Danish oil finish. This is a little bit different, as the previous examples finished with the Danish oil were on darker woods. This being maple, the same colors of finish produced wildly different results.
The difference is very subtle, but the light-colored pieces in the picture below are actually two different shades of finish.
Finished puzzle
This will also be listed on Etsy.
Summary
I still have more varieties of wood choices to cut. But from what I have done so far, the cherry Appleply is my wood of choice. Second to that would be the MDF core maple panel product. I think the Meranti and the single ply cherry core plywood are unacceptable for what I do.
As far as any hard analytical data, I kept records of the number of blades used and the amount of time spent on cutting each puzzle. They are listed in the table below. It is a pretty small sample size for real conclusions.
Note that the cutting time is not the vast majority of time spent on these overall. Applying finish, sanding, etc take up a considerable amount of time. Add in time for boxing, labeling, picture taking and editing for Etsy listings, creating the Etsy listing, etc, come close to doubling the time in some cases. The smaller the puzzle, the more relative “admin” time involved.
Some of these are already listed on my Etsy website at FiveFrogsWoodworking, and more will be as time moves on. I was hoping to get these listed earlier in the month to allow for more time before Christmas, but life sometimes interferes in manmade plans.
Happy Puzzling!
Bob
Posted inTechnical|Comments Off on Puzzle Material – First set of results
The catalyst for this puzzle board comparison was the announced availability of sampler packs from Boulter Plywood with five 8″ x 8″ samples of different varieties of plywood. Dee Rogers on her Facebook group page explained that Chris Boulter had arranged for these sampler packs so puzzle cutters could try out five different types of plywood and see how they like them. BoulterPlywood.com
I thought “Why not?” In August, I finally got around to calling to order a sampler pack. It was pointed out that shipping costs might make it worthwhile to order more than one pack to reduce the impact per order. So, I ordered three packs. $24 of wood, and $17.20 in shipping charges from the east coast to the Spokane, Washington area. So that is 960 square inches of material for $41.20, or $6.18 per square foot. Just in comparison, two weeks later, I bought six 4′ x 4′ panels of Appleply from States Industries in Oregon. The total cost was $585.83 delivered (only $71 of that was shipping). That equates to $6.10 per square foot. The last Baltic birch I bought locally was $61.03 for a 5′ x 5′ panel, or $2.44 per square foot.
The price per square foot is probably not a fair comparison, as I suspect larger pieces from Boulter Plywood to here would be pretty expensive to ship. If you have a local lumber store or specialty store, that is probably your best source price wise. Many of them will also order wood they do not normally carry.
Here is a sampler pack. They are helpfully marked on one edge with a single letter corresponding to the species name.
Boulter sample pack – Okoume, Sapele, Meranti, Cherry, Baltic birch, in order from left to right
Since I have three packs, I decided to put a coat of Danish Oil on one side of each variety to see what color is brought out. I also want to see if a finish of some sort reduces the amount of splintering on the back side of the puzzle while cutting, so the oiled samples will be cut with the oil side down (once the oil dries).
Raw wood on top, oiled wood below. In the same order from left to right as above.
The Danish oil really brought out the grain and shows what the wood looks like. Well, except for the Baltic birch. Baltic Birch just looks… bland? The sapele sample is almost iridescent as you tilt it around in the light.
Okoume – Okoume comes from the central African country of Gabon. If you are interested, information about it is available on The Wood Database. I wanted to verify it is not listed on the bad list. It is shown as vulnerable but not on the CITES list. This particular sample is the thickest of them, advertised as 7mm. I measured all of the samples with a dial caliper, and this was actually 7mm. All layers are made of rotary cut okoume. This piece is marine grade plywood, meaning the adhesive meets a specific standard for being water and boil proof (WBP).
Okoume plywood
Okoume edge view
Sapelle – Sapelle is from tropical Africa. It is one of the very many woods often lumped together under the mahogany label, although it is not a true mahogany. The Wood Database has good information on it. Like the okoume, it is not listed on the CITES list, but is considered vulnerable. This is also a marine grade plywood. All layers are made of rotary cut sapelle.
Sapelle plywood
Sapelle edge view
Meranti – Meranti is one of many different species that is referred to as Philippine Mahogany, which is no relation to real mahogany from Honduras. It is found throughout Southeast Asia, and although some varieties are vulnerable, some Meranti comes from sustainable sources. Dark Red Meranti | The Wood Database. This is also a marine grade plywood. All layers are made of rotary cut meranti.
Meranti plywood (yes, yes, one is already cut, but you cannot see that)
Meranti edge view
Boulter provided cherry – This is the first product examined that is made of two different materials. The outer face veneer is obviously cherry. It is plain sliced. The single inner veneer is poplar. Here are the Wood Database pages for both of those woods.
Notice that most poplar wood used for furniture is not really poplar but comes from the tulip tree. Actual wood from a poplar tree is kind of a trash wood and is used for stuff like pallets, firewood, and making paper. Confusing, right?
This is the thinnest of the samples so far. In the edge view picture below, you can see how thin the face veneers are. Since there is only a single inner ply, I have included a view of both the end grain and the side grain of the inner ply.
Baltic birch – I have been able to easily find this just about everywhere I have lived (residences in 13 different locales in 40 years). Most of it is from nations in the Baltic area, such as Russia, Finland, etc. Baltic Birch | The Wood Database. Baltic birch is a great product even though it is visually boring. It is strong, stable, and flat. I have been using different thicknesses of it for years to make shop jigs, shop cabinets, shop tools, etc. I turned to the 1/4″ version to make puzzles when I decided to get serious about puzzles. All layers are made with rotary cut birch. You can see there are five fairly equally thick layers.
Baltic birch plywood
Baltic birch edge view
Appleply
Appleply is a product made in Oregon by States Industries. If you cannot find it locally, you can order it direct from ApplePly Hardwood Plywood. They are sometimes out of stock in the sheet size you want, but it may be available in other sizes. I buy the 4′ x 4′ sheets. If you do, I recommend you buy it in groups of four to get the most out of your shipping dollar. They ship them UPS in a big box with up to four sheets in one box. A nice protector sheet of packing material is between each plywood sheet, and edge protectors of thick hardened cardboard do a great job. I have ordered from them twice and have not been disappointed.
Appleply is made with inner layers of birch or alder. They have various options to choose from for the face veneer. I usually pick cherry, but I recently included a sheet of their white maple. There are a lot of maple species, but since they are located in the Pacific Northwest, I am going to assume they are using Bigleaf maple. I am also assuming the inner layers are rotary cut with the face layers plain cut. Some of the cherry I have has beautiful book matching grain. Here are the Wood Database pages for the new species introduced.
You can see this wood has four inner veneers with two fairly thin face veneers.
Cherry and white maple Appleply
Cherry and white maple Appleply edge views
Cabinet shop off-cuts
Cabinet grade plywood – There is a cabinet shop located nearby that makes and sells high quality cabinets to a nationwide market. They used to have an outlet store where you could obtain pallets full of scraps and quality reject wood pieces. By this I mean they would cut a drawer front, and if there was a small splinter it would be rejected. You might have a 6″ x 24″ of 3/4″ thick maple that was in good shape except for a little nick on one corner. I frequented this place quite often, as the wood projects I make are often of a smaller size. One time, I was able to pick up a pallet of sheet goods at a price that I still cannot believe. The 1/2″ thick panels are 2′ x 2′, and the 1/4″ panels are 16″ x 18″. The face veneers are maple, and I assume the inner layers are birch or alder. The 1/2″ sample has seven inner plies and two face veneers. The 1/4″ sample has three inner plies and two face veneers.
Stack of cabinet shop cut offs – with 4-foot ruler
The stacks are considerably shorter than they were, but you can see there is quite a bit of plywood there. As an added bonus, they are finished on the good side with some sort of varnish or lacquer. I thought I was going to make unique puzzles from this, but the 1/2″ material is really too thick. I have sold a few, and exchanged some at a Puzzle Parley, but that is all. The 1/4″ plywood is quality wood but is not as good for puzzle making as Baltic birch and Appleply. I use scraps of it for practicing different or new puzzle piece styles. I will include one blank of each of this stuff in my little comparison project.
Cabinet grade maple plywood
Edge view of cabinet grade plywood
MDF core panels – included in the same pallet were some thinner panels that have an MDF core and face veneers of maple and alder. These are nominally about 3/16″. I have not used these for puzzles before but will include some in this test. If you look at the upper right-hand corner, you can see what happens if you sand this thin face veneer too long!
Face of maple and alder MDO core panels
Edge view of MDO core panel. Very thin face veneers on this
Miscellaneous scraps
Poking around through my scrap pile, I found some other pieces of material to use for this comparison test. I may not even cut these, depending on how done with the project I am by the time I get to them!
Construction grade plywood – This is a piece of 1/4″ construction grade plywood, like I made my first puzzles with. It has three layers of veneer made from some flavor of evergreen tree, like Douglas Fir or spruce or something.
Construction grade plywood
Construction plywood edge view
Solid maple hardwood – This is actually a piece of a panel I made from 8/4 hardwood maple I resawed on my bandsaw. The maple was originally a scrap from making a poster bed for my daughter 30 years ago. This maple came from Steve Wall Lumber Co. in North Carolina. I bought it when we lived in Georgia and have been carrying the scraps around since then.
Face view of solid maple panel
End grain view of solid maple
Masonite (hardboard) – I really searched for some solid hardboard to test as a puzzle. I did not find any. However, I did find a small piece of pegboard which is the same stuff with holes in it. Now, can I make a presentable puzzle from a piece of pegboard? I have no idea, but we might find out! The one drawback is that this is not 1/4″ hardboard, but rather 1/8″.
Pegboard face view
Pegboard backside view
Hardboard edge view
Cutting preparation
All of these samples (except the pegboard) were sanded on both sides (except any pre-finished sides were not sanded) up through 320 grit. The thickness of each sample was measured with a dial caliper both before sanding and after sanding. Each sanded panel was weighed. The results of the measurements can be seen in the below table. The red measurements are common measurements to use as reference to compare the various wood thicknesses to.
Please note that many woods are sold as a nominal measurement. In other words, a lot of material sold as 1/4″ is not actually 1/4″ thick. It is often 1/32″ thinner. So, if someone sells you a puzzle that is made of 1/4″ material, and you measure it and it is only 7/32″ thick, they were not lying to you. They told you the nominal thickness of the material. Another example of this would be if you go to the big box store and buy a 2 x 4 stud, you might think it will be 2″ thick and 4″ wide. No, that was the rough-cut measurement as it came out of the saws. Once it comes out of the saw, it is run through the planer to remove all the rough material and splinters. When it settles in the stack at the box store, it is nominally 1 1/2″ thick and 3 3/4″ wide. Note that is still a nominal measurement. Wood shrinks and swells, different sawing/planing machinery is set to different tolerances, etc.
So, that wraps this segment up. Now to take some time and go cut puzzles!
Happy Puzzling!
Bob
Posted inTechnical|Comments Off on Puzzle Material (part 2)
There are many possible materials to use for a good jigsaw puzzle. It is not always a form of wood, either. There are numerous examples of puzzles made from materials such as acrylic, thin metal, etc. Someone has recently made a Facebook post showing they cut a puzzle out of a sheet of embossed leather. I have even heard a rumor that cardboard puzzles exist! Gasp! Perish the thought!
In general, though, some form of wood is most commonly used as a base for a good puzzle with a positive tactile feeling. I am going to examine some of the options available, but certainly not all of them. As always with my posts, these are my results based on my personal experience, preferences, and prejudices. There is no one right answer. (And, my experiences are based on materials available in the U.S., other materials may be easier to find overseas.)
In the past, I have mainly used Baltic birch plywood when I make puzzles. I have not always been happy with the results with respect to how the wood performs. Baltic birch is good in that it is stable and strong. Recently, I have started using a product called Appleply with a cherry veneer on it. This is made by States Industries in Oregon. I like it better than Baltic birch. That is one of my prejudices I mentioned. I have been a woodworker since my age was in the single digits. My favorite wood is cherry, so I am always going to lean towards anything made of cherry.
But it may not be the best wood available for making puzzles. I have acquired a number of different samples of various sheet goods that I am going to use to make puzzles out of.
An array of sheet good samples
Before I start, maybe a little basic background.
Solid wood
This is exactly what it says. A piece of solid wood that is thin enough to make a puzzle with. A woodworker can take a slab of some wood, say maple, rip it to thin slices using a bandsaw, glue those sliced sections together at the edges, and make a wide and thin panel of solid wood. Solid wood presents some issues for the puzzle maker.
may be subject to warping with moisture changes
not strong enough across the grain – puzzle pieces might break easily
may be expensive as compared to some other material
time consuming to make panels big enough for a puzzle
Plywood
Plywood is an engineered material made from thin sheets of solid wood. The sheet thickness varies based on the intended use of the plywood. The thin sheets (called veneers or plies) are alternated by 90 degrees and stacked together with glue until the desired overall thickness is achieved. This eliminates the first two bullets above for solid wood. The inner layers of veneer are usually made from an inexpensive wood source. The outer layers (face veneers) are often made from a wood source valued for its appearance. Using thin veneers of expensive wood for the face veneers offsets the third bullet point above for solid wood.
Plywood can be broken down into so many different categories that it could fill a book to write about them all. The two most basic categories are construction grade and cabinet grade (or furniture grade). Construction grade plywood is made from softwood, often has thicker layers of veneer, and is full of knots and filled or unfilled voids. The 1/4″ thick stuff has 3 layers with no face veneer to it. It is ugly. Not what we want to use for a puzzle, but is actually what I started with when I first made puzzles for my grandmother.
Cabinet grade plywood is made from thinner layers of hardwood veneer. The inner layers are often made from rotary cut birch, poplar or aspen. The face veneer is often made from plain sliced hardwoods such as cherry, oak, walnut, etc.
Cabinet grade plywood will have at least one very nice surface to it. The opposite surface may be of a lower appearance quality. The interior plies may have voids in them. Most lumber stores are going to have some inventory of cabinet grade plywood in stock. Here is an image of a piece of 1/4″ maple plywood showing a void. You can see it has three inner layers with two very thin layers of face veneer. The inner layers are probably birch, and the outer layers are maple. DO NOT sand too vigorously, or you will not have a face veneer left to look at.
Void in middle ply of cabinet grade 1/4″ maple plywood
That void is not something you want to discover while cutting a delicate puzzle piece. You can, of course, fill it with an appropriate filler material, but that is extra work you really do not want to need to do. That brings us to the good stuff!
Multi-ply
Multi-ply encompasses a short list of very high-quality plywood products: Baltic Birch, Finnish Birch, Russian Birch, Europly, and Appleply. There may be others. Baltic Birch is usually fairly easy to find locally, the others not so much. These products have much thinner veneer layers and are supposedly void free. (I will state that I have had to discard several pieces of Baltic Birch that DID have voids in it. It wasn’t just one or two. It was like working with Swiss cheese.) These are more expensive than the cabinet grade plywoods, but for puzzle making are worth the extra cost. Here is an image showing construction grade, cabinet grade, Baltic Birch, and Appleply for comparison.
Four examples of 1/4″ plywood
The top piece is construction grade plywood, made of three plies of a softwood such as Douglass Fir. Next, is the same piece of cabinet grade plywood we saw previously, showing three layers of an inexpensive hardwood such as birch or poplar, with two very thin layers of maple as the outer veneers. The third item is Baltic Birch. It has five equally thick layers of birch. The bottom piece is Appleply, which has four inner layers of birch and two thinner outer layers of cherry (bottom layer is hard to see here).
Fiberboards
Here is where another one of my prejudices will be evident. I do not like fiberboard (fuzz wood, particle board, etc.) in most circumstances. It is heavier than real wood, it creates nasty dust, it does not do well with moisture, does not hold fasteners well, and typically is not as strong as the equivalent sized plywood.
However, it does have some advantages. If you have ever painted a piece of wood, you realize that the wood grain shows through the paint. Some of the fiberboard sheet goods are perfect if you want to paint your product. Additionally, many of the fiberboard materials are perfectly smooth and flat and remain so as long as properly supported.
There are a lot of varieties of fiberboard available. Some are purely for construction projects and would be totally inappropriate for a puzzle. One example would be OSB (Oriented Strand Board). Another would be particle board. I think particle board in a 1/4″ thickness would just essentially crumble if cut into puzzle pieces.
Medium Density Fiberboard (MDF) – This is made from very fine pieces of wood fiber that are mixed with a resin and formed into sheets under intense pressure. There are no voids, and it is almost perfectly flat. Very easy to paint with no wood grain showing through. I have not used this for a puzzle, but others do. I do not have a piece of this and am not going to go buy a 4′ x 8′ sheet just to make a small 8″ x 8″ test puzzle.
Medium Density Overlay (MDO) – This material has great potential in my eyes. It has a wooden veneer core like the plywoods above, but the outer face layers are made of MDF. This gives the strength and resilience of plywood, with the paintability of MDF. A lot of outdoor signage is made from this material. Unfortunately, I have not been able to lay my hands on a sample.
Melamine – this has a particle board core but has face veneers made of a plastic resin like material. I would avoid this. Particle board is not particularly strong, and the plastic resin face veneers chip very easily and eat circular saw blades like crazy. I cannot image scroll saw blades doing well with this.
Hardboard (Masonite) – This is also made from fine pieces of wood fiber mixed with resin. Unlike most fiberboard, it is somewhat flexible when still in the large sheet size. This is what pegboard is made of but is available in solid sheets without all the holes in it. It comes in 1/8″ and 1/4″ thicknesses. I used to have some for making patterns that I wanted to repeat, such as for tracing out Queen Anne furniture legs to cut on the band saw. If I can find a piece in my scrap pile, I will add it to the sample list. It can be brittle, so maybe not a good puzzle material. Might be a good choice for painting pieces, though. Some of the laser cut puzzles I have acquired seem to be made with this material or something very similar.
MDF core – This is a product that has a core of MDF but is covered with face veneer of wood. I have some of this in maple and alder. I have never used it for a puzzle, but I will cut a test puzzle from it.
This link leads to a good summary of all the above and more. Woodcraft Magazine
Well, this is a long post. I think I am going to be into another three-part post series here. My next one will be details about the samples I am going to cut, and then the third one will be about the discoveries made while cutting them.
Happy Puzzling!
Bob
Posted inTechnical|Comments Off on Puzzle Material
This mounted print has been waiting to be cut for a couple of months now. It is entitled “Meeting of the Minds” by David Galchatt. It was purchased by a customer and shipped here for me to turn into a puzzle. I mounted the print on a beautiful piece of cherry Appleply. After I pulled it out of the press, I discovered that there was apparently some residual adhesive on my release paper from the last project. It bonded to the print, and I could not cleanly remove it. I tried heating it with a heat gun, which just caused problems with the print mount to the plywood. I tried scraping it off, which guess what!?! Caused problems with the surface of the image. The picture below shows one instance of this, but there a couple of these on the puzzle surface.
Adhesive marring the image
I ended up ordering a new print myself and using that to replace the one I goobered up. That puzzle was cut and shipped off to the customer months ago.
Normally, when I have a problem like this, I will just burn the offending item. But that is really a pretty piece of cherry, so I could not bring myself to do it.
Back of the puzzle, showing the cherry
Instead, I thought I would cut it up as a personal use puzzle. Maybe it will be a Christmas gift to a family member. I do not have a problem with giving it as a gift, but when someone is paying a fair amount of money for a nice puzzle, I want it as close to perfect as possible.
I then thought I would make it a kind of demonstration puzzle, showing several different styles of piece cuts. So, I first cut it into quarters. On a larger puzzle like this, that is what normally happens any way.
Quartered puzzle (after cutting)
Each quarter then was cut with a different style of piece.
Back of dragon tails section
Swirly pieces
My normal piece style – my favorite one to cut
New for me piece style – needs more practice if I am going to use it!
Once it was cut, I brought it up to the house and vacuumed the dust off. I have a wooden frame with window screen mounted to it. This allows me to vacuum the cut puzzle.
Vacuuming the dust away
Once it was vacuumed, I applied three coats of Danish Oil to the back to bring out the grain of the cherry. Now I will disassemble it, let it dry for 3 or 4 days, make a final piece count, and box it.
As I implied above, this is NOT available on Etsy. If you would like something similar to it, please contact me via email to discuss specifics. You can order any print you like from one of the on-line vendors and have it shipped directly to me to be cut into a puzzle.
My next project/blog post will be about plywood. There are a lot of different types of sheet goods that may be good for puzzle use. I will discuss some of them, give some specifics on the materials I use, and then cut some small 8 x 8 puzzles. I think I have eleven different pieces of sheet goods to test and provide observations about.
Happy Puzzling!
Bob
Posted inCurrent project|Comments Off on Meeting of the Minds
Well, I thought I was done writing about scroll saws. I really had nothing else to say, unless I was presented with an opportunity to use someone else’s saw to cut a similar puzzle. However, I received a couple of comments about blade movement that I ended up delving farther into. These comments were about how the Pegas and similar saws can be adjusted to make blade movement almost go away.
That really troubled me, as the geometry of the short arms moving through an arc is going to make for more blade movement fore and aft on the saw than the longer arms of the parallel arm saws. I found this video by Steve Good of the Scrollsaw Workshop. It is a good video about the DeWalt specifically and worth watching.
So, I decided to measure the amount of actual movement of my own DeWalt saw. I have a set up gauge with a magnetic mount. I placed a small steel rule in the blade clamps to ensure that any flexing of the blade did not contaminate the results.
Next, I used a screwdriver to manually turn the saw motor to slowly move the pivot arms.
Next, I moved the motor to one extreme of blade movement, and zeroed out the gauge.
Then, I rotated the motor to determine the maximum amount of blade deflection.
.036″ of an inch blade movement! Wow! That is basically double the theoretical .018″ I previously calculated. That calculation was based on the assumption that the arc motion of the blade started out at 0 degrees deflection and was split evenly up and down from that point. It turns out that is the best-case scenario. What if the blade starts out at 0 degrees deflection and the entire movement is either up or down? Time to get out the calculator again.
Now, using my previous calculations, we have a range of back-and-forth motion of the blade from best case to worst case.
DeWalt is from .018″ to .073″. Mine measured at .036″.
Hawk G426 is from .005″ to .020″. Mine measured at .009″.
Shopsmith is from .006″ to .022″. Did not get measured.
You can see the best-case scenario for the DeWalt is basically equivalent to the worst-case scenario for either the Hawk or the Shopsmith.
In the previously referenced video by Steve Good, at about time mark 3:21, he discusses adjusting the motor on the Seyco saw to minimize this movement. He mentions that the adjustment raises the upper arm (or conversely, lowers it). At about time mark 4:27, he comments that the Type 1 DeWalt’s seemed to have better manufacturing tolerances than the Type 2 DeWalt’s and generally have less blade motion. I have no personal experience with this, so take it for what it is worth.
In this other video, Steve Good reviews a pre-production version of the Pegas scroll saw. At about time mark 6:31, he starts discussing adjustment of the fore to back blade movement on that brand of saw. Notice there are two different adjustments that can be made.
I do not have an adjustable version of these saws. However, it appears to me the adjustment just allows you to move from the high end of the range to the low end of the range. The geometry of the movement of the short arms of the double parallel link system is still going to result in more blade movement than the longer arms of a parallel arm scroll saw.
Does this mean one is better than the other? No, not at all. It depends on what you are looking for and at what cost. The DeWalt is a great saw and I have been using mine for years and been happy with it. Now that I know about the issue, though, it is probably going to bug me! I wish I could adjust it down to the lower end of the range. For the most part, the DeWalt may remain my go-to saw for most of my puzzle cutting. The blade changes are faster, and it cuts faster because it cuts more aggressively. However, for some pieces, the Hawk will be the go-to saw. The Dragon Tail pieces are much easier to cut on the Hawk. My frog signature piece can be challenging to cut with the DeWalt blade jumping around like it does. For example, look at the picture below:
If you look at the right leg where it meets the body, that gouge is from the blade jumping back and forth as I spin the wood around the blade, trying to get a nice clean point. Compare that to the picture below, which is almost perfect.
This was also cut on the DeWalt, but the blade speed was dialed waaay down to give me more time to spin the wood.
Once I figure out how to resolve the MGT reverse tooth blade issue on the Hawk, it may become my preferred saw. All three of these saws are perfectly fine saws for cutting. Each fulfills a different need. I have a pickup truck for hauling loads, a Tahoe for hauling people, and a convertible sporty car for hauling @$& and having fun! And, I have a DeWalt for fast simple cutting and a Hawk for very detailed cutting!
At the time of this writing, there is one Dragon Tails puzzle listed on Etsy. This puzzle was cut in the testing of the three saws. FiveFrogsWoodworking – Etsy
Happy Puzzling!
Bob
Posted inTechnical|Comments Off on Scroll Saws – (Part 4 – blade movement – I only thought I was done)