One of the major issues I have had to learn to deal with is that of paper issues. Specifically, photographic printer paper issues. These issues fall into a few categories which include:
- Paper type vs ink type
- Paper delamination
- Paper adhesion to base material
Someone who is just getting started out in this puzzle cutting world may want to read about my discoveries. I am not formally educated on this subject. My lessons come from the school of hard knocks, and other people’s experiences may vary from my own.
Paper Type vs Ink Type
For those who do not know or pay much attention to it, there are two basic types of ink jet inks: dye-based inks, and pigment-based inks. A dye-based ink has the colorant completely dissolved in the carrier fluid, whereas pigment-based inks have very small little particles suspended in the carrier fluid. Not all photo papers accept both types of ink. I started printing with a small inexpensive HP printer that only printed up to 8 1/2″ x 11″ prints. This printer used dye-based ink, so my paper was good for dye-based inks. I successfully printed out many images with this printer and cut them up into puzzles.
Wanting to increase my size range, I obtained a used Epson printer that would print 13″ x 19″ prints. It actually had an attachment so you could print a roll of 13″ wide paper that was some number of feet long. It was a nice printer that turned out to use pigment-based inks. I brought it home and set it up with new ink cartridges. I cleaned the heads using the specified process. I printed some test papers using plain printer paper, and then I ran a test print using some old Kodak photo paper that was laying around. It all worked great. But, the first time I ran my old puzzle photo paper through it, I had a real mess on my hands. The small particles in the pigment ink would not absorb properly into the printer paper and sat on the surface of the print and did not dry. Silly ol’ me, I ran three copies of the print at once and they stacked up on each other. They stuck together and the images were horrible. The worst part was that the rollers in the printer that move the paper through the machine were coated with this stuff. The printer was basically ruined. I could never get it to print well after that. The guy I bought it from assured me it worked great when I bought it. He was another puzzle cutter that was upgrading to an even bigger printer, and I have no reason to doubt his word.
The moral of this story is to match your paper to your ink! I currently use Ilford Galerie Smooth Pearl paper. It is designed to be compatible with all high-quality dye and pigment-based ink jet printers. The older paper I was using was Ilford Galerie Classic Pearl paper. It was designed only for dye-based ink jet printers. Pearl paper describes the surface style, which has less glare than a gloss paper.
So which is better? Dye or Pigment? That all depends. In general, for long term longevity of the print, a pigment-based ink is going to last longer. Dye inks (and their associated printers) are usually less expensive. Dye based inks dissolve more easily with a drop of water landing on the print. Pigment based inks are a little more robust. Dye based inks have a better color range than pigment-based inks. Dried dye-based inks are smoother, so they appear more vivid and vibrant.
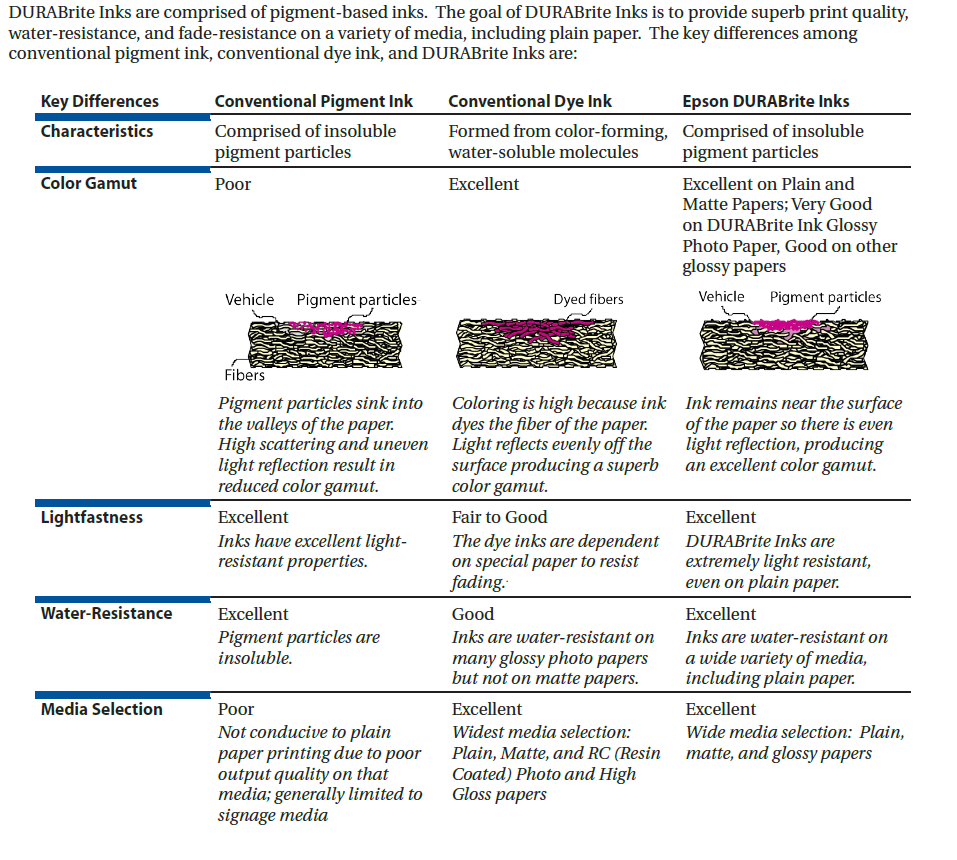
Pick the ink that matches your printer is the best answer I have for you. Here is Epson’s blurb on their DURABrite brand ink which is used in my printer. This is taken from their technical brief which can be found at https://files.support.epson.com/pdf/sc80__/sc80__db.pdf. And, of course, their brand of pigment ink is better than conventional pigment ink!
Two more thoughts on the subject of ink. #1 – Do not buy it online. My experience (twice) is that if you do, they will ship you the oldest box they have, which might expire one month after you receive it. I go to a local store and paw through their boxes to find a “best before” date that is at least one year out. #2 – Pigment based inks can settle in the cartridge. Before you load the cartridges in your printer, shake them up. And, if your printer has been idle for a while, pull out the cartridges and shake them before printing.
Paper Delamination
This was really frustrating for me. In my beginning days cutting puzzles, I used old calendar pages and they worked great. I started printing images on my HP printer, and the printer paper would actually come apart in layers like a piece of filo dough or baklava. The picture below shows this problem. The mechanical object is the tip of a very fine (.5mm) mechanical pencil.
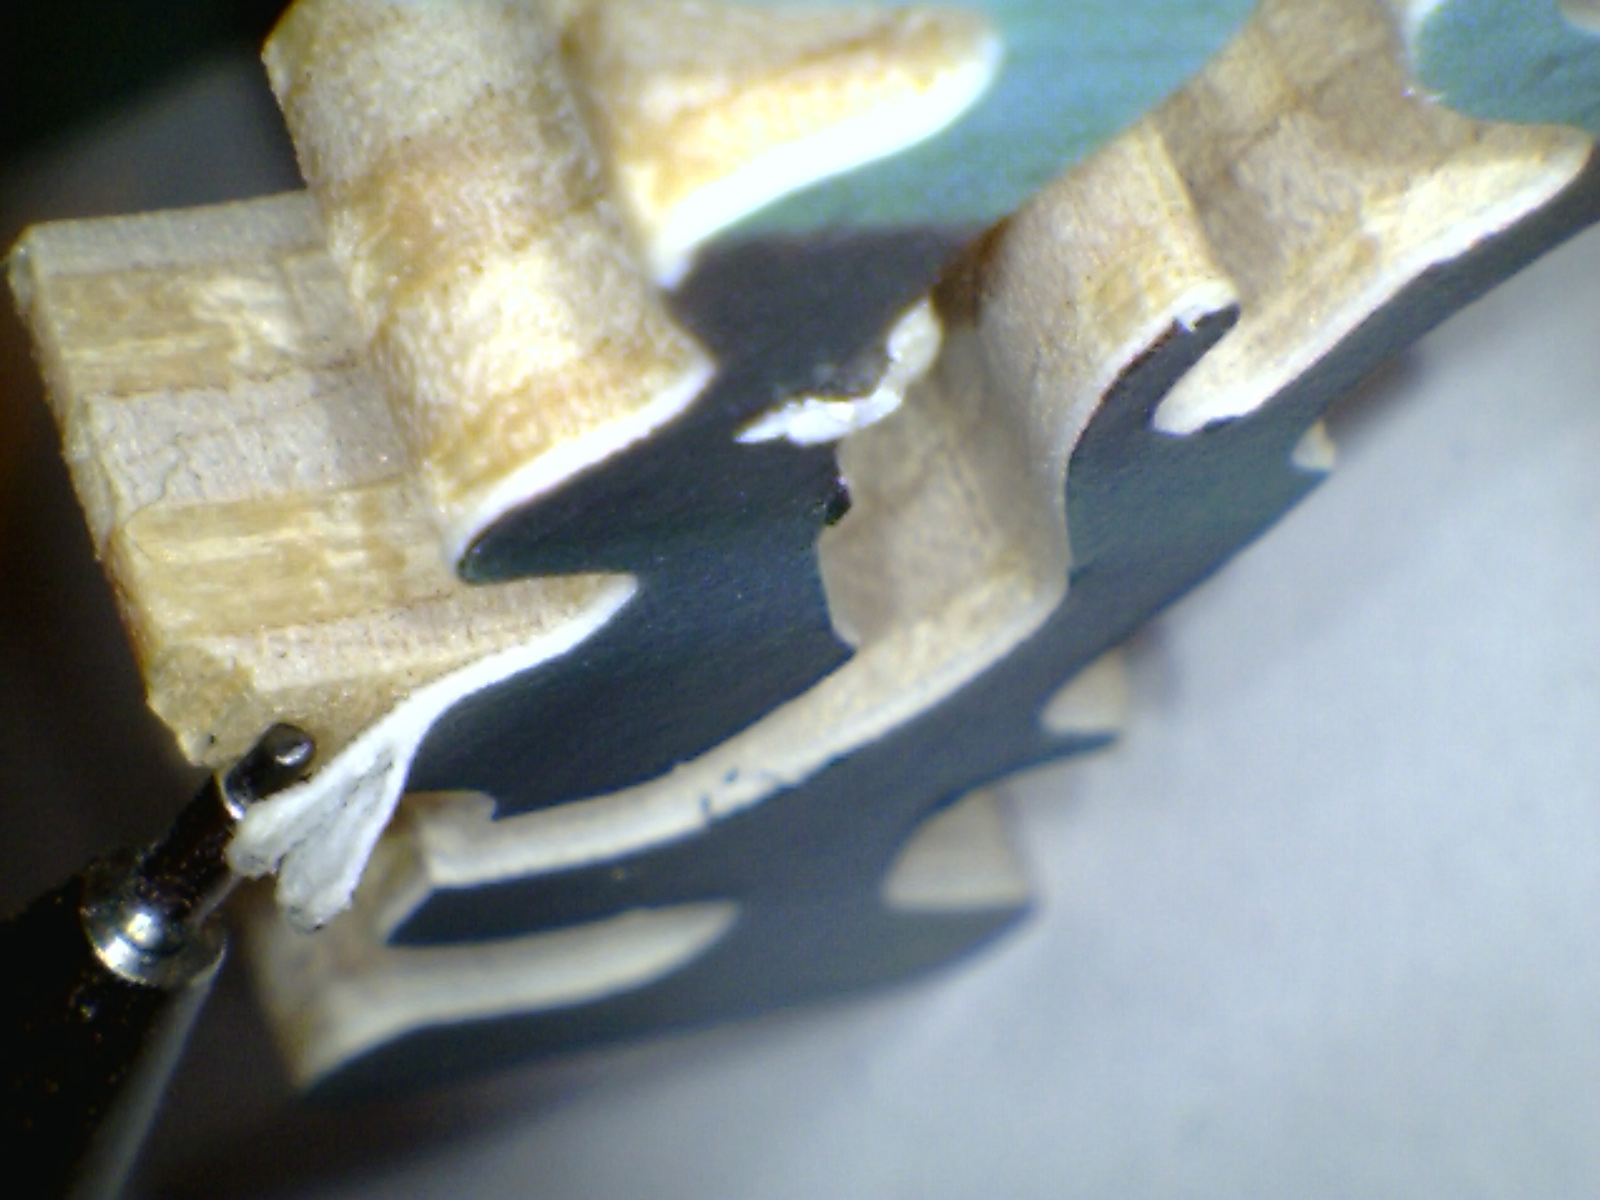
You can see the image is both splitting and lifting off of the plywood.
Modern inkjet photographic paper is a composite structure of at least four and up to six layers of material. You may often see it referred to as RC or resin coated paper. This graphic shows the layers.
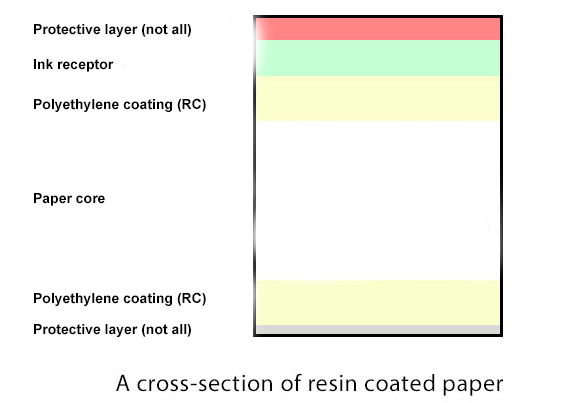
Most papers are fine for what they were designed for: printing and displaying photos. However, when you start cutting the paper into weird little shapes, it does not hold up so well. The thick paper core can start to separate into multiple layers.
I went through many flavors of common brands of ink jet photo papers to find the best paper for my use. I tried big name brands and store brands. I even tried “adventure paper”, which is a waterproof paper for printing backpacking maps on. I will not name any brand as unacceptable, but I will say that I now specifically use Ilford Galerie Smooth Pearl paper. Ilford paper presents me with the least number of problems of all of them. I still have an occasional separation, but it is rare. This usually only happens with extreme points on the puzzle piece, such as the leaf tips on the oak leaf puzzles. I will use Epson paper as a backup. I can find Epson paper locally, but I have to buy Ilford paper via the internet.
I am sure other puzzle cutters have their favorite brands of paper. Nothing against those brands, but I am just telling what works best for me.
Paper Adhesion to Base Material
In the picture above that shows the paper splitting, you can also see the image is lifting off of the base plywood. In the case of this particular puzzle, the image was attached to the plywood with a spray glue. It could have been 3M Super 77, it could have been some other brand. The spray glues work and when they do, they work well. My personal experience for what I was using it for is that it is finicky. You have to have the timing just right. Too much, and you get a “bubble” that pops when you cut through it. The “bubble” spreads on the image and ruins it. Or, if you spray it too thin, it tends to lift when you cut it into weird shapes.
I upgraded to a dry mount press. This is a heavy device that heats objects pressed between the flat plates, and then there is a cam mechanism that delivers an impressive amount of pressure to bind items together under heat. A couple of pictures of mine are below.
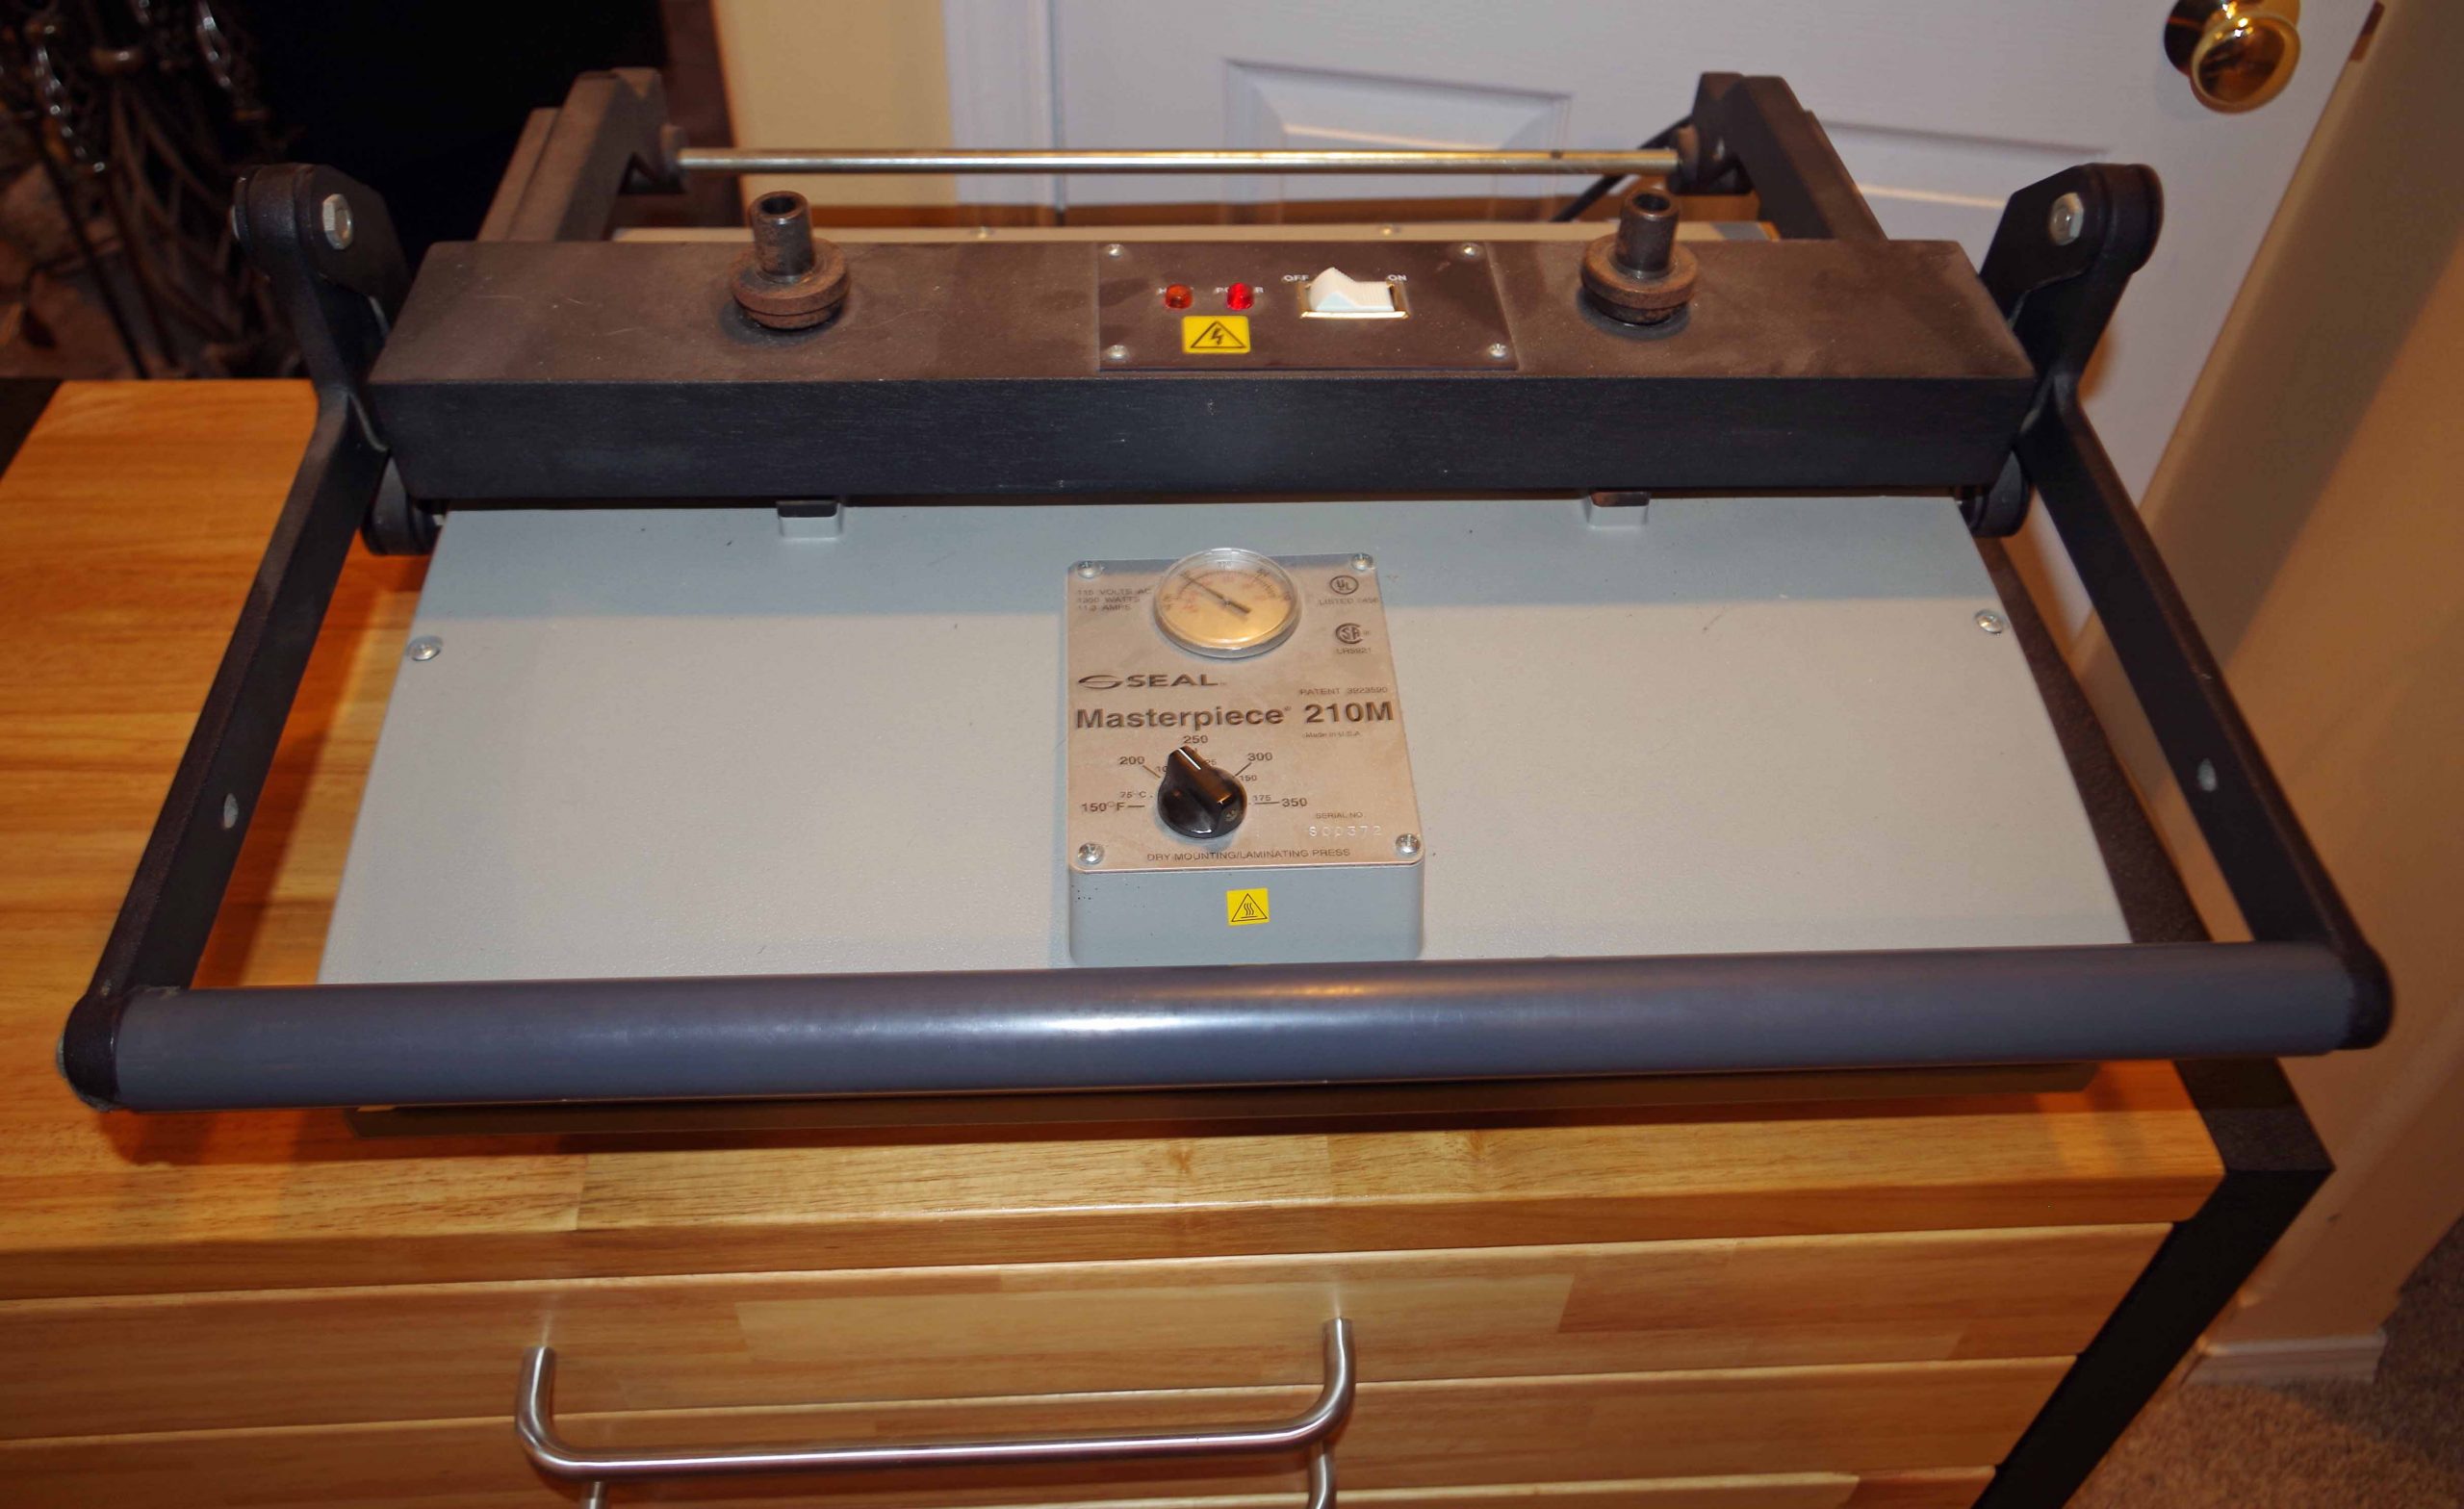
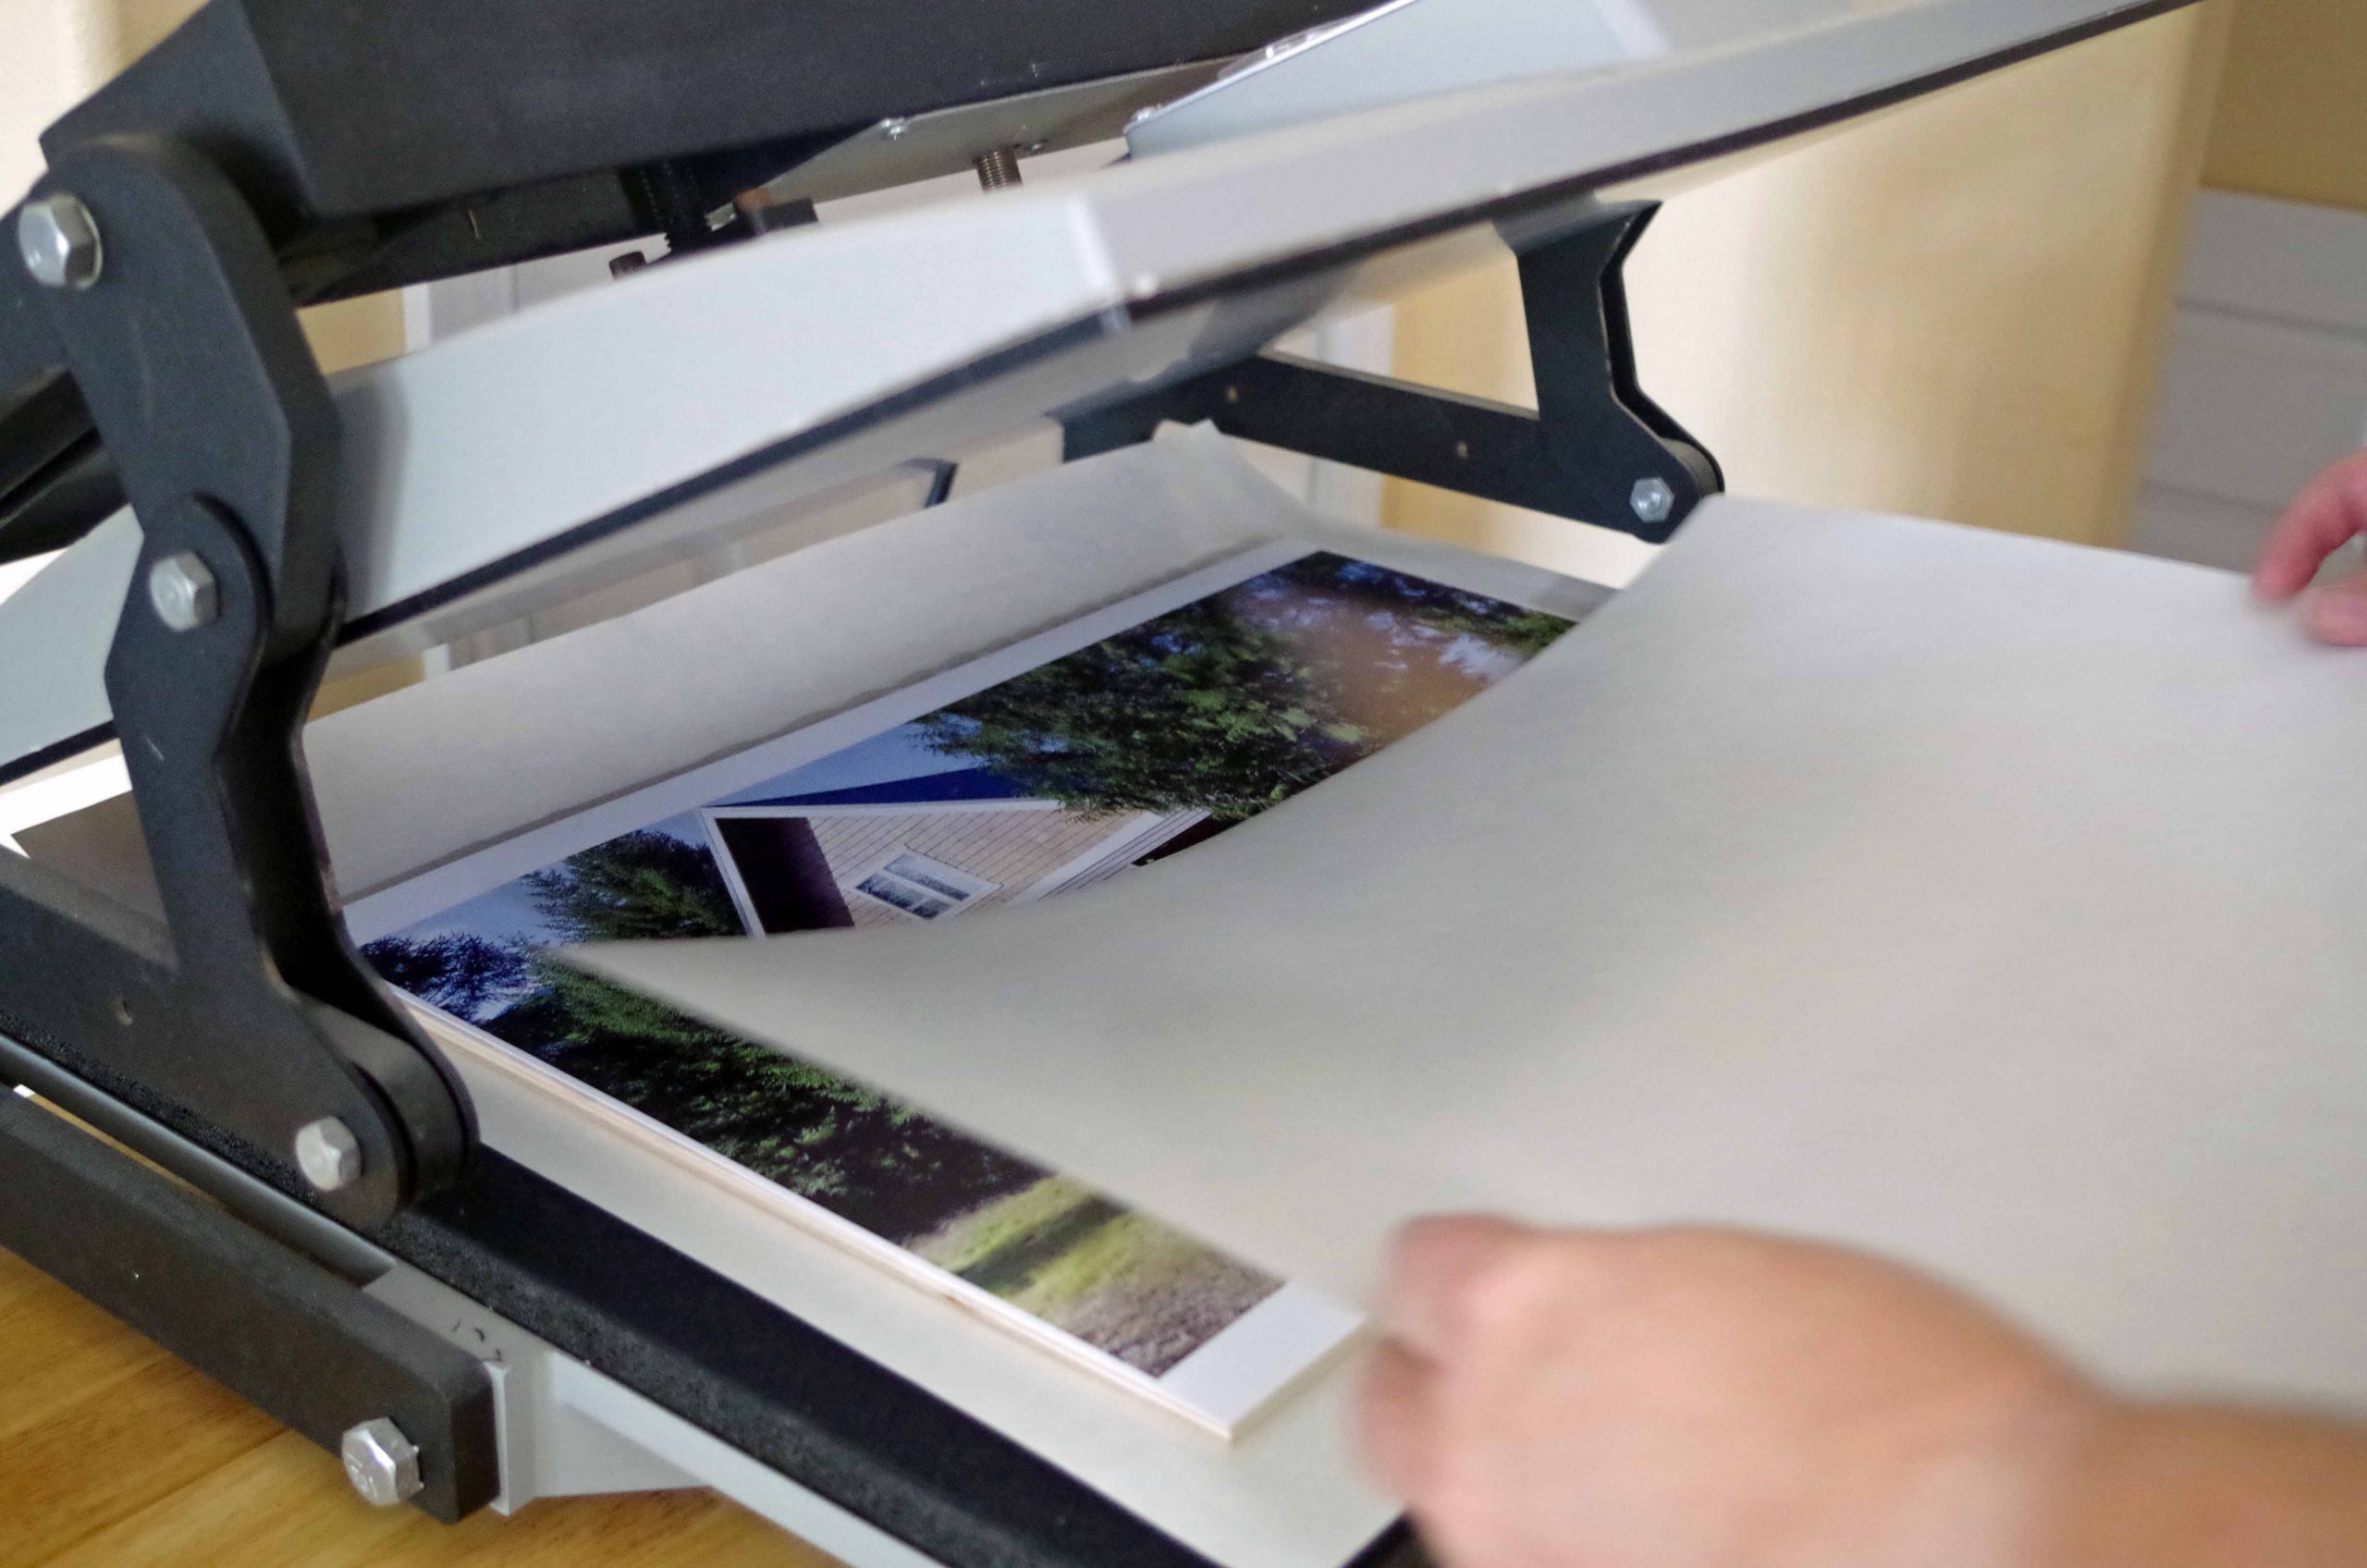
This is not a slap dash solution to mounting images to the plywood. There is actually some thought and procedure to follow to get good results. After beating my head against the wall, I borrowed a book from the library. The title is “The Mounting and Laminating Handbook” and is written by Chris A. Paschke. Her book is written for people who mount and display art prints for a living. But, some of the information in her book is valid for mounting puzzle images to plywood. She has a section dedicated to use of the dry mount press with RC photo papers. The basics include using the correct temperature for the correct amount of time under the correct pressure while controlling the amount of moisture present. I am not going to attempt to regurgitate the many pages of the book here.
I started following her techniques and have very few problems with my images lifting anymore. When I do, it is usually because I tried to take short cuts while mounting an image. I ended up buying my own copy of the book to refer to.
However, this brings me to the current issue that brought me to finally write this blog post I planned to write years ago. I have a customer who sent me a large photographic print to cut into a puzzle. I noticed on the back of the print that it was printed on Kodak Ultra Premium Photo Paper. I cringed a little, as I was concerned about maybe having some of the paper separation issues discussed above. So far, I have not had any problems with that issue on this project.
BUT, and this is a big BUT, the image is lifting off of the base plywood. This is the worst case of this I have ever had. I followed all the best steps to get the adhesive to work with the dry mount process. I even brought the puzzle back to the press to “re-cook” it. No luck. I am cutting pieces out, and then sitting there with white glue and a skinny object to glue down the image to the cut pieces. It is extremely frustrating and time consuming.
As I sat here tonight typing this blog post, I was flipping through the book. I discovered this little tidbit at the bottom of page 120 of the third edition.
“A problem with smoother backed Kodak, Epson, and Xerox digital photos is bond failure when using standard methods as on these pages. Minutes to hours after removal from a hot vacuum or mechanical press, photos bubble or fall off the substrate. Suggested reasoning behind this bond failure is the need to smooth the photo backing so stacked images are not scratched….. The smoother backing may have resolved the scratching issue, but has created the new problem of bond failure. Sandpaper abrasion and alcohol cleaning might help the bond.” (Bold text is my emphasis.)
Sandpaper abrasion on the back of a digital print! Who’d have thunk it?!? Obviously, it would have to be very lightly done to avoid destroying the image.
Even when you think you have done everything right, sometimes something comes out of left field and smacks you across the face! It is too late for this project, but I wish I had known of this before. I mention above that I use Epson paper as a backup paper if I am out of Ilford. The Epson paper does not split, but I have noticed that it does not stay “stuck” to the plywood as well as the Ilford. This little nugget from Chris’ book confirms my anecdotal experience. When I bought the book from her, it was the 3rd edition (she sent a copy of the 2nd edition with it). The version I had borrowed from the library years ago was the 2nd edition and does not mention this particular issue. The 3rd edition was updated with new information concerning the mounting of digital images.
So there you go. My thoughts and experiences on dealing with ink jet photo paper for jigsaw puzzles.
Happy puzzling!