This last installment will be a discussion of my observations as I cut three very similar Dragon Tail puzzles, one with each of the three saws I have discussed before.
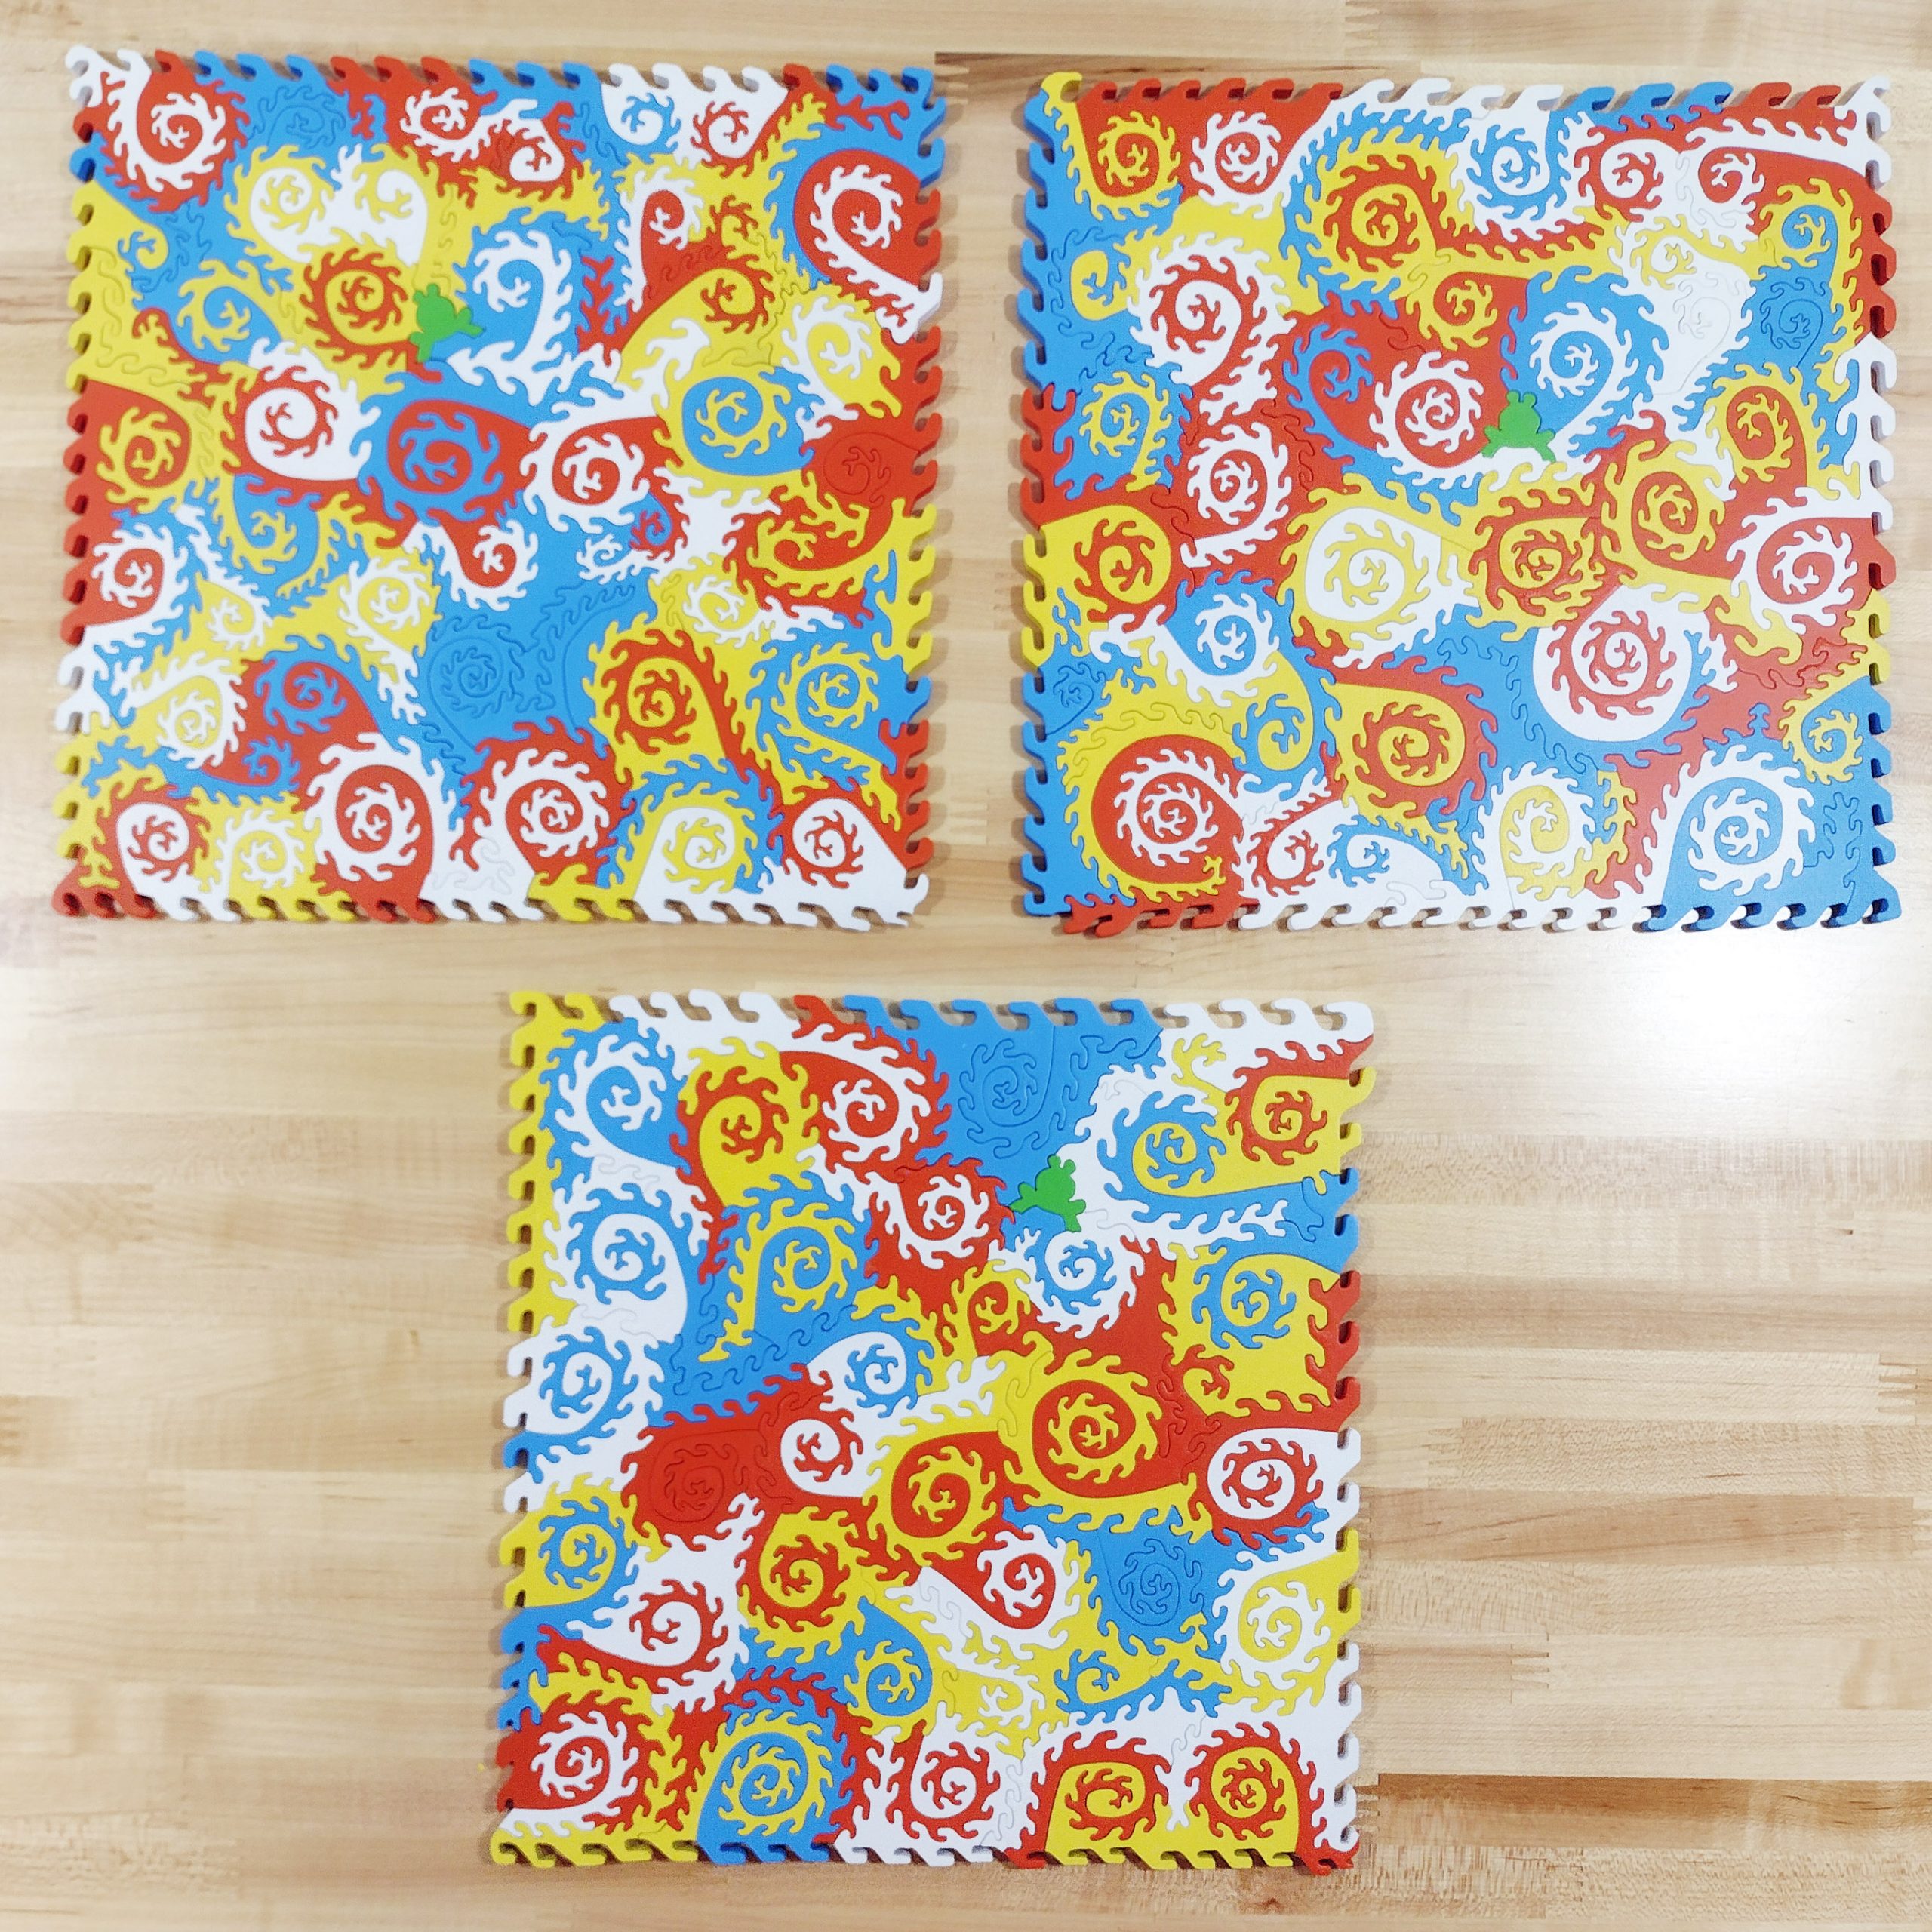
For all three puzzles, I started with a 9″ x 9″ piece of cherry 1/4″ Appleply plywood. Using the cherry was kind of a waste, as I ended up painting both sides of these. I actually cut a fourth puzzle at the same time for a customer, and she wanted hers painted on both sides to make the puzzle harder to solve. I just went with it for all of them to keep it simple.
The finished size of each of these is roughly 9 1/4″ x 9 1/4″. To keep the conditions the same, I used the same blades on all three puzzles. The blades I used are Pegas MGT 2/0R blades. I have used these for quite a while. They are only .0087″ thick, .0236″ wide, have 15.4 teeth per inch (TPI), and the bottom 10 teeth point up. They give a very smooth cut with the DeWalt saw. The reverse section of teeth gives a smoother cut on the bottom, especially important if I am cutting a double-sided puzzle with an image on the bottom as I cut. My previous favorite blade was the Flying Dutchman Special Puzzle blade from Mike’s Workshop, but I have found these Pegas blades are just a tad better for what I do.
To prepare each saw, I cleaned and waxed the table before I started. I wipe down the table with either denatured alcohol or mineral spirits to remove any greases or oils that may have landed on the table. If a cast iron table has a little surface rust, I will first use a very fine grit sandpaper (1200 grit or finer) to remove rust. Once the table is clean, then I apply wax to protect the surface from oxidation and make the wood slide nice and easy.
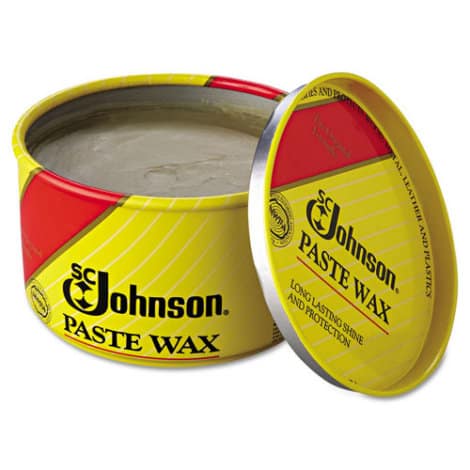
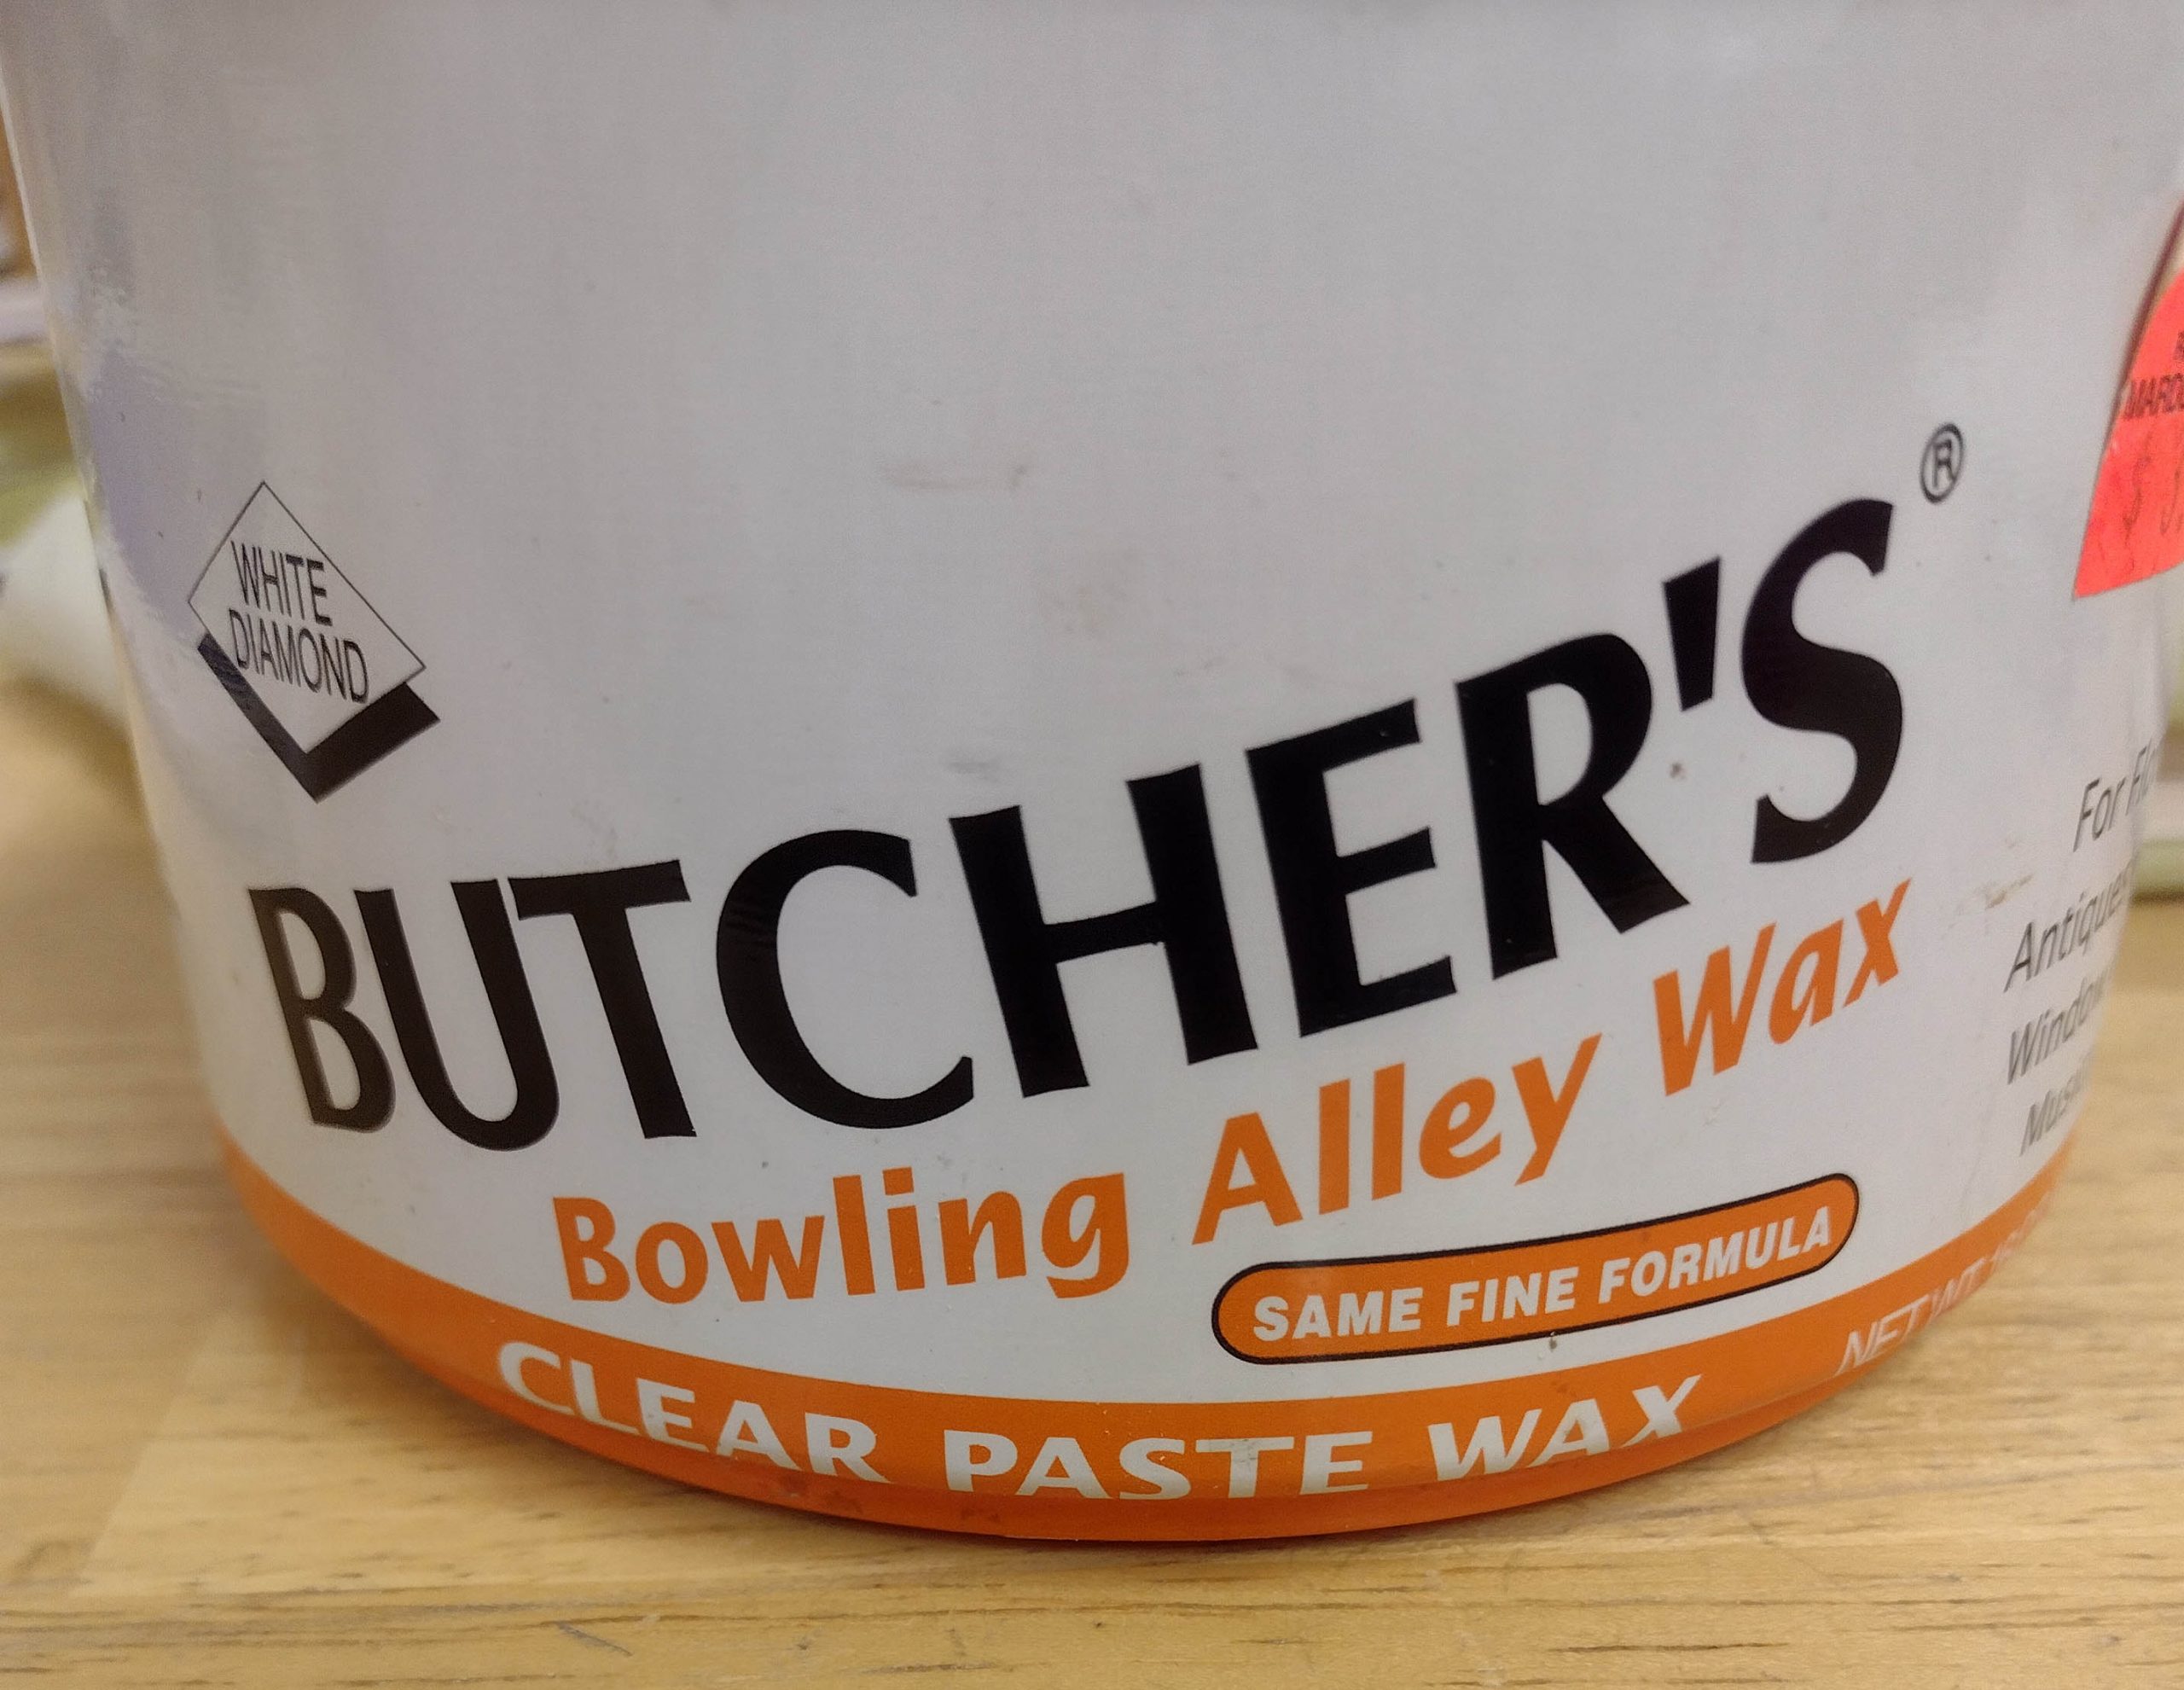
You need to make sure the wax used does not have any silicon in it, as silicon will interfere with any finish applied later. And you need to ensure it does not have any traction additives. Some floor waxes have a friction additive to prevent slips and falls. That is not what we want for this. I have previously used Rhodes Furniture Paste Wax and Johnson original formula paste wax. I am currently using Butcher’s Bowling Alley Wax. There is no magic to the brand, just a good paste wax with no silicon and no friction additives. Every home should have a tub of good paste wax around. It is good for protecting metal surfaces, polishing wood furniture, polishing leather, lubricating wooden window frames, lubricating stubborn drawer slides, and just a dab on the tip of a wood screw will help it go right in with less chance of splitting the wood.
As an aside, I discovered tonight that Johnson Paste Wax was discontinued. That stuff has been a staple for longer than I have been alive. Like one gentleman on a forum said: “For someone of my generation, finding out that Johnson’s Paste Wax was discontinued is like going into an auto parts store and being told WD-40 was out of production, or going into the grocery store and finding out they’d stopped selling Cheerios. It just a product that’s part of Americana for us Baby Boomers.” I also discovered that Butcher’s Bowling Alley Wax is gone as well! Fortunately, another company acquired the rights to the Butcher’s recipe and are making and selling the product as “Bowling Alley Wax”.
Whatever brand you have, smear some on the tabletop and let it set for 5 minutes. It will get kind of hazy in appearance and hard. Then you just buff it off until the tabletop is nice and slick and shiny.
Next, I like to start each project with a new blade. They are about .25 each when you buy a gross of them, so it is not a huge investment to start with a new blade. Install the new blade and adjust for proper tension by plucking the blade with your fingernail. This link is a short video from Judy Gale Roberts on how to listen to your blade for correct tension.
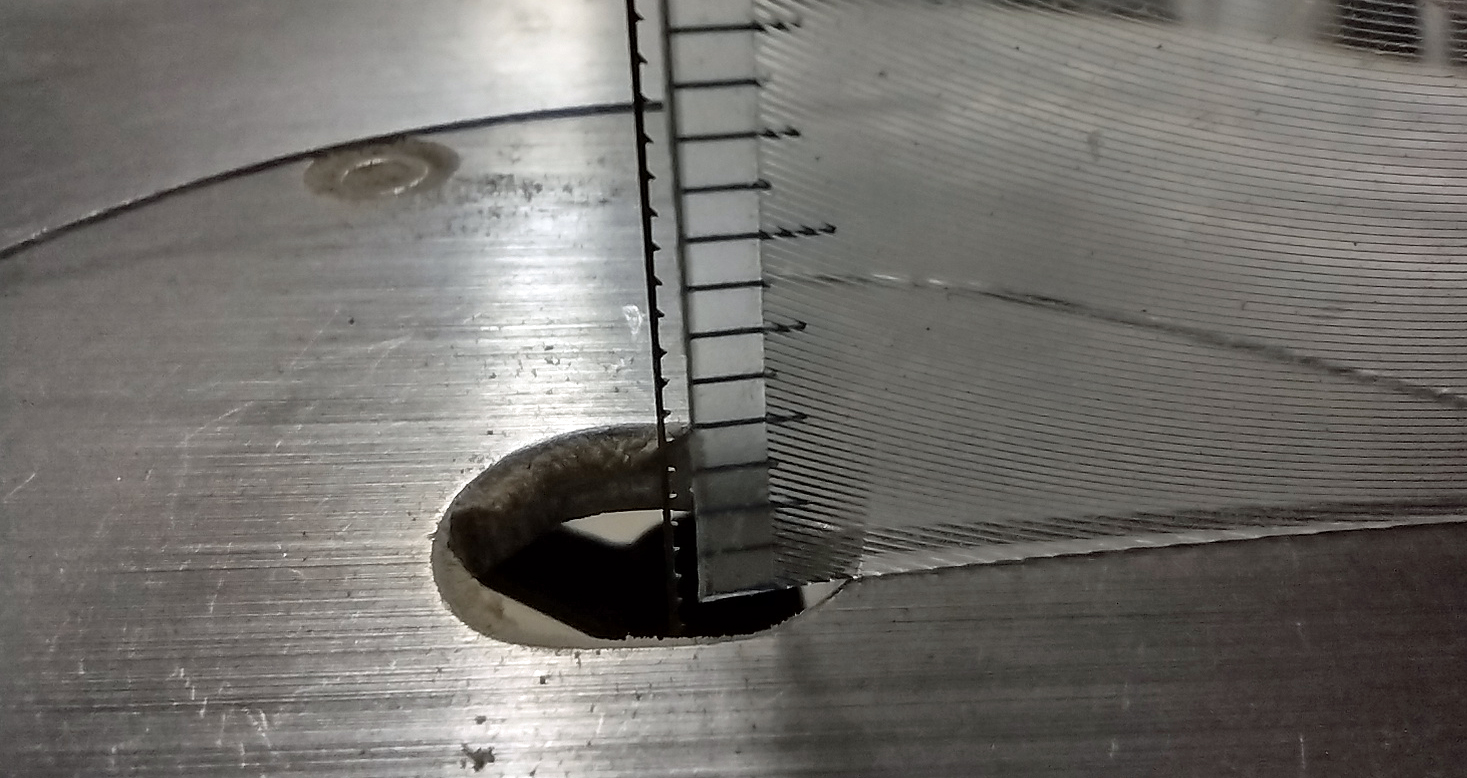
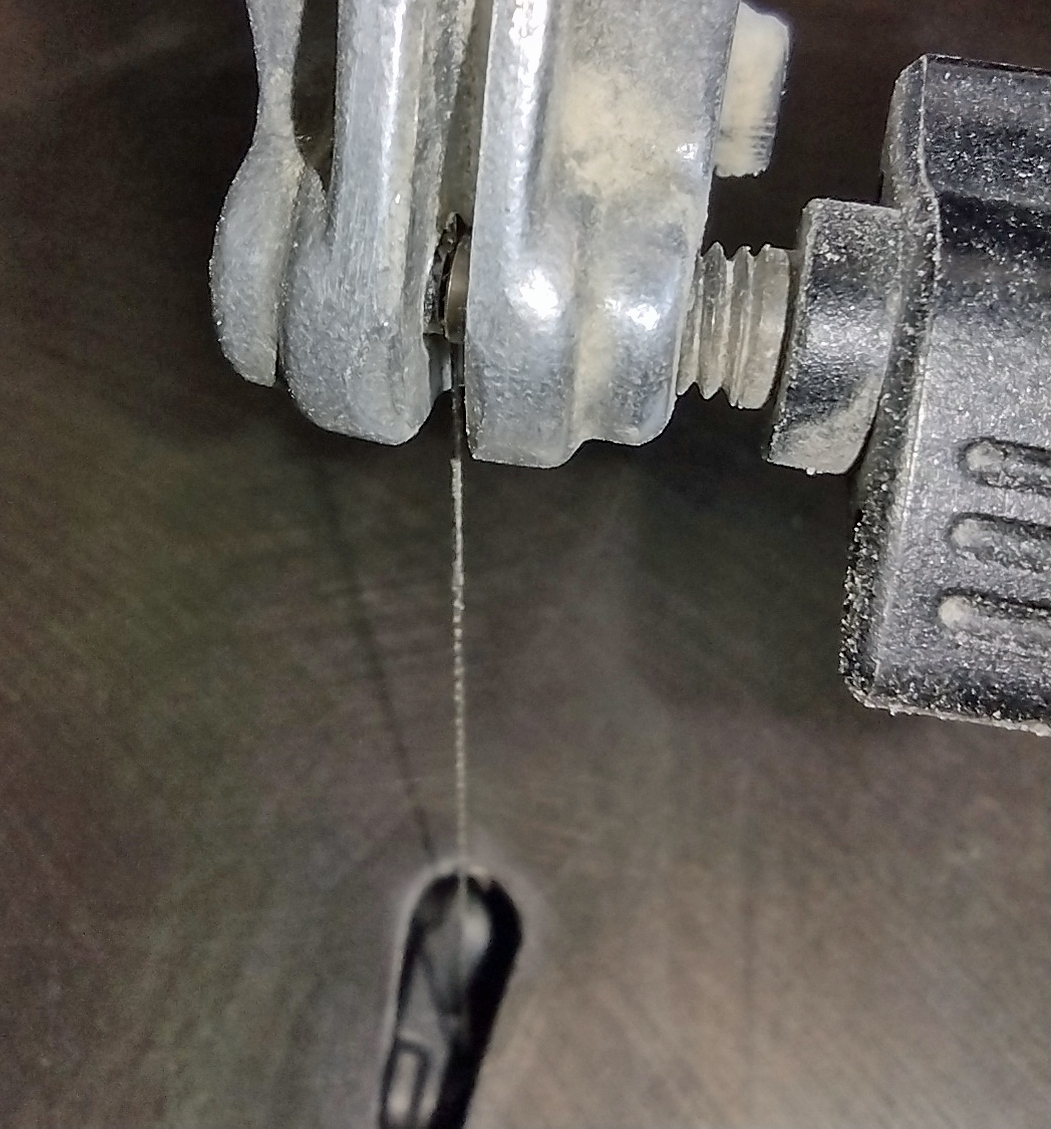
Finally, I verify the tabletop is square to the blade side to side. Instead of messing around with a little square, I grab a thicker piece of wood and then start a cut into it. Once the cut is started, I back the wood off of the blade and turn off the saw.
Without lifting the wood off of the tabletop, I spin the wood 180 degrees around the blade and line up behind the blade with the slot I just cut. If it looks like this below where the blade is not parallel to the saw kerf, you need to split the difference to level the tabletop.
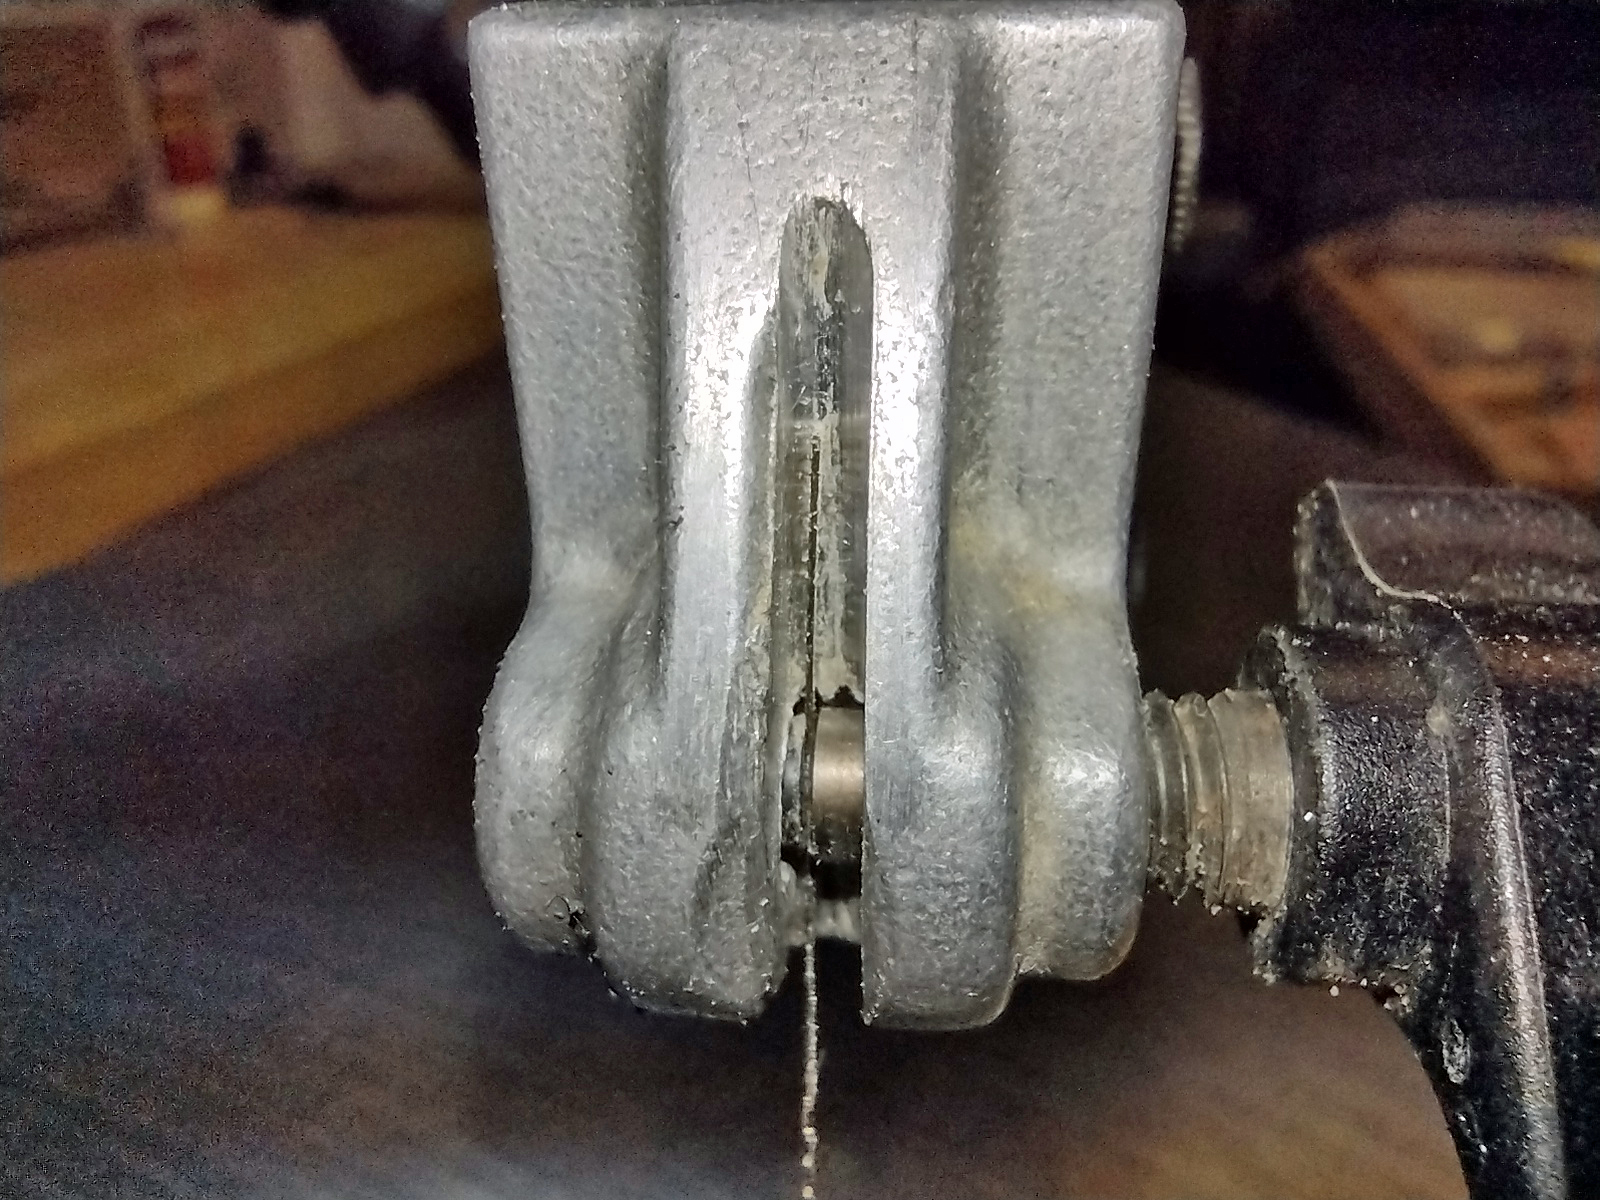
Once the tabletop is properly adjusted, the blade will be parallel to the kerf and slide right in the slot! You are ready to start cutting. The picture below looks wrong because the camera was a little to the side and caused some parallax in the view, but it is nice and square.

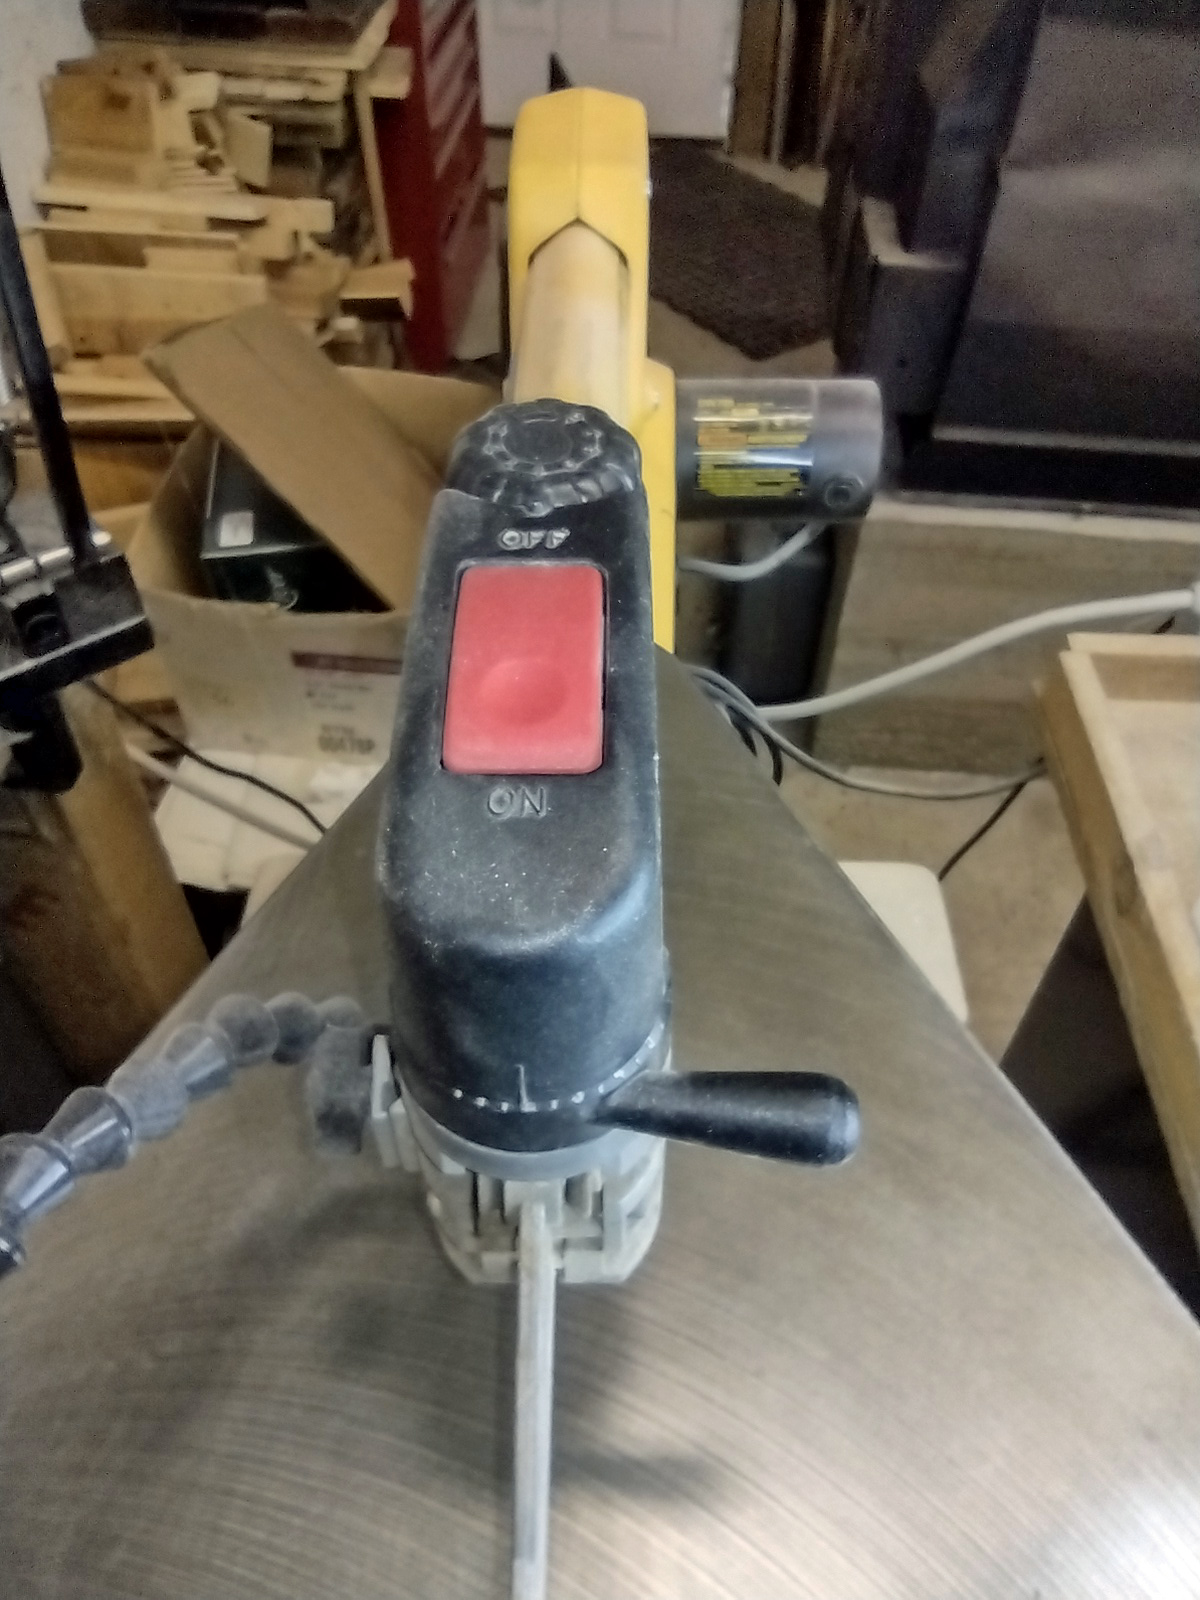
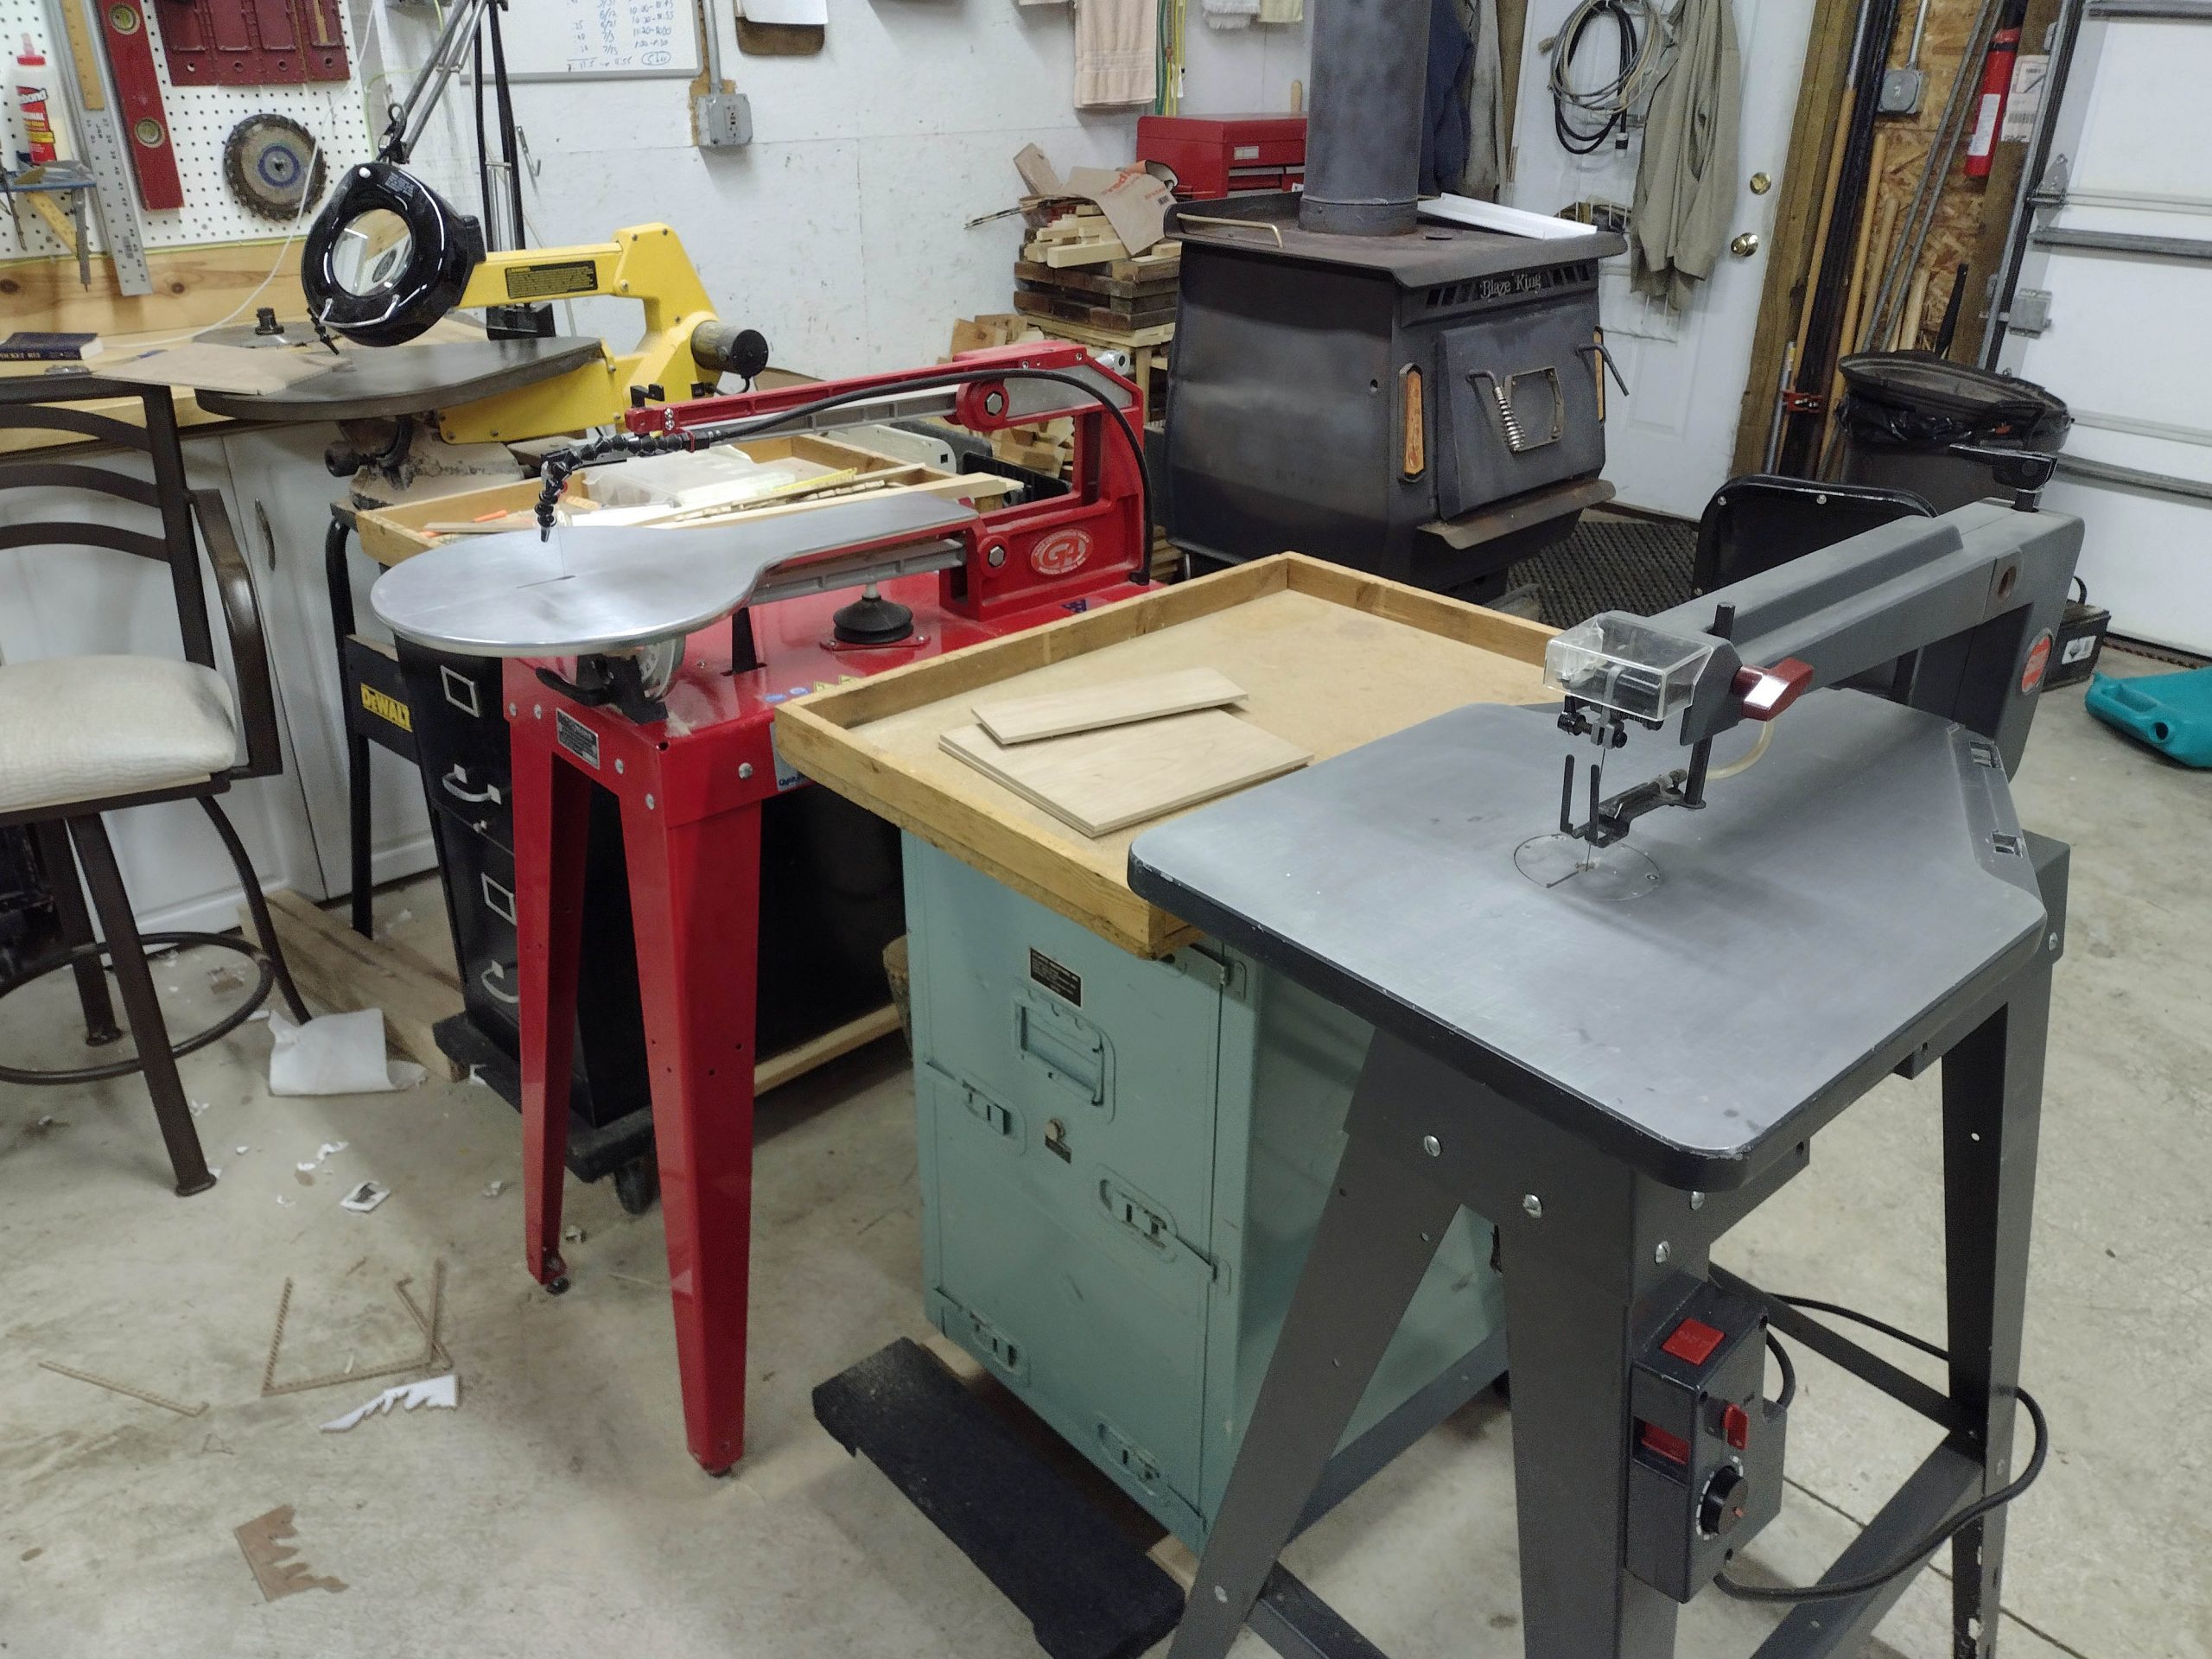
I started cutting with the DeWalt saw first. This is going to be my baseline to compare the other two saws to. This has been my go-to saw for years and the one I am most comfortable with going in to this. Cutting with this saw is “comfortable like an old shoe”. I really do not have much to comment on at this point other than I like having the controls all in one place on the top of the upper mechanism.
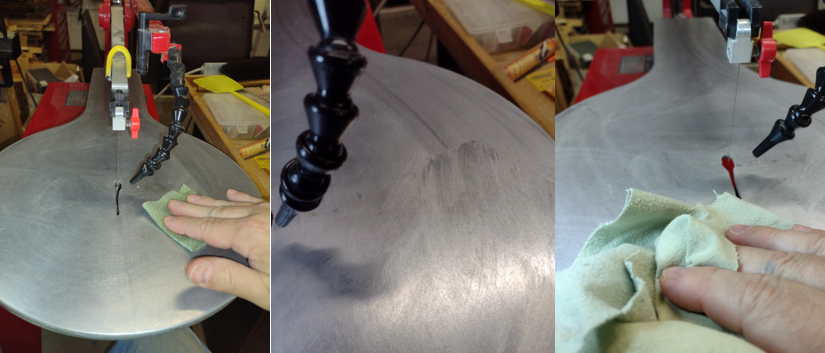
I am used to cutting with my workbench on my left side, and with a rolling table on my right side. To keep the cutting experience consistent, I moved each saw into that position when I used it to cut this puzzle. In the picture below, the yellow DeWalt is in that position. When I was done with the DeWalt, I pulled it out of the way and moved the Hawk there. That also made it so the magnifier light was available without much difficulty. If you look on the floor, you can see the residue from cutting the edge of the first puzzle.
I am not going to give a blow by blow of cutting with each saw. I did not take any video as I was doing it, either. I am just going to give numbered bullet type findings. The first step on all three was to cut the edge.
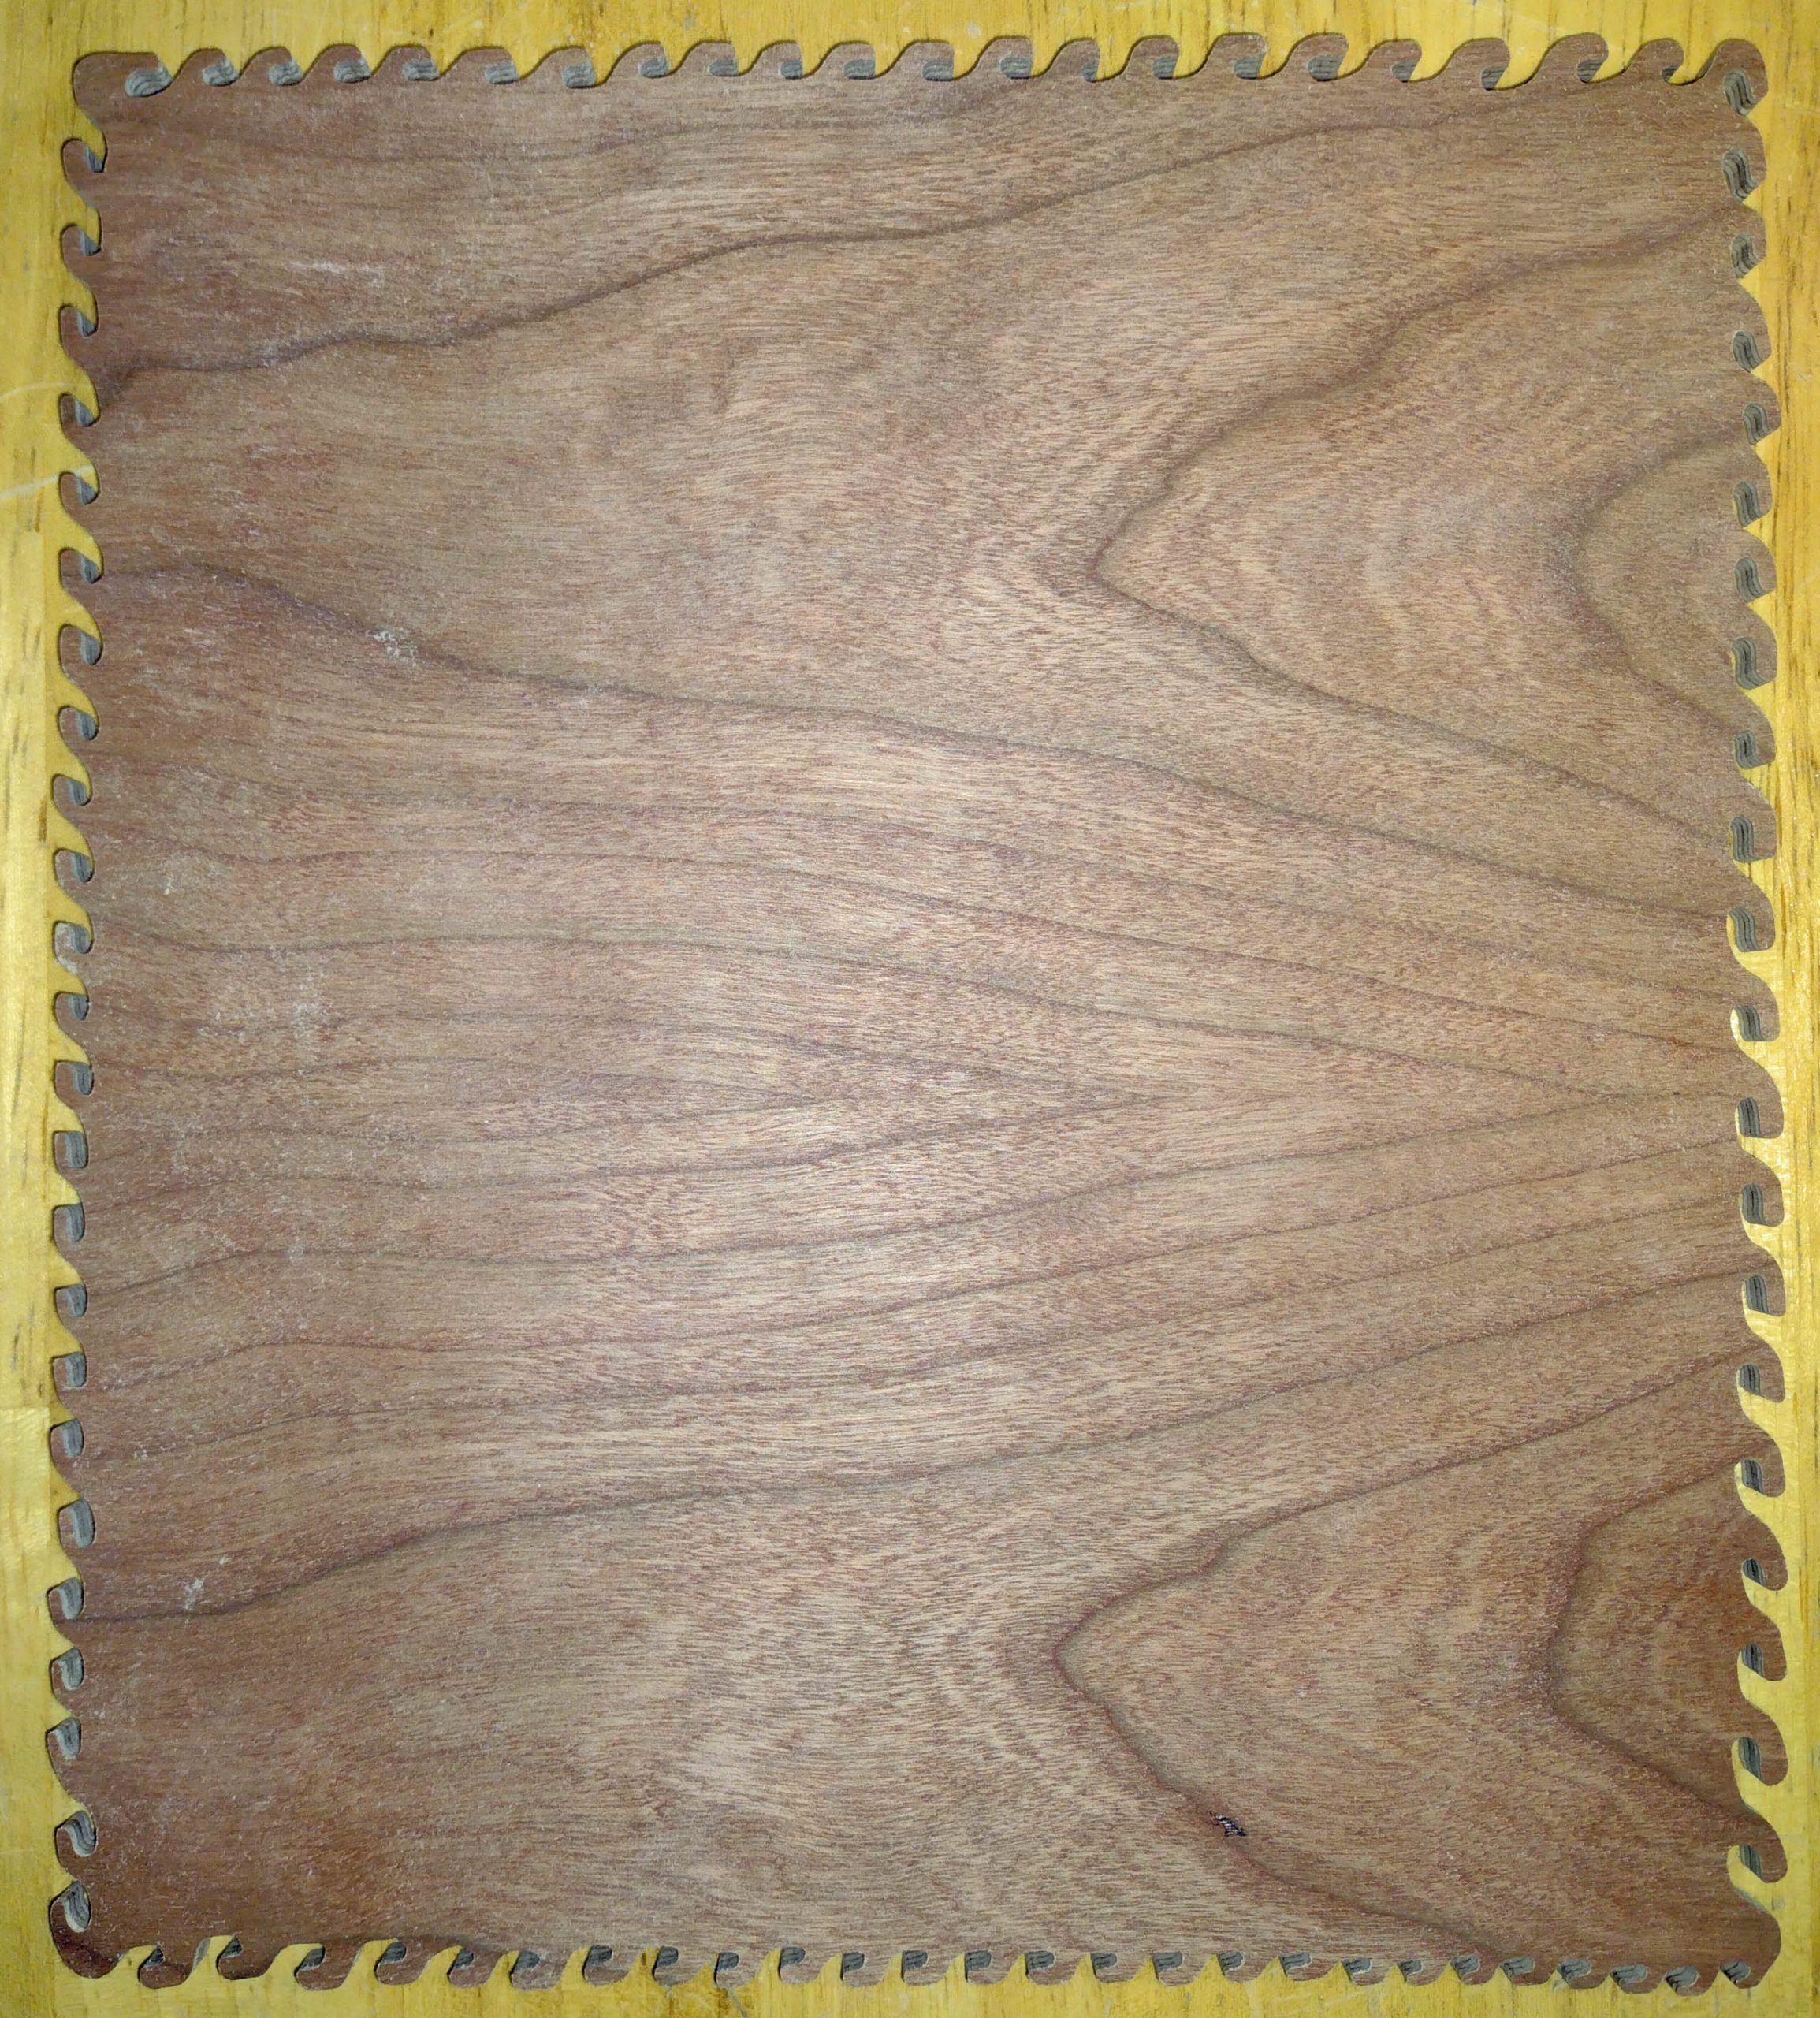
The blanks were slightly cupped. This made cutting a little challenging as the board rocked. To reduce this effect, I cut them in half with dragon tails along the center of the cup line. Here is a picture of the one cut using the Shopsmith saw.

And one cut in half. The panels were cupped with the centerline of the cup along the path I cut, so the right and left sides were a little bent up. Doing this made them more manageable during the cutting process. One these were finished, the little bit of cupping was gone and will not be noticed by anyone assembling them.
Now for my observations.
Observation #1 – Detailed cutting control. It is funny how you do not know if there is a difference until you discover it! I did not know I was near-sighted and needed glasses until I went in the Navy. Now that I wear glasses all the time, I feel blind without them. In this case, I discovered I had much more control cutting the curly tips of the dragon tails with both the Hawk and the Shopsmith. Cutting those with the DeWalt was actually a little hairy. I was turning down the saw speed just to maintain control, especially with a new blade. I realize that is how I normally cut with the DeWalt, constantly adjusting speed depending on what I am cutting and how dull the blade is getting. With the Hawk and the Shopsmith, I did not adjust the speed dial for the entire puzzle. A little geometry review explains this issue.
Remember back in Part 1 when I discussed the parallel link saw system and I mentioned it moved the blade fore and aft more than a parallel arm system? The short arms of the parallel link have to move through a greater angular distance to achieve the same saw stroke length. Let’s start with the length of the arms in discussion. I measured from the pivot point of the arm to the blade. Here is a combined picture of the three measurements.
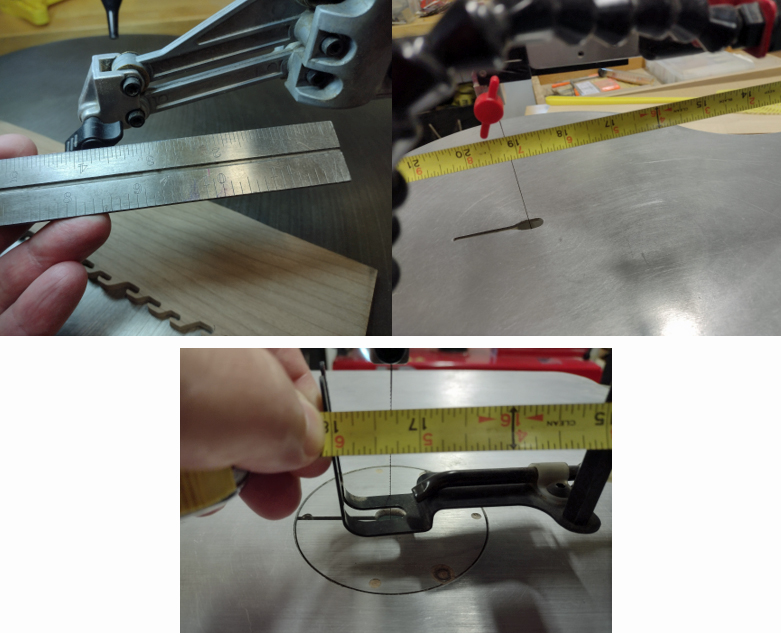
Pivot arm length for the DeWalt is 3 7/8″ (3.875″), the Hawk is 19 1/8″ (19.125″), and the Shopsmith is 17 5/16″ (17.3125″).
Now we need to know the stroke length for each. From the manufacturer brochures, the DeWalt stroke is 3/4″ (.75″), and the Hawk and Shopsmith strokes are both 7/8″ (.875″). Assume when the arm is level, one half of the stroke goes above level and one half below.
Now we use the Pythagorean Formula: a2 + b2 = c2 . Here’s a drawing with some math.
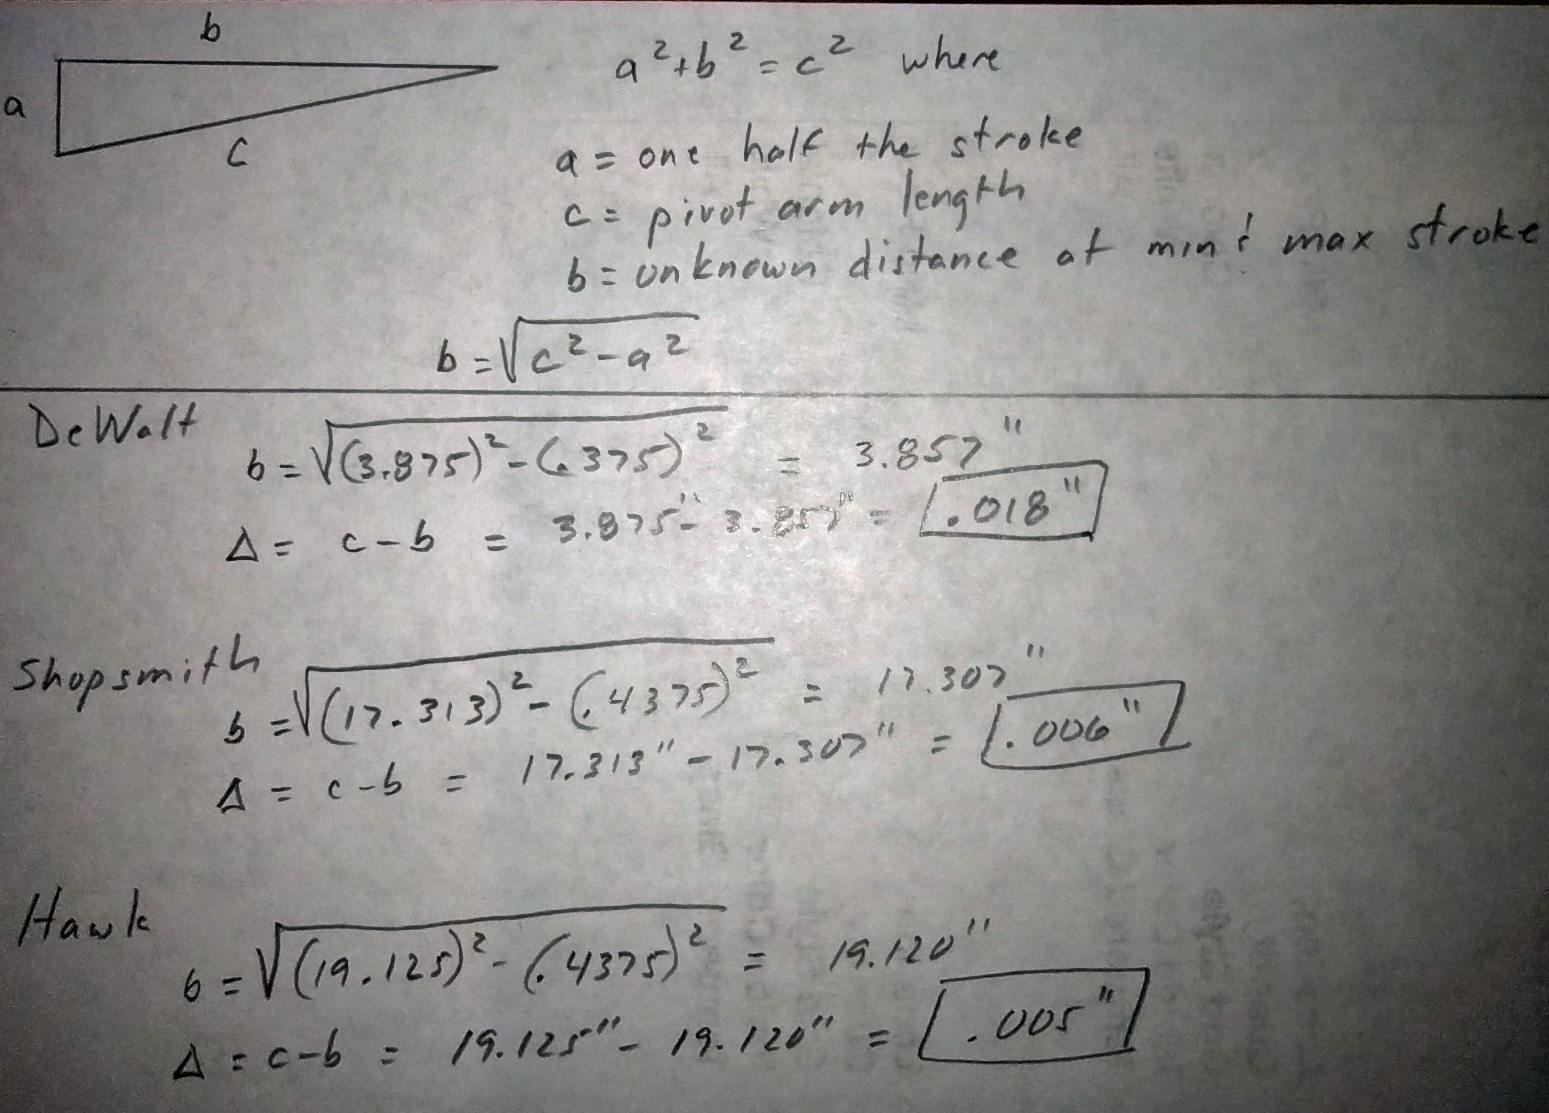
What does all this mean? When you are sitting at the DeWalt, the saw blade is moving towards you and away from you by .018″ every stroke it takes. That does not sound like much movement, but remember the blade itself is only .0236″. The blade is moving almost the entire width of the blade. The Hawk and the Shopsmith have one third less blade movement. This effect was VERY noticeable as I was cutting the tips of the dragon tails. Does this mean the DeWalt is no good? Heck no! Remember, I was unconsciously compensating by slowing down the stroke speed to maintain control of what the blade was doing. Until I cut on the Hawk/Shopsmith, I did not know any different. Now I do!
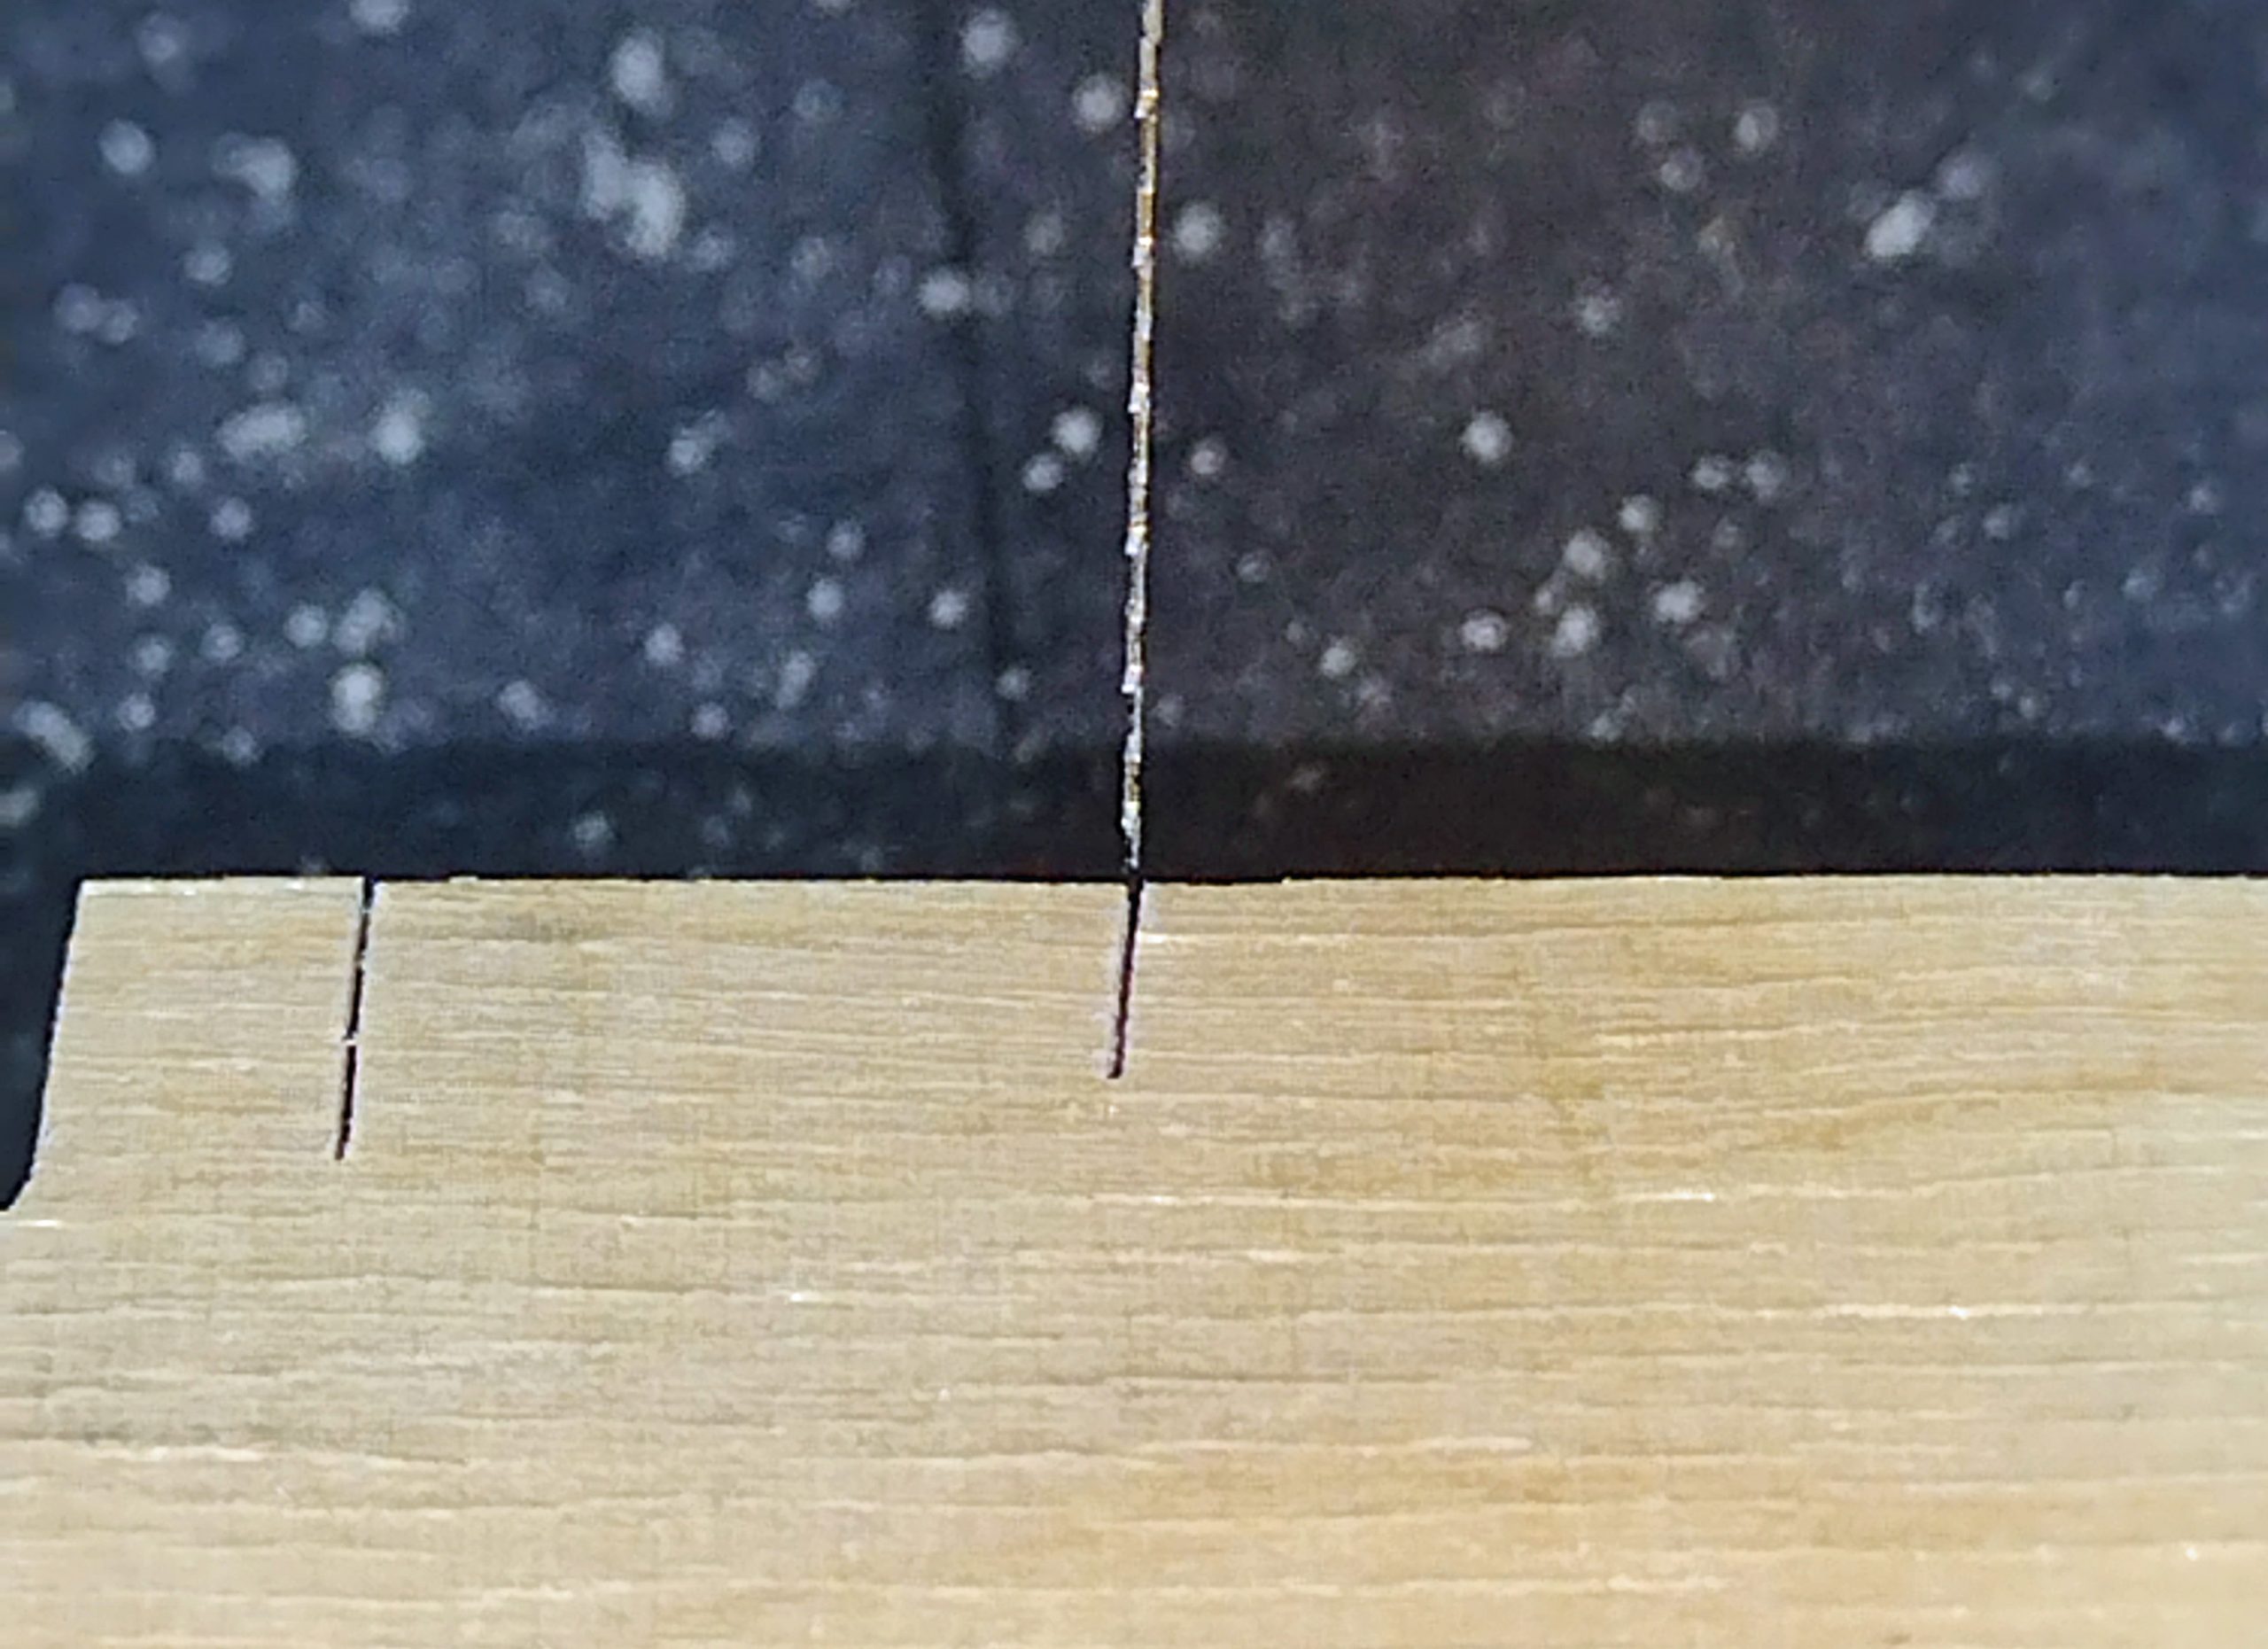
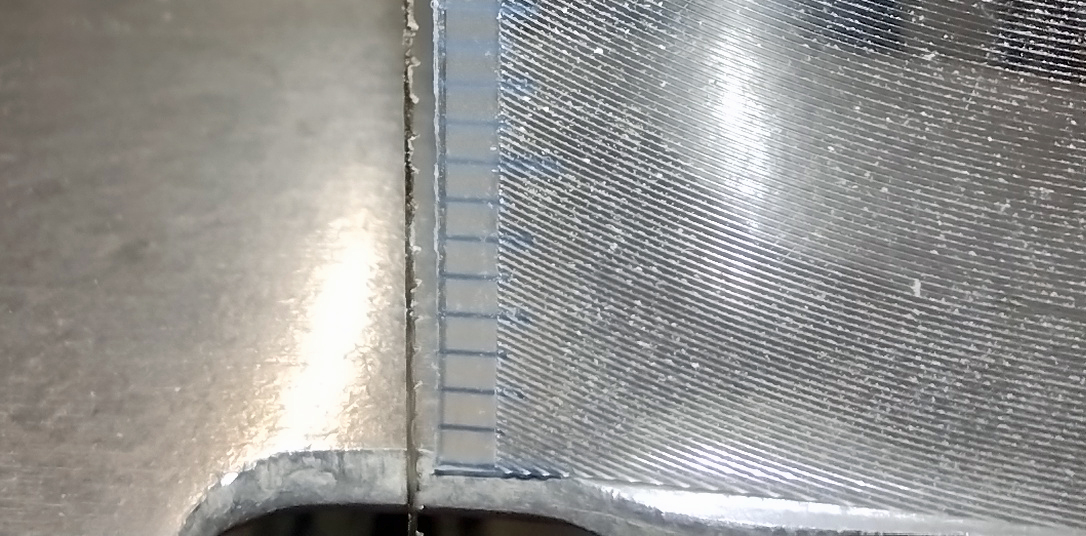
Observation #2 – Use of reverse tooth blades. This one totally flabbergasted me. As I was cutting the puzzle with the Hawk, I noticed that the top of the puzzle was getting whiskers on it along the saw kerf. I am used to having a minimal amount of these on the bottom of the wood, and none on the top. The same thing happened with the Shopsmith, but not as pronounced as the Hawk. There are two factors causing this. The first one is the actual design of the saws. I measured the distance from the table up to the bottom of the upper blade clamp while the saw was at the top of its stroke. The DeWalt measured at 3.125″, the Shopsmith at 3.25″, and the Hawk at 3.375″.
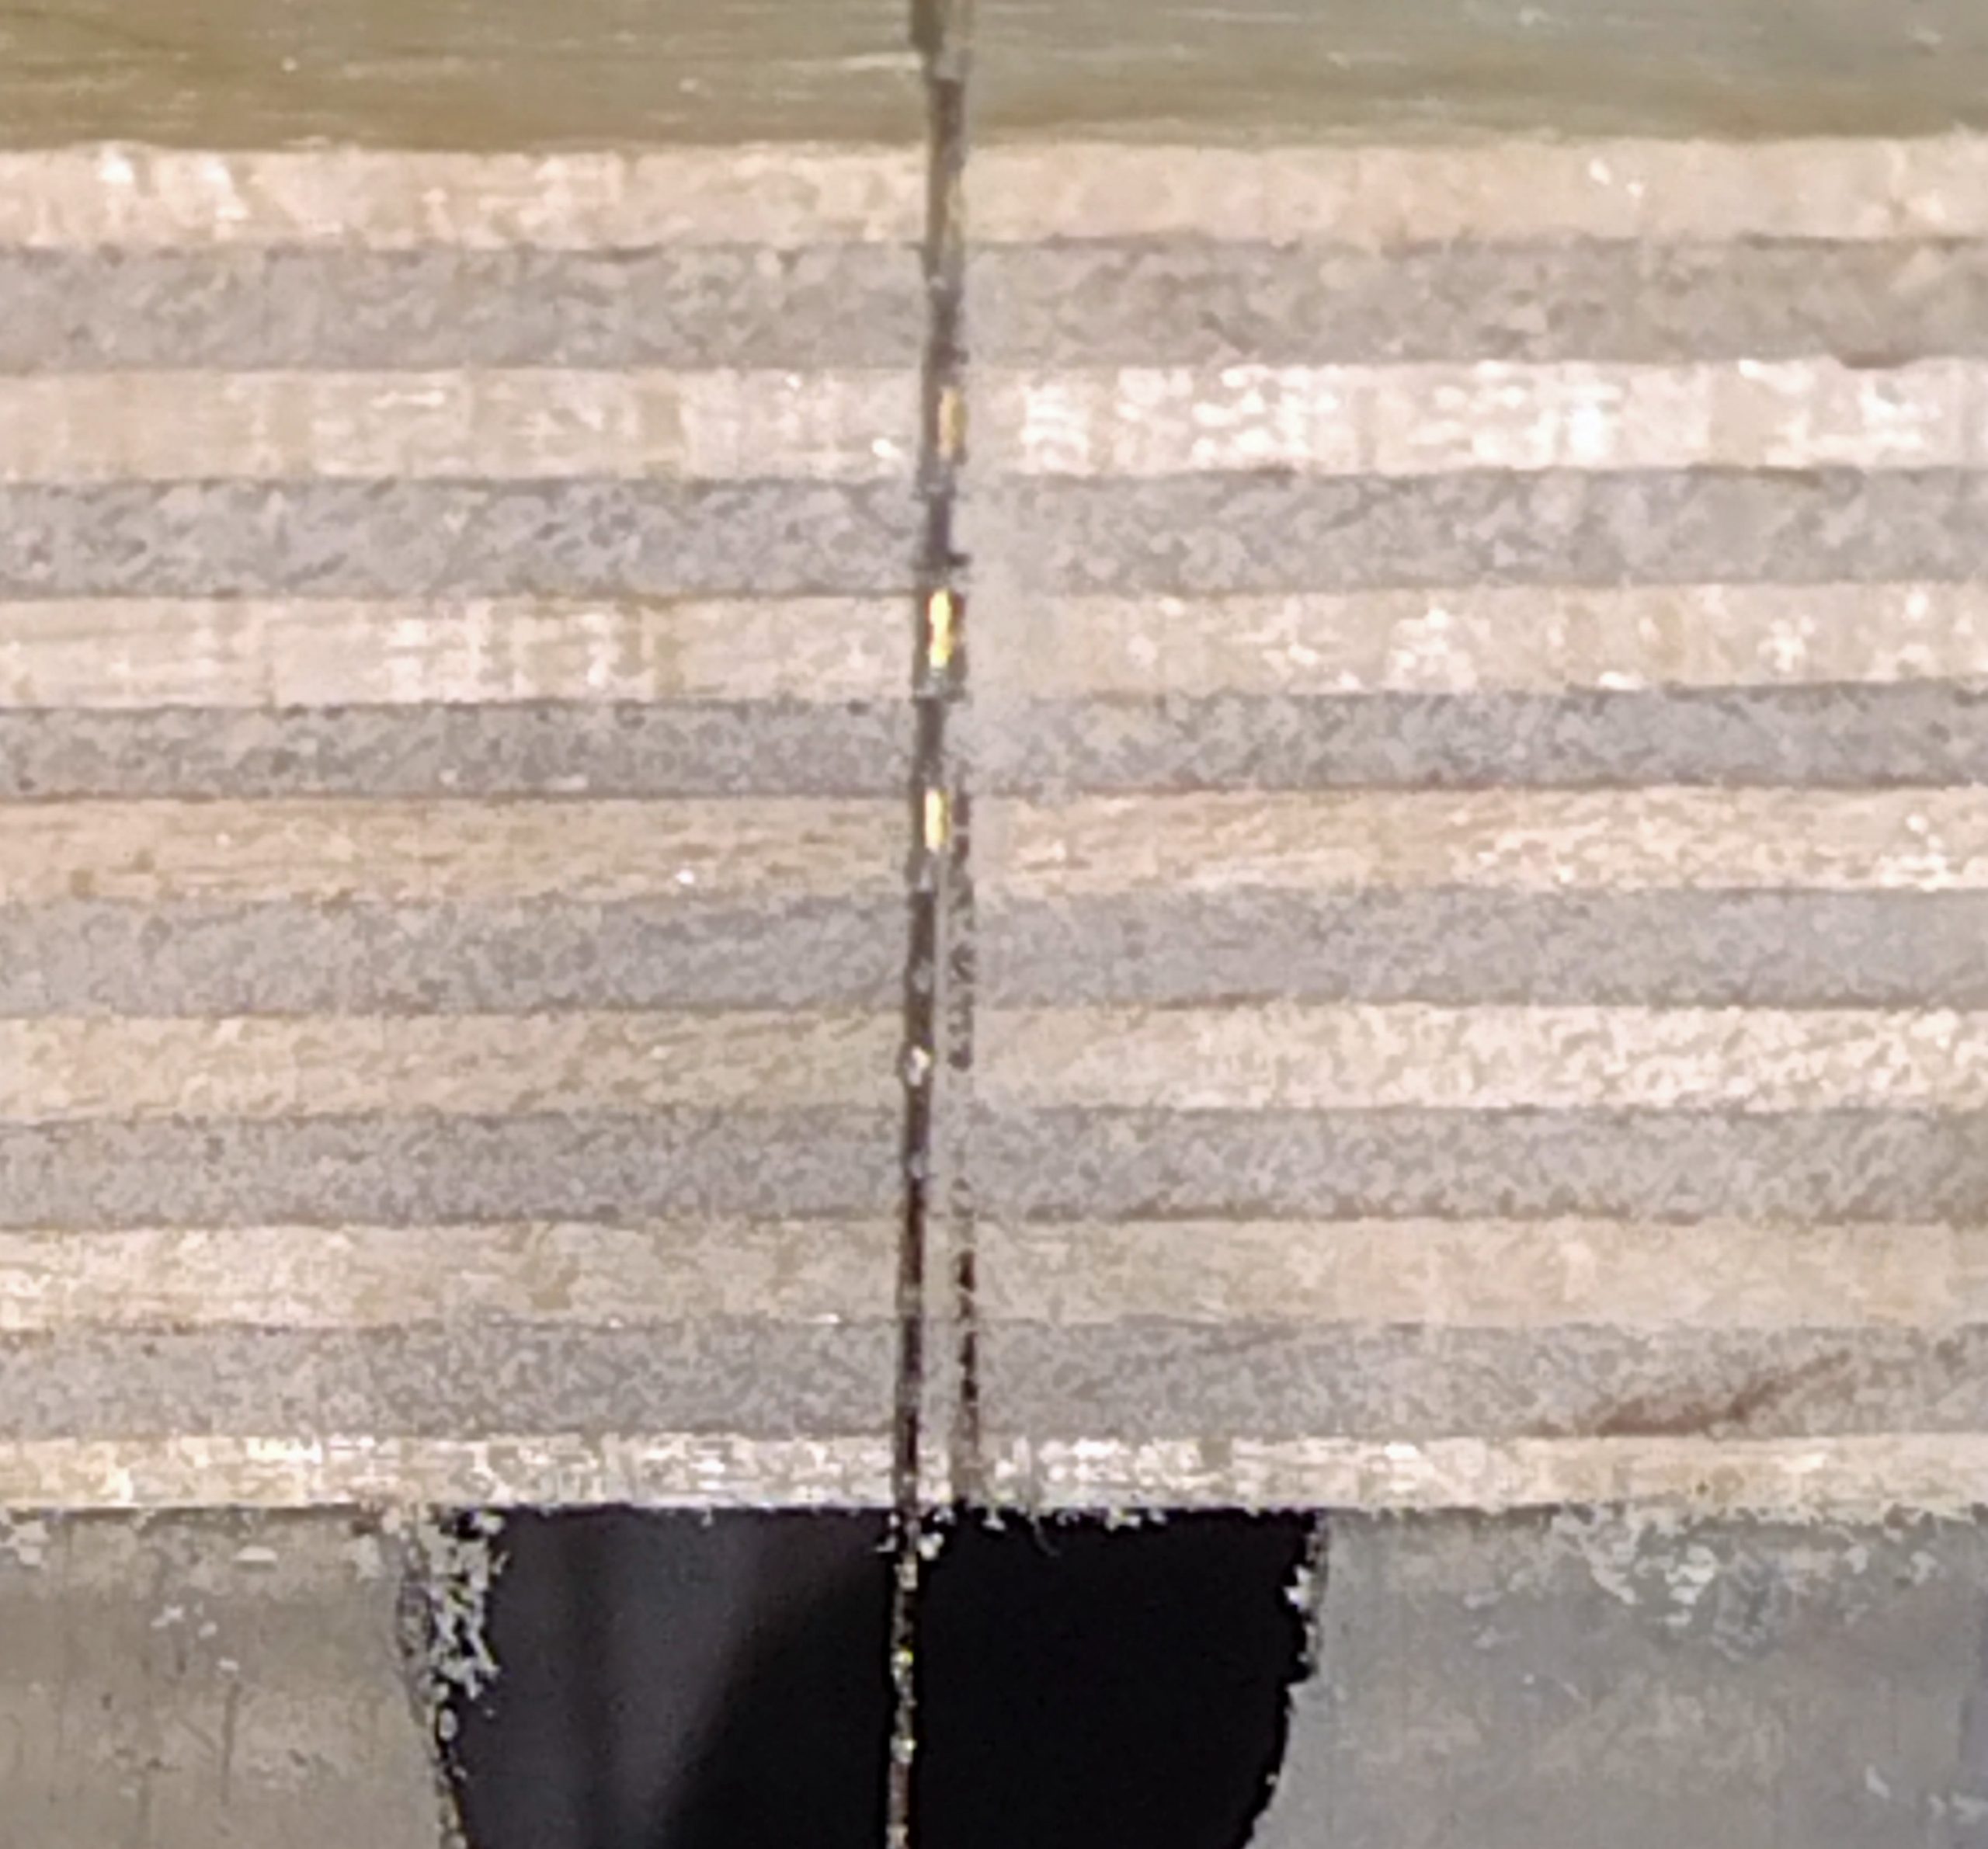
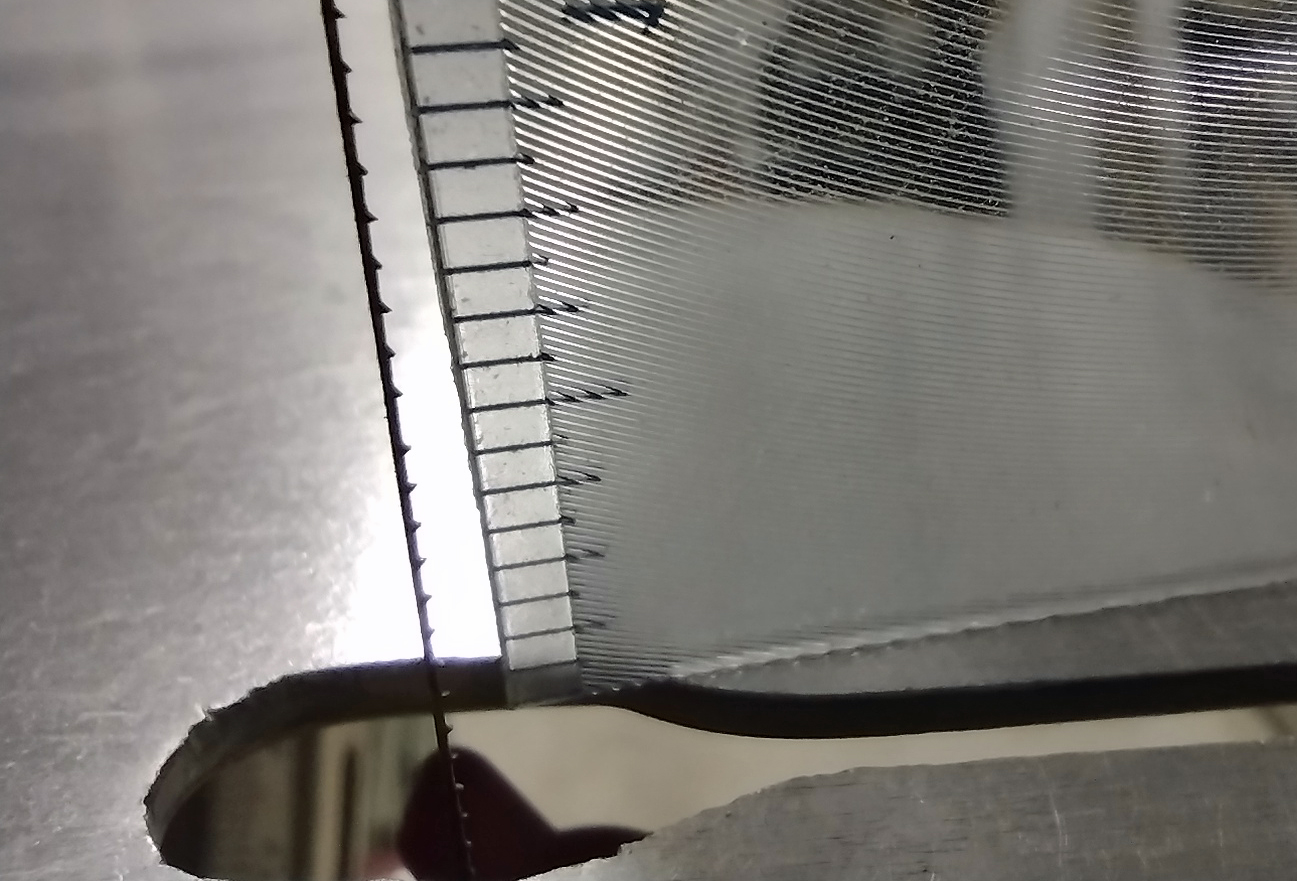
So the Hawk design geometry keeps 1/4″ more of the blade over the table than the DeWalt does. Here is a picture of what that looks like with my preferred blade installed. Each graduation on the rule is 1/16″. You can see at the 1/2″ mark where the transition from reverse tooth to normal tooth blades happens. If cutting with 1/4″ plywood, a full 1/4″ of reverse tooth blades protrude above the surface. Not a problem with this particular puzzle, as a quick sanding at the end removes them all, but it does impact it if there is an image attached.
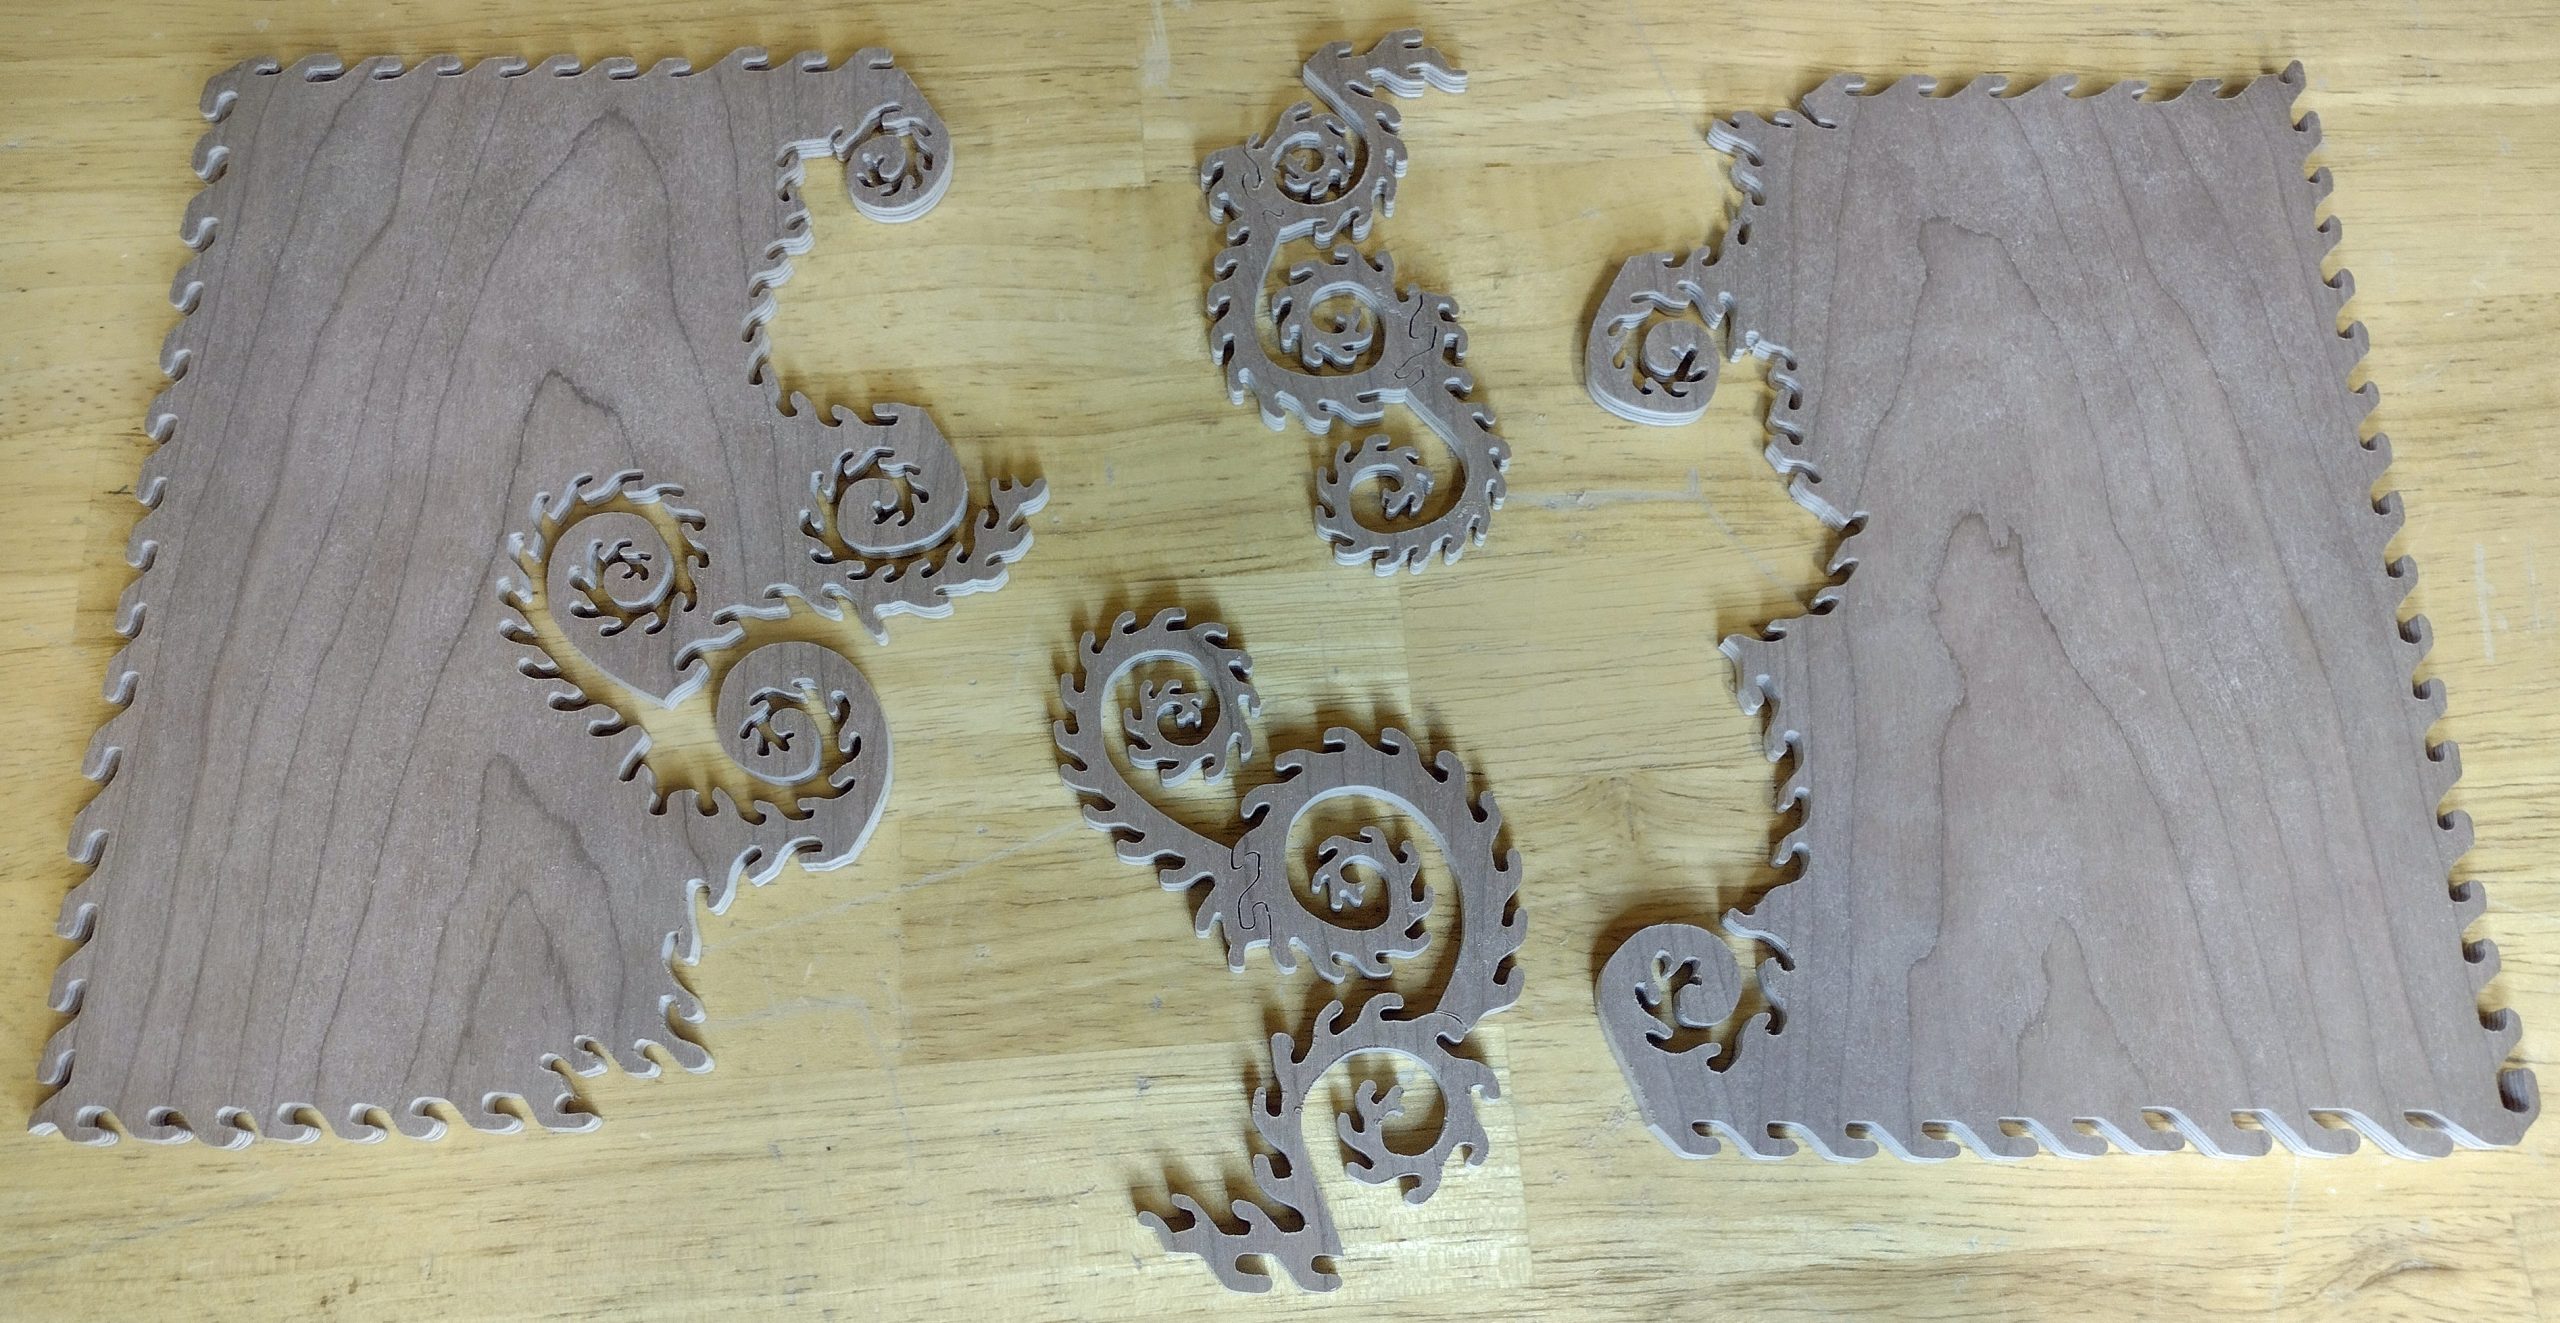
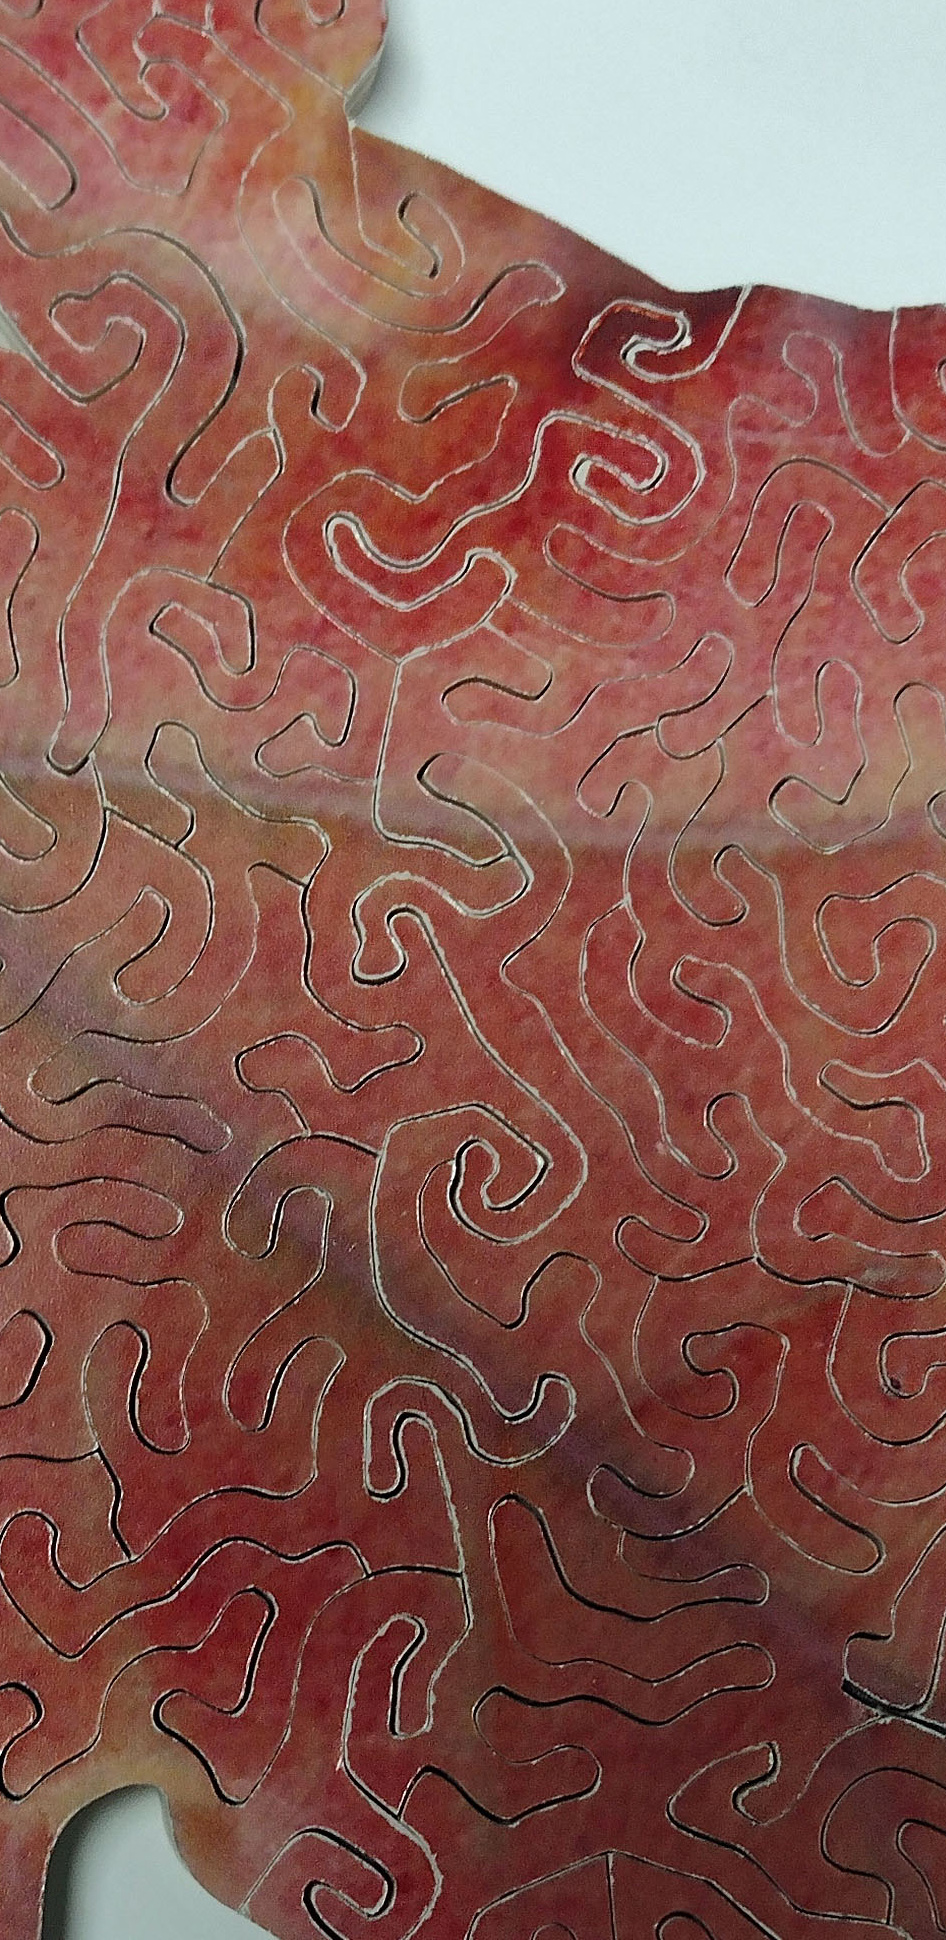
This was the biggest and most impactful revelation that happened to me from this comparison cut. I was totally unaware of this and it has impacted one of my puzzles. If you have read my prior blog entires, you saw a multi-panel puzzle I made of a fall oak leaf. I cut a 13 x 19 panel down for ease of handling using the Hawk scroll saw, and I noticed that cut line appeared to be more prominent. I blamed a bad blade, but now I know it was the effect of using reverse tooth blades on the Hawk scroll saw. You can see that one cut line stands out a little more than its neighbors in the picture below.
For the Shopsmith, the amount of reverse blade above the table is 3/8″, or 1/8″ above the plywood.
For the DeWalt, a little over 5/16″ above the table, or 1/16″ above the plywood.
I said there were two factors that affect this issue. The second one is the blade holders themselves. You may remember that I mentioned in Part 2 that the blades have to be fully inserted in the blade clamps for the Hawk and Shopsmith in order to maintain a constant tension with blade changes. There is no adjustability of where the blade rides with respect to the table. On the DeWalt, however, the blade clamps are slots. You can move the blade up and down in the slots just as long as the blade is fully engaged top and bottom.
So you can see that by adjusting where the blade is located, you can affect the number of reverse teeth in the wood.
If I am going to use the Hawk for cutting puzzles with images on them, I will have to find a new blade to use or make an auxiliary table that will raise the puzzle up so the reverse tooth blades do not protrude above the image side.
Observation #3 – Noise as it runs. The DeWalt was noticeably quieter than the other two. The Hawk and the Shopsmith were about the same. I will note that the Shopsmith attachment on the Shopsmith headstock is very loud. Not part of this cutting test, but worth mentioning.
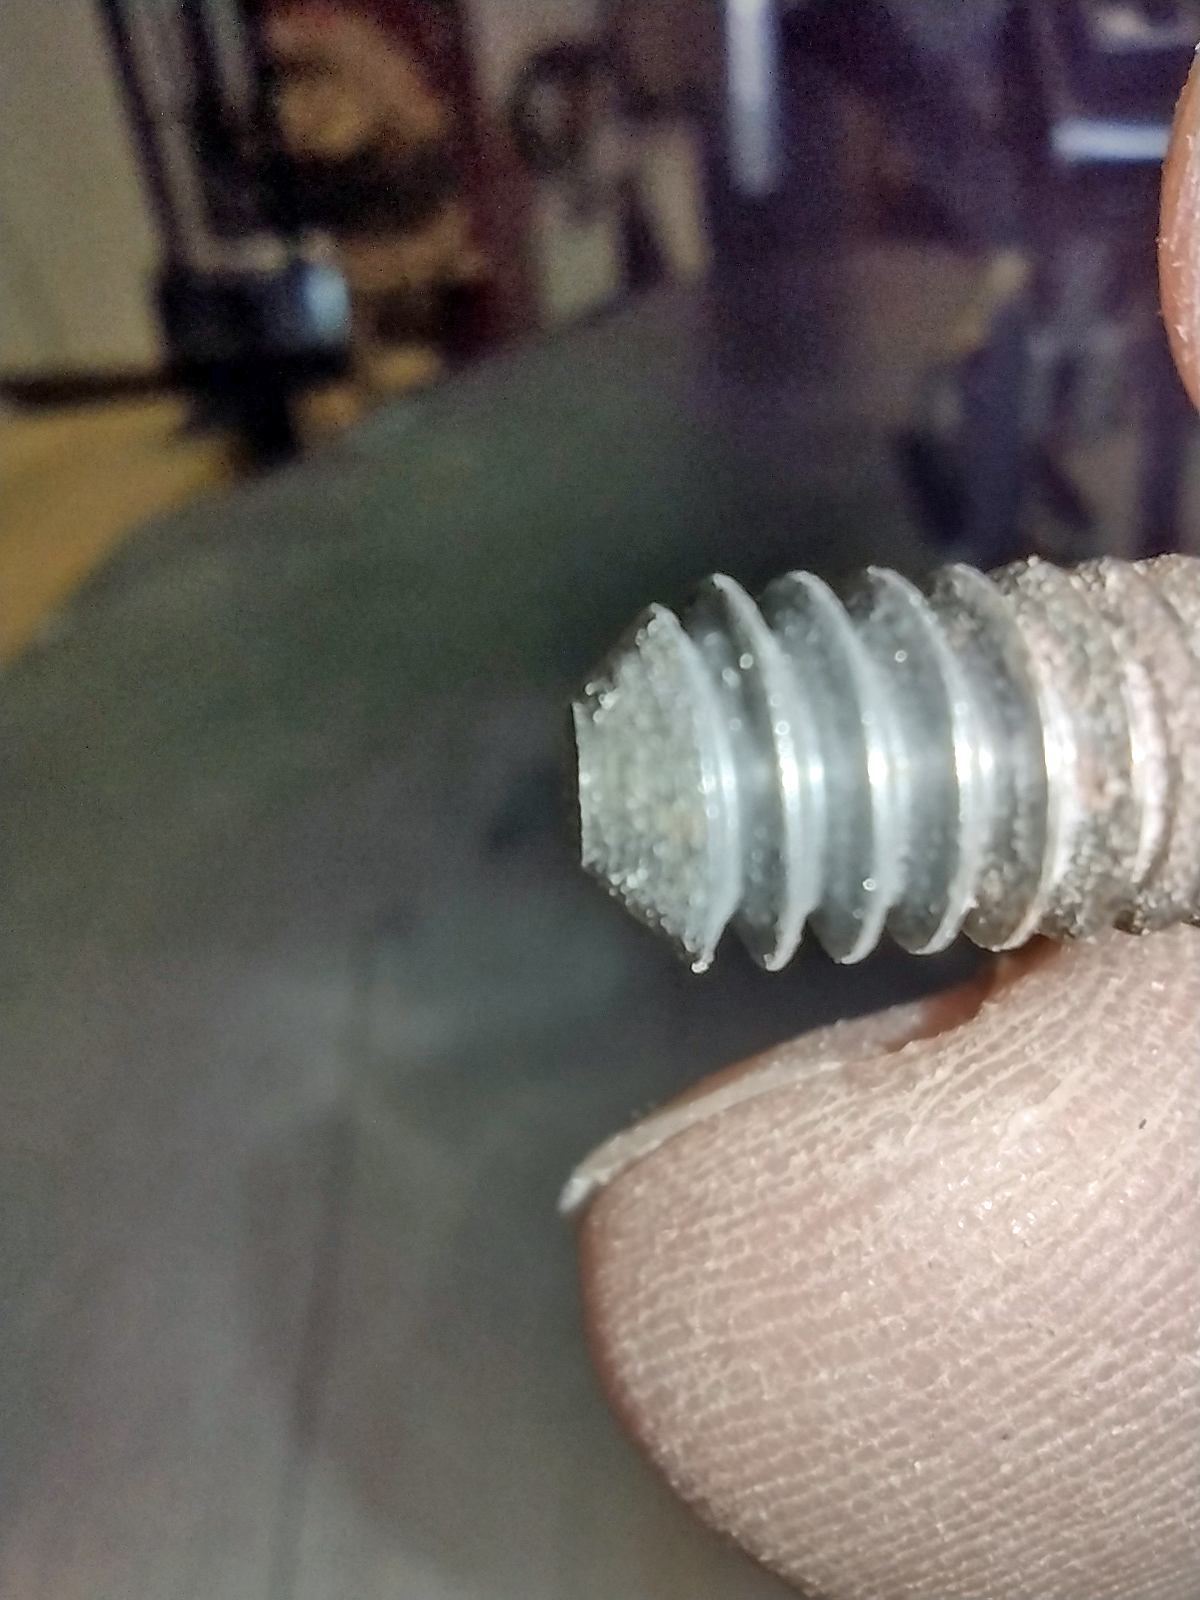
Observation #4 – Shopsmith blade clamps. These turned out to be very annoying as compared to the other two machines. The end of the screwed studs on the Shopsmith were tapered. That means there is less flat surface to engage the blade. If the blade was not perfectly centered on the studs, it would tend to slip out. Now, if you have a lot of blade slipping problems, you are supposed to clean and degrease the studs. If they are highly polished from a lot of use, then you take some sandpaper and roughen them up. In this case, they held fine when perfectly centered.
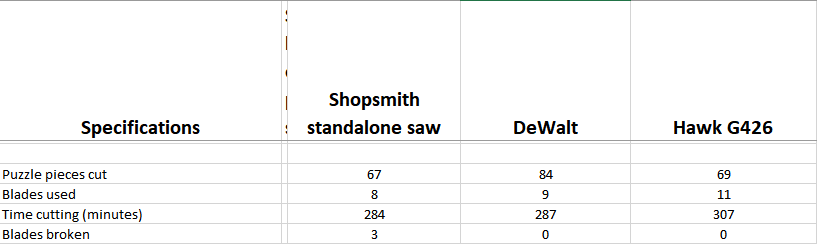
Observation #5 – Blade breakage. The only saw I broke a blade on was the Shopsmith. I actually broke three blades, which is indicative of the tension being too high. The tension being too high might have also been a factor on my issue with the tapered studs in the blade holders. The real problem with broken blades with the Shopsmith is that the upper arm beats the stuffing out of the cover over the upper arm. It makes a lot of noise that startles the cutter half to death. Neither of the other saws did anything like this. I have broken blades with them before, and you just calmly reach and turn the saw off. With the Shopsmith, it sounds like the saw is going to explode. It actually shattered a clear plastic guard that I will have to replace before I return the saw to my daughter.
The rest of my observations are really minor issues and preferences.
I like the articulated airline to be on the left side of the saw like it is on the DeWalt. The Hawk gives the ability to move it, so I am going to do so. The Shopsmith airline is a metal tube that is integral to the hold down foot. That sucks! Besides having the hold down foot in the way, it blows the dust straight at you. This issue almost had me finish this puzzle using one of the other saws. As mentioned in Part 2, I will be upgrading the Shopsmith with an articulated airline before I return it to my daughter. With the articulated airline, she can remove the foot and this major annoyance would be fixed!
I really like the cast iron table on the DeWalt over the aluminum tables on the other two. I cannot put a hard reason for it, I just like the cast iron.
The sides of the cuts on all three saws were very smooth.
Summary. All three saws are perfectly adequate to cut a nice puzzle. As with many things in life, each is a compromise. I really like the ease of use of the DeWalt. Having the three major controls up top is a huge benefit, and the blade changes with it are the fastest of the three. It works well with the blades I like. The Hawk has a plus in the greater throat depth (26″ vs 20″) and the minimal movement of the blade back and forth. The Hawk also has some interesting features that were not germane to this test. The Hawk has a greater thickness it can cut. I guess if I had to pick one to “let go”, it would be the Shopsmith. Fortunately, that is the one that I can take back to my daughter’s house! Having said that, the Shopsmith is perfectly adequate and up to the challenge. It does need the airline upgrade.
When I look at the puzzle cutting statistics, the DeWalt cut 15 more pieces in 20 minutes less time than the Hawk. Some of this might be because I was flopping around about the rough cut on top, but I stopped logging my time while I was researching that issue. The DeWalt is just lightning fast on the blade changes. The Shopsmith statistics are not shabby either.
I would not hesitate to buy any of these saws used if they are in working order and at the right price. If I was forced to buy one of these brand-new, it would probably be the DeWalt based on the price point. I personally think the Hawk is a better made saw, but it is considerably more money.
Which saw will I use going forward? I will be working on a custom order puzzle soon, and it will be with the DeWalt. I need to figure out how to resolve the blade issue with the Hawk before it gets much use.
Now if only someone in the Spokane or Coeur d’Alene area had a Hegner or Pegas I could borrow to add to the comparison!!
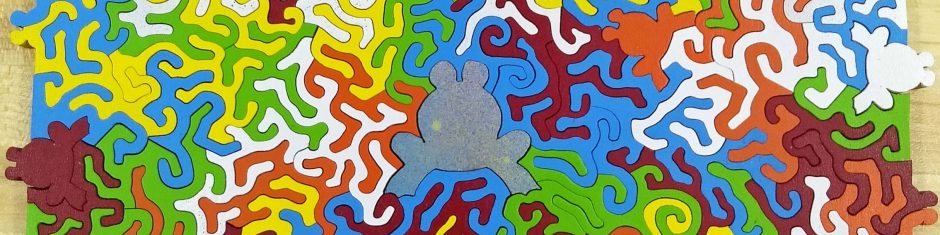
Of the three puzzles pictured above, two are already sold! The third one will be listed on Etsy in a couple of days and will remain there until it is sold.
Happy Puzzling!
Bob