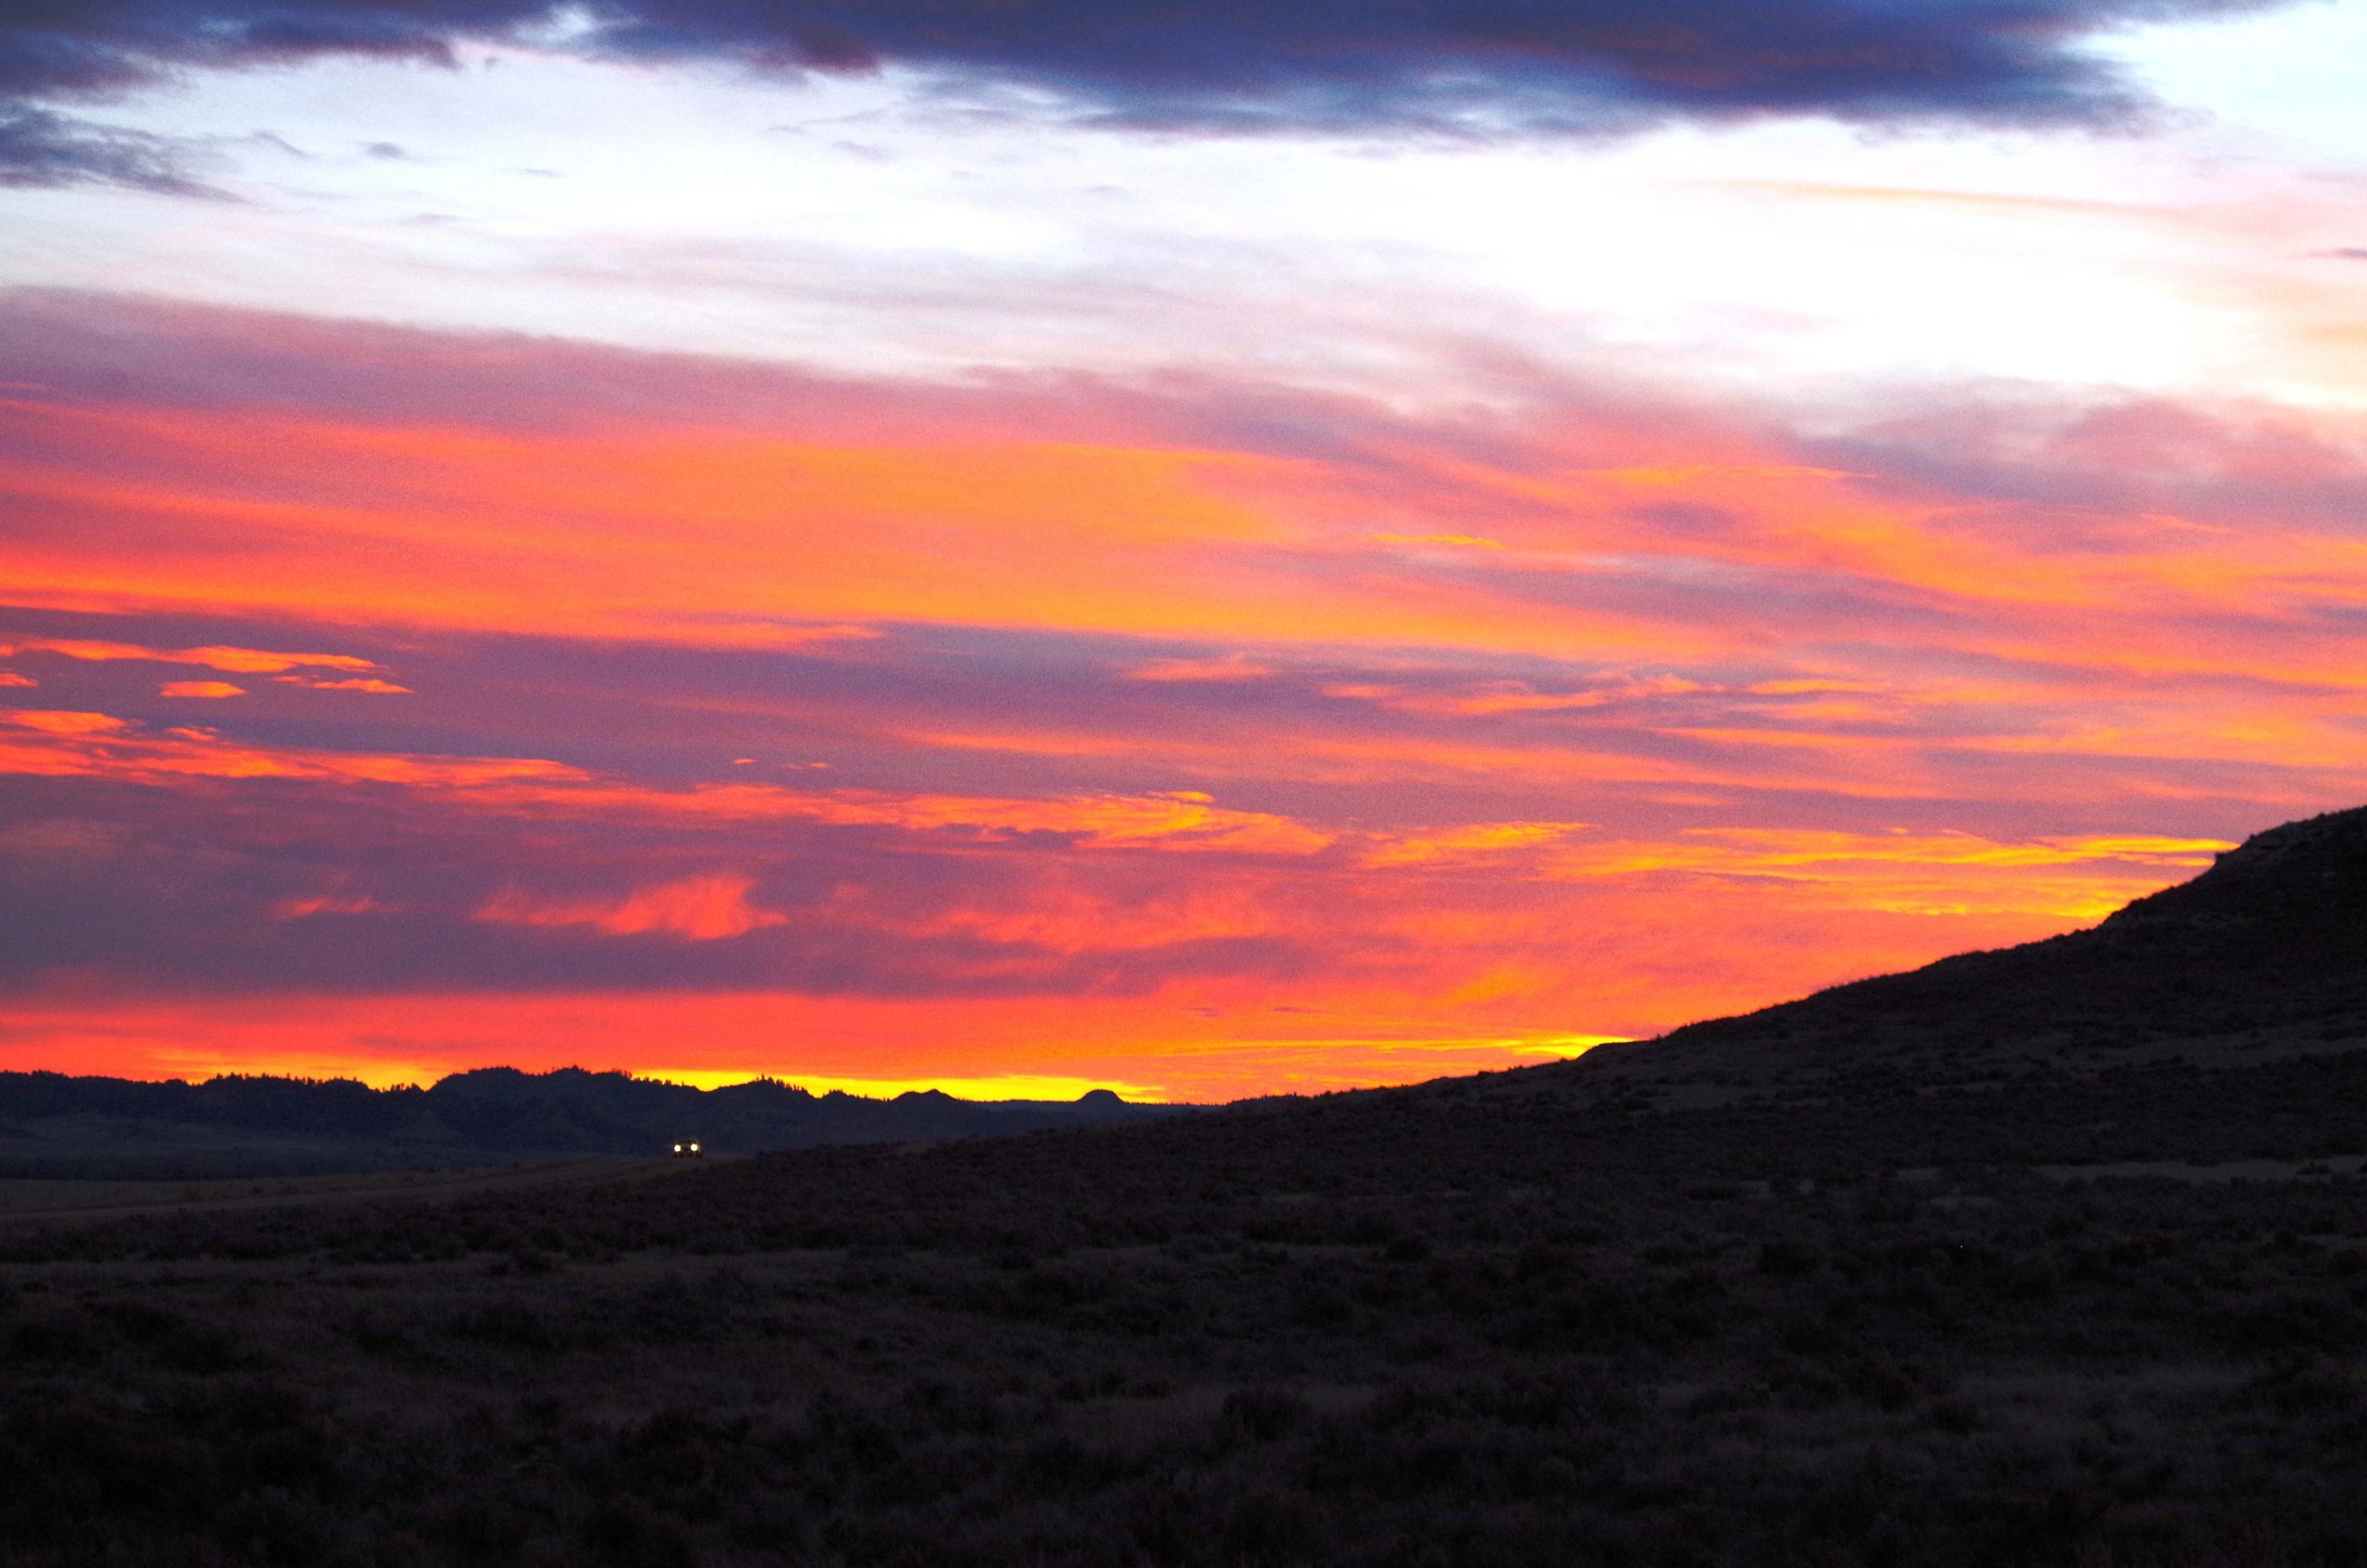
I have a gorgeous photograph of a sunset I took in the Powder River country of southeastern Montana on a cold November evening in 2013. We were driving back to our camp, and it was getting dark. The colors were striking, and I had to pull over just to sit there and enjoy it. Fortunately, I had a tripod and digital SLR camera in the truck with me. I hopped out and set up my equipment and captured this view. I took several shots, but this ended up being the one with the best colors. Unfortunately, the headlights of another passing car somewhat detract from the overall image.
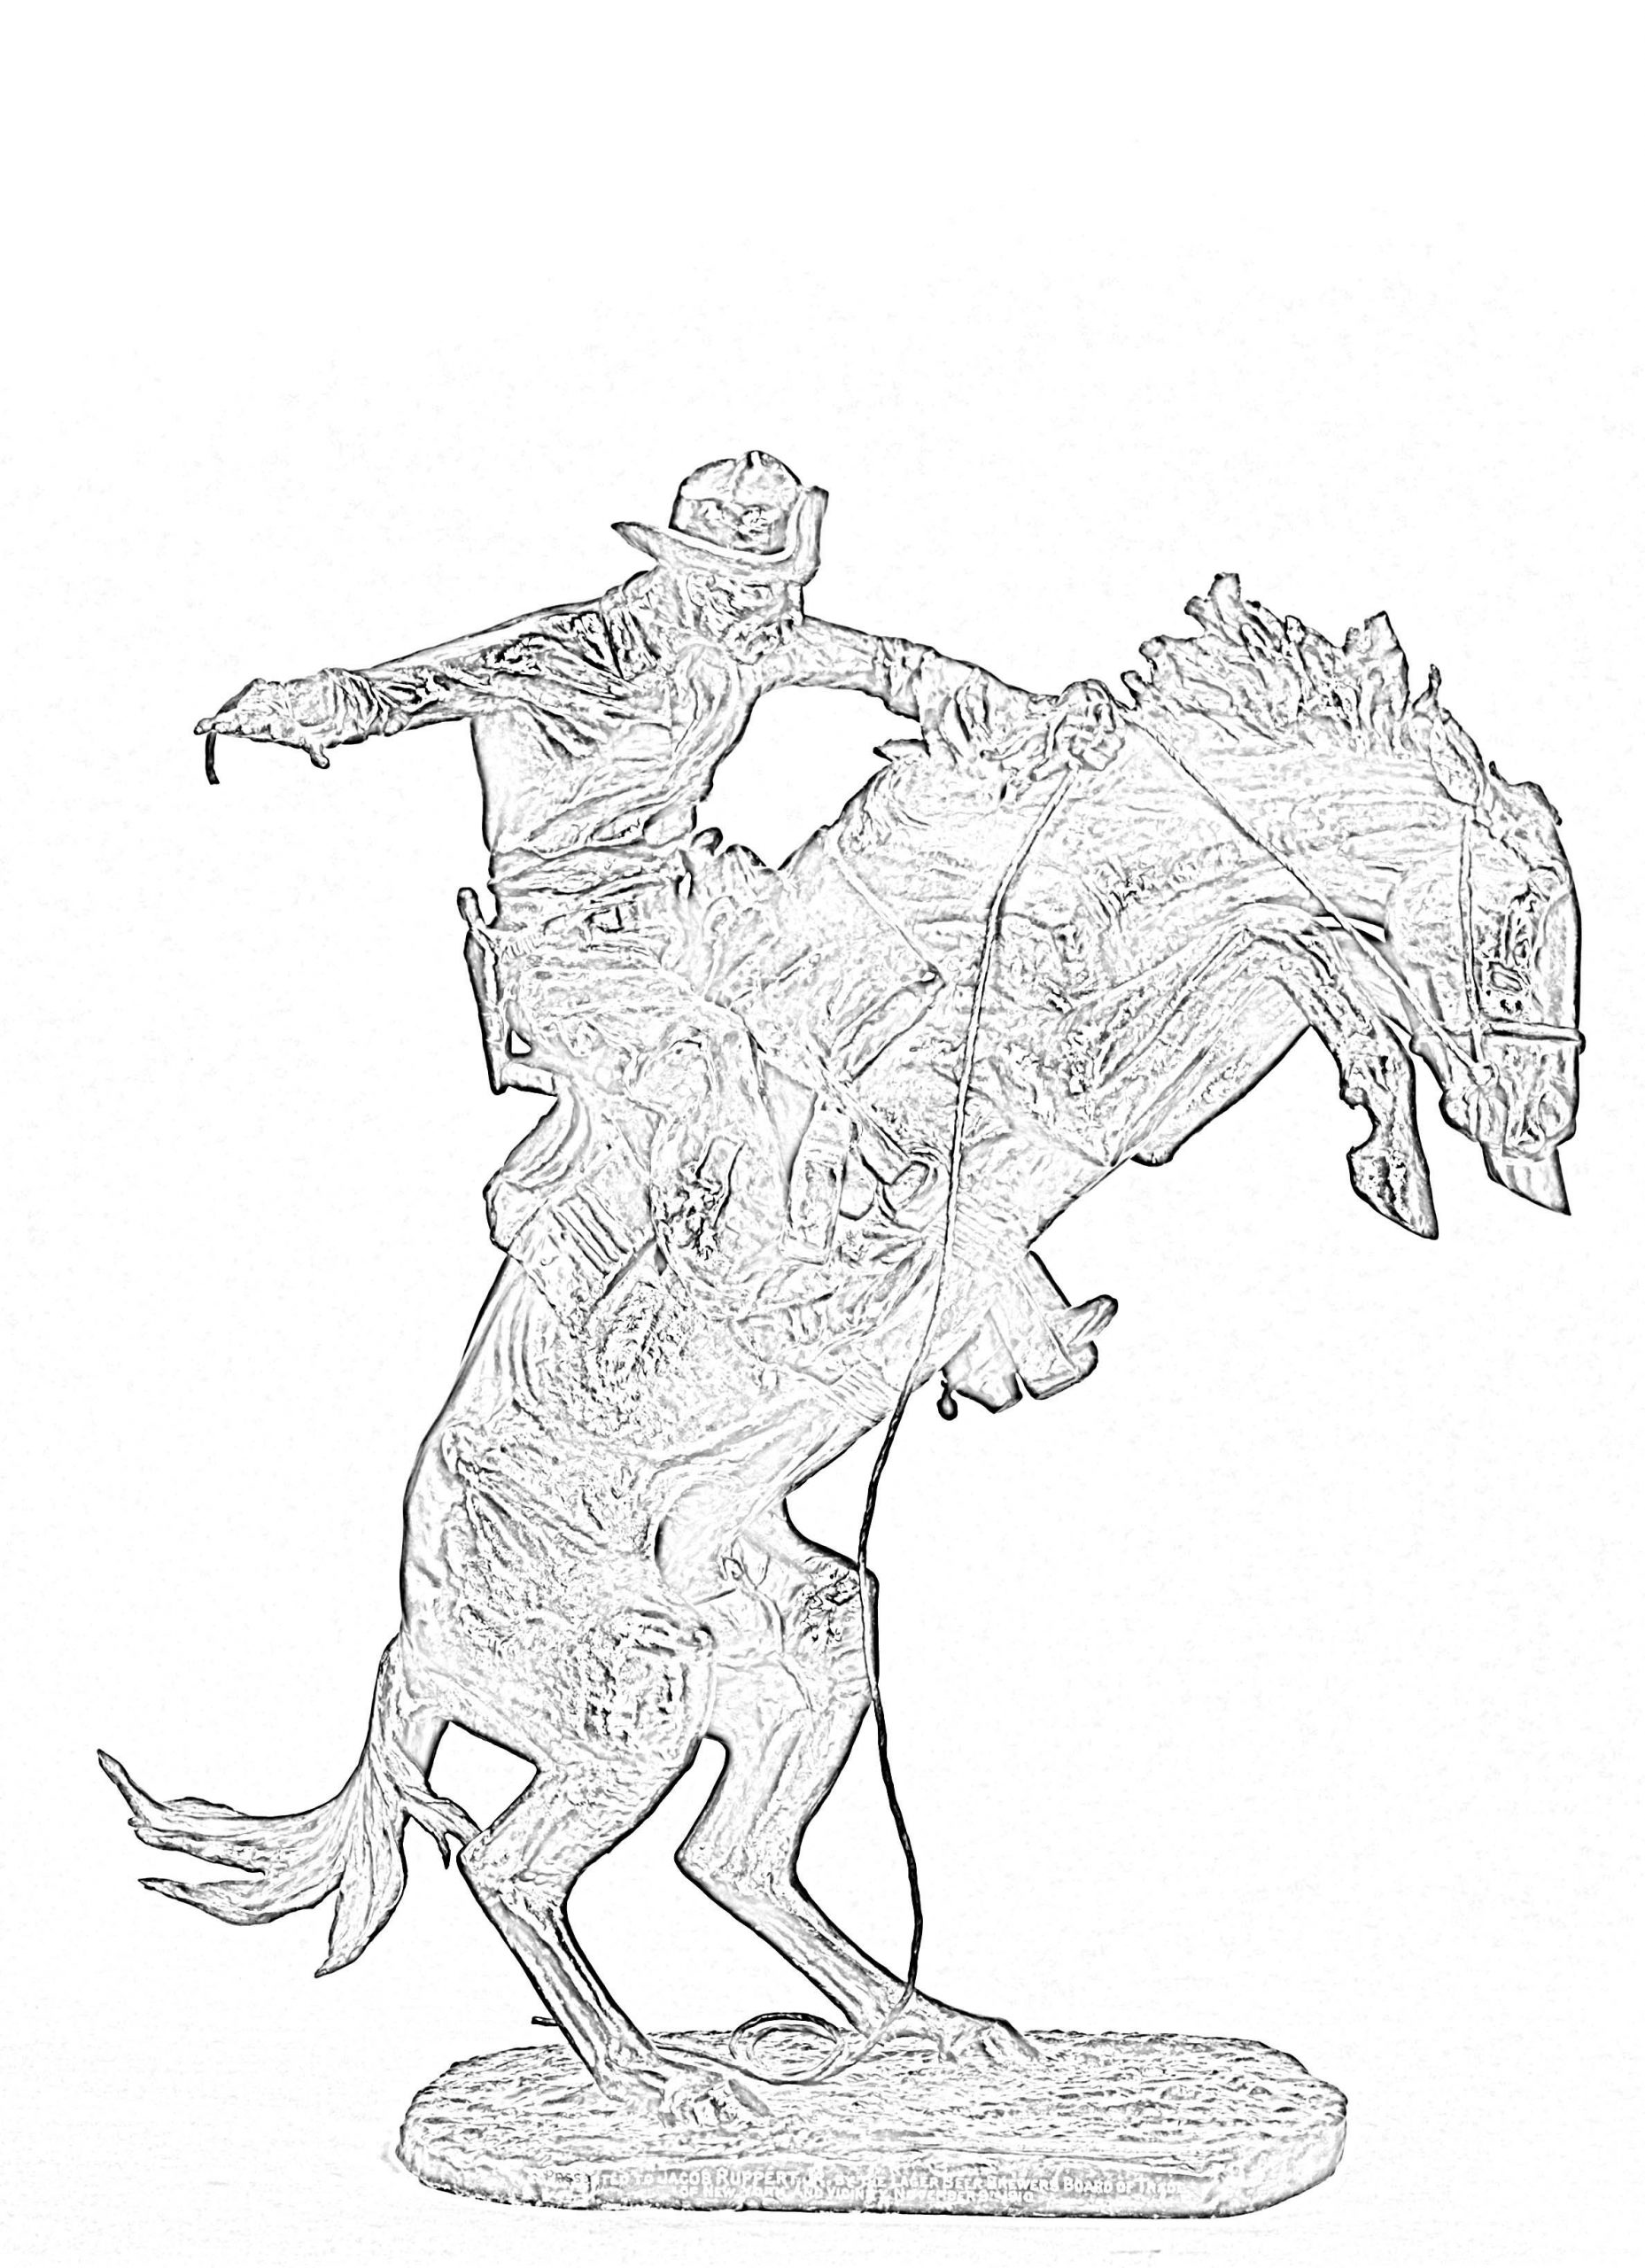
So, what can I do with that image? I have always admired some of the bronze work of the artist Frederick Remington. I am amazed by the detail he was able to include in his castings. I found a public domain downloadable photo of “The Broncho Buster” at the Metropolitan Museum of Art website. They also have a second version of the casting. It was made years after his death and does not include nearly as much fine detail as this one. And, yes, a century ago an “h” was often included in the word. If you want to waste a little bit of time on internet rabbit trails, you can go google “broncho vs. bronco vs. bronc”. His bronze is technically named with the “h”, but I choose to drop the “h” in my puzzle name.

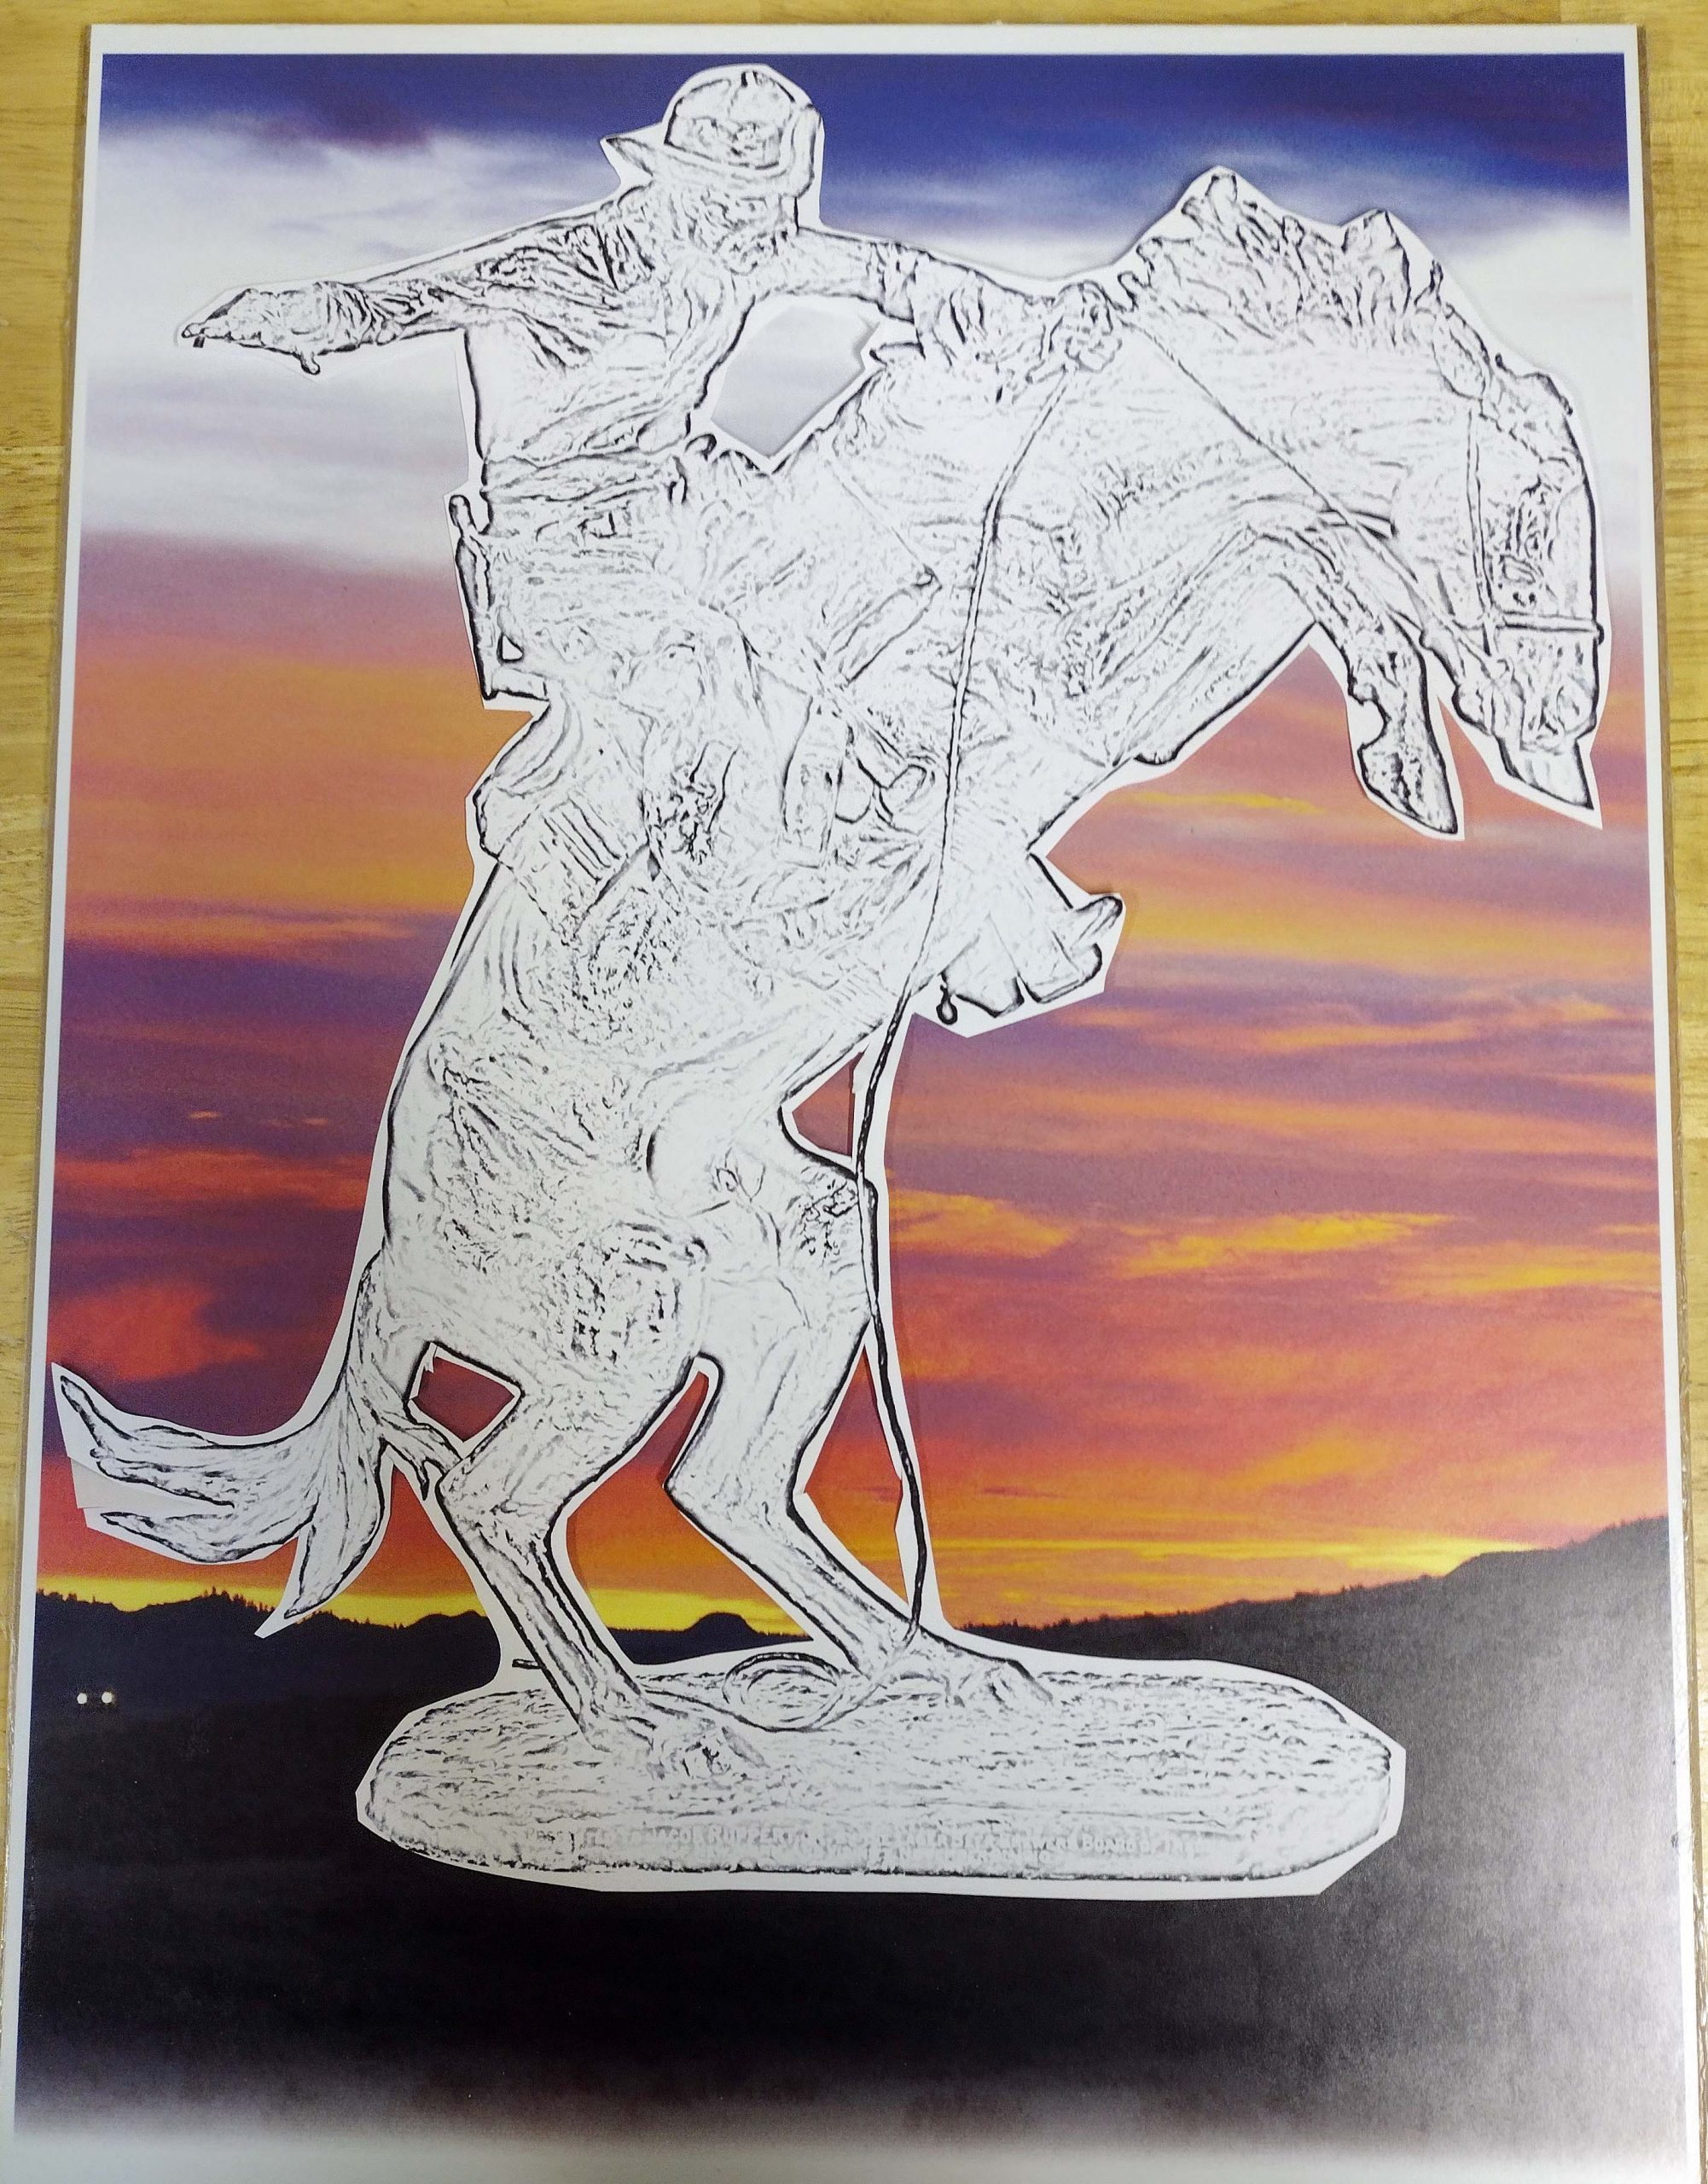
I used software to convert this to a black and white image and printed it onto a piece of 13″ x 19″ printer paper to use as a pattern.
Next, I adjusted the digital sunset image for a vertical portrait composition while trying to keep the black horizon as level as possible. I printed the result on photopaper and mounted it to a 13″ x 19″ piece of cherry Appleply.
I cut out the black and white image and adjusted it on my sunset print until it was where I wanted it. I obviously needed to avoid the headlights, and I wanted the black portion to be the ground the horse’s hooves were on. I would have gone a little bit higher but was running out of room for the hat. I could have made the black and white image a little smaller, but I wanted it as large as I could get it.
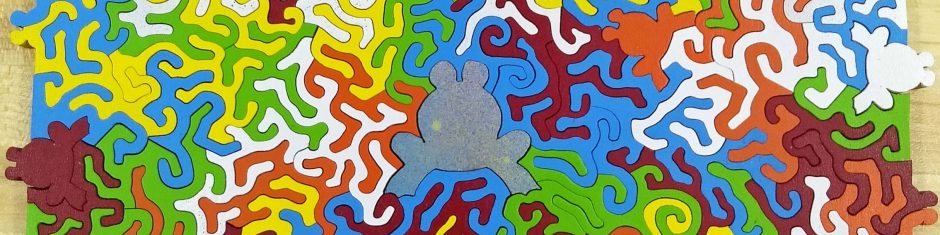
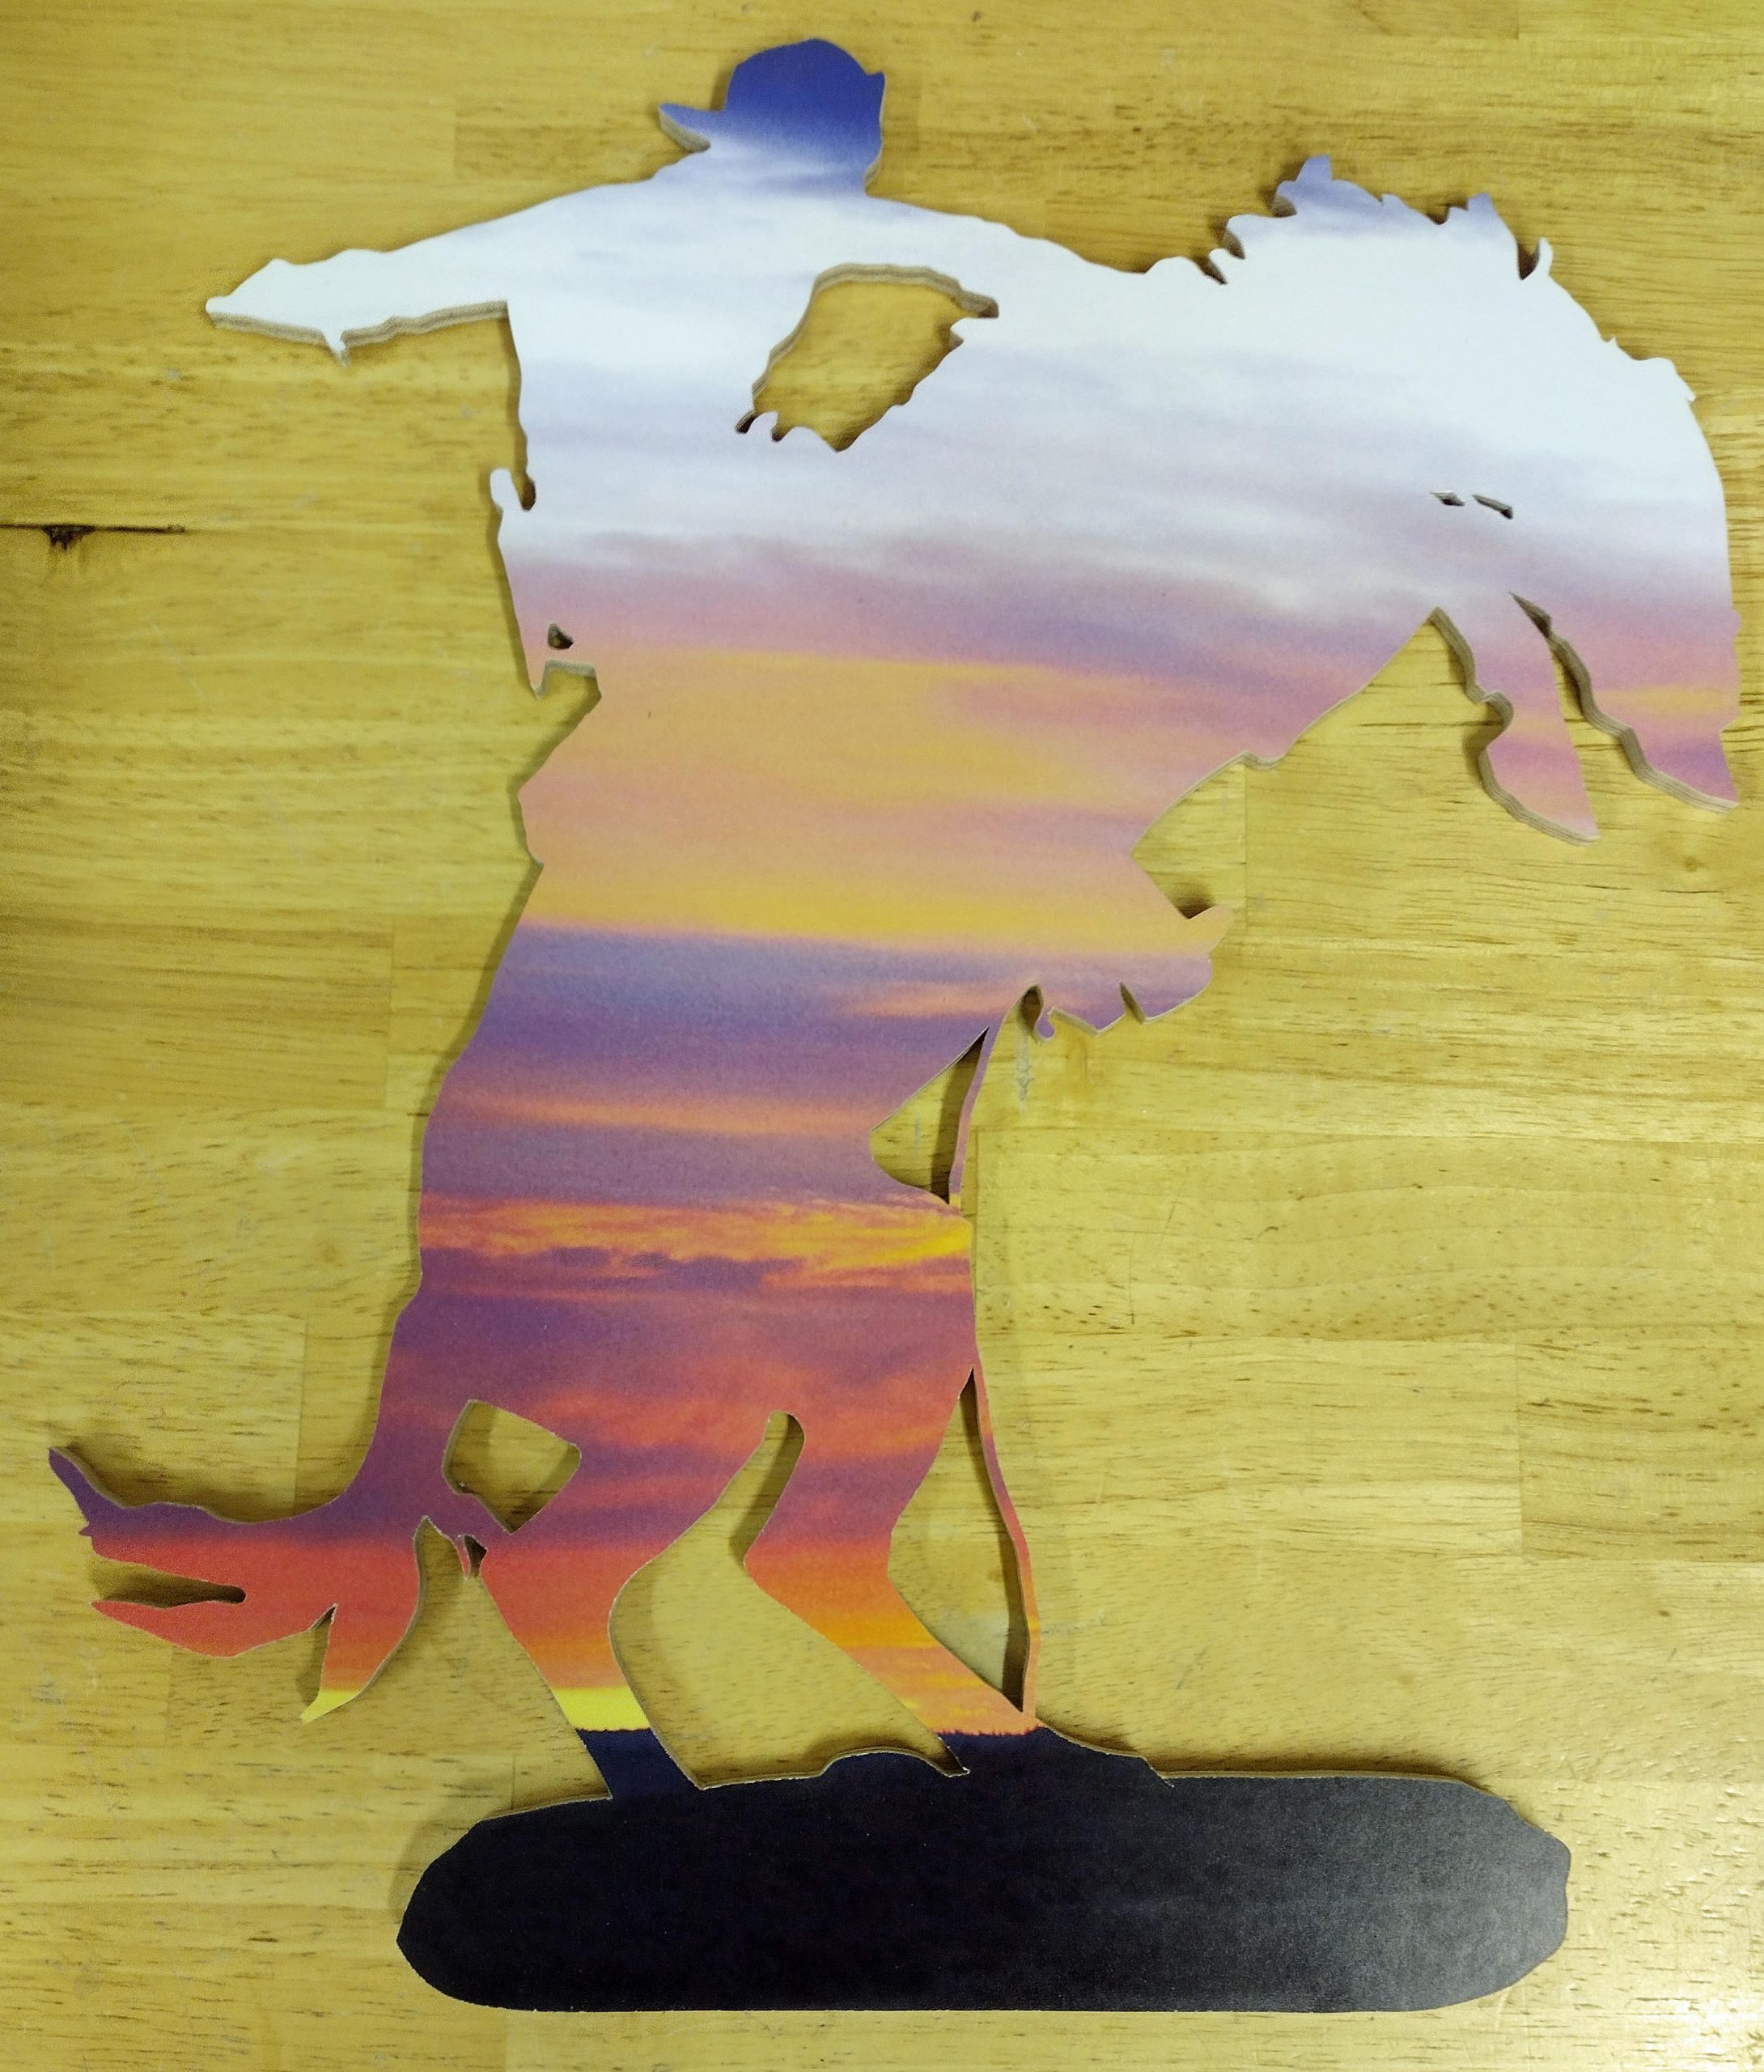
Next was to tape it down and cut the outline. I drilled the holes for the dropouts first and then cut the dropouts. (If you read my earlier posts on scroll saws, I used bottom feeding for the internal cuts.) The last little bit I cut was the outside edge of the dangling rein. A couple of things are not exactly clear on the finished outline. First, the far side front hoof appears to be integral to the horse’s mouth and nostrils. Also, the two little dropouts between the front legs and the horse’s neck might be hard to interpret. Here is the result.
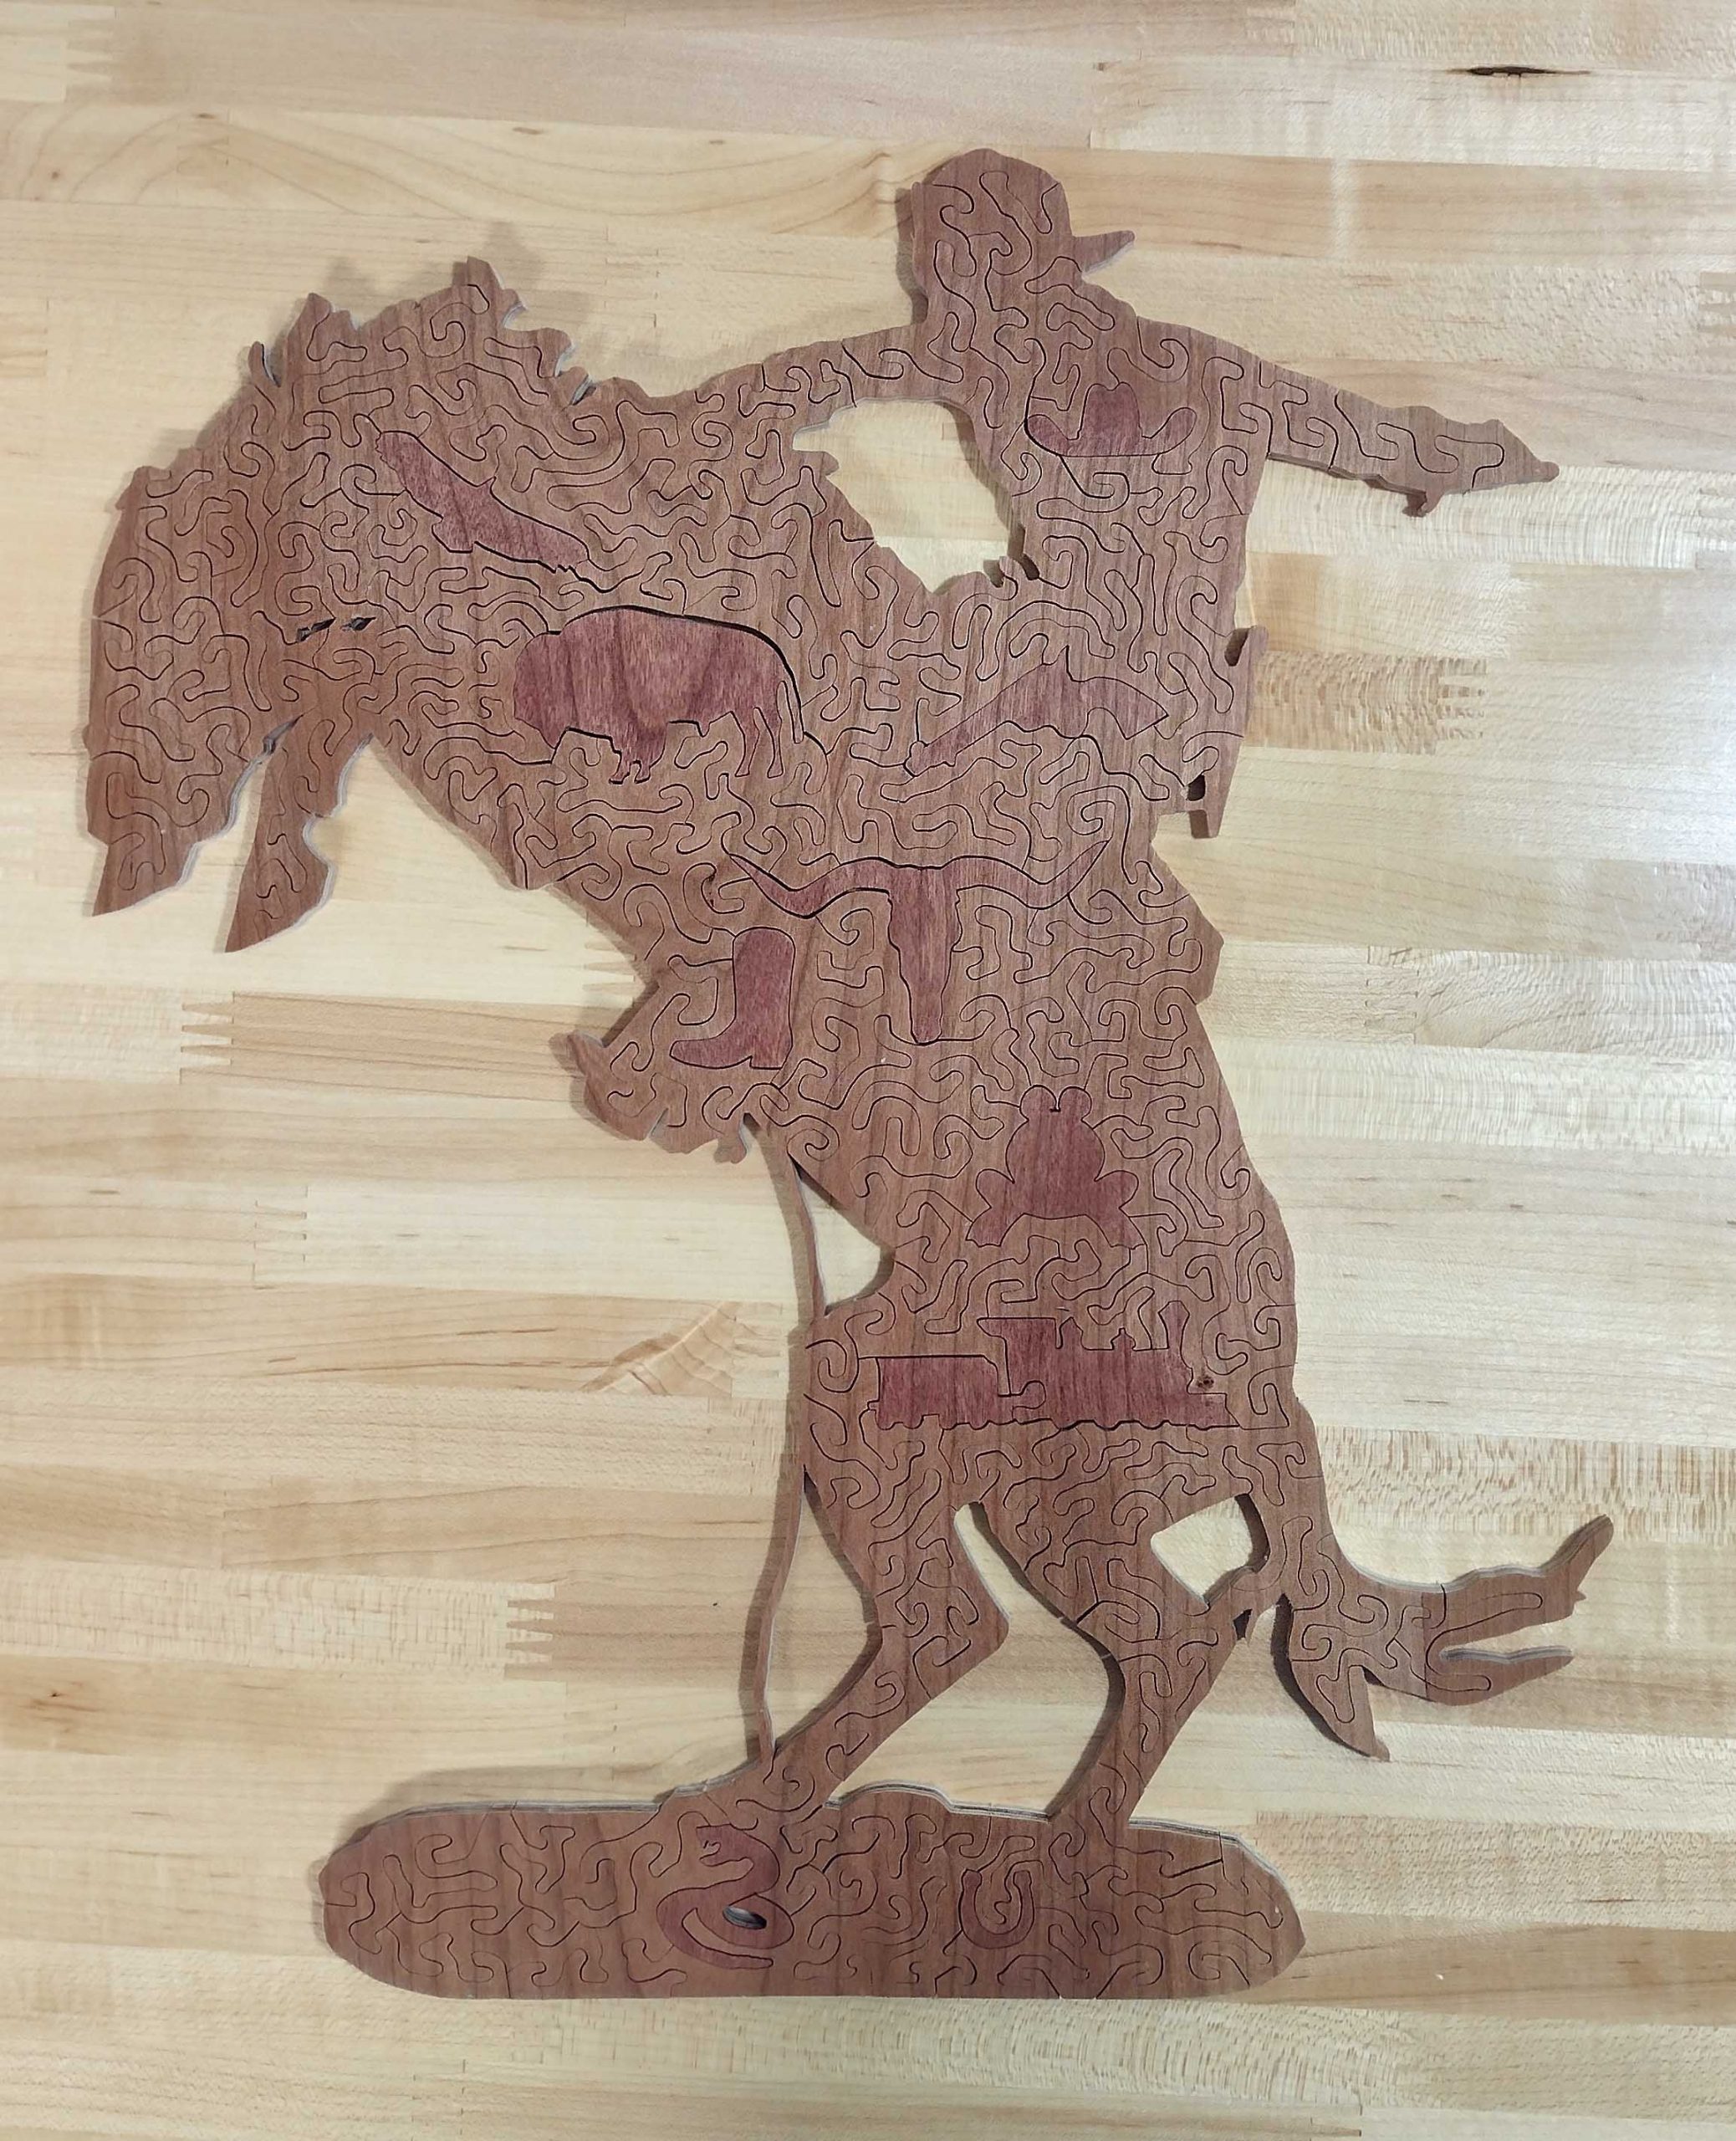
The next step was to pick some figurals that go with the cowboy. I felt a thrown horseshoe and a coiled snake ready to strike would be perfect for the ground. Higher up, a cowboy hat profile and a soaring eagle. A Colt Single Action Army revolver by the cowboy’s holster, a boot by the stirrup, a bison, and a long horn steer head would also be appropriate. Oh, and a steam locomotive with its tender. And, of course, the signature frog piece.
Here is the cut puzzle front.

The back was finished with two shades of Danish oil.
A closer view of the collected figural pieces.

This puzzle is already sold. If you are interested in your own copy of this puzzle, please contact me direct via email (bob@fivefrogswoodworking.com) to discuss options.
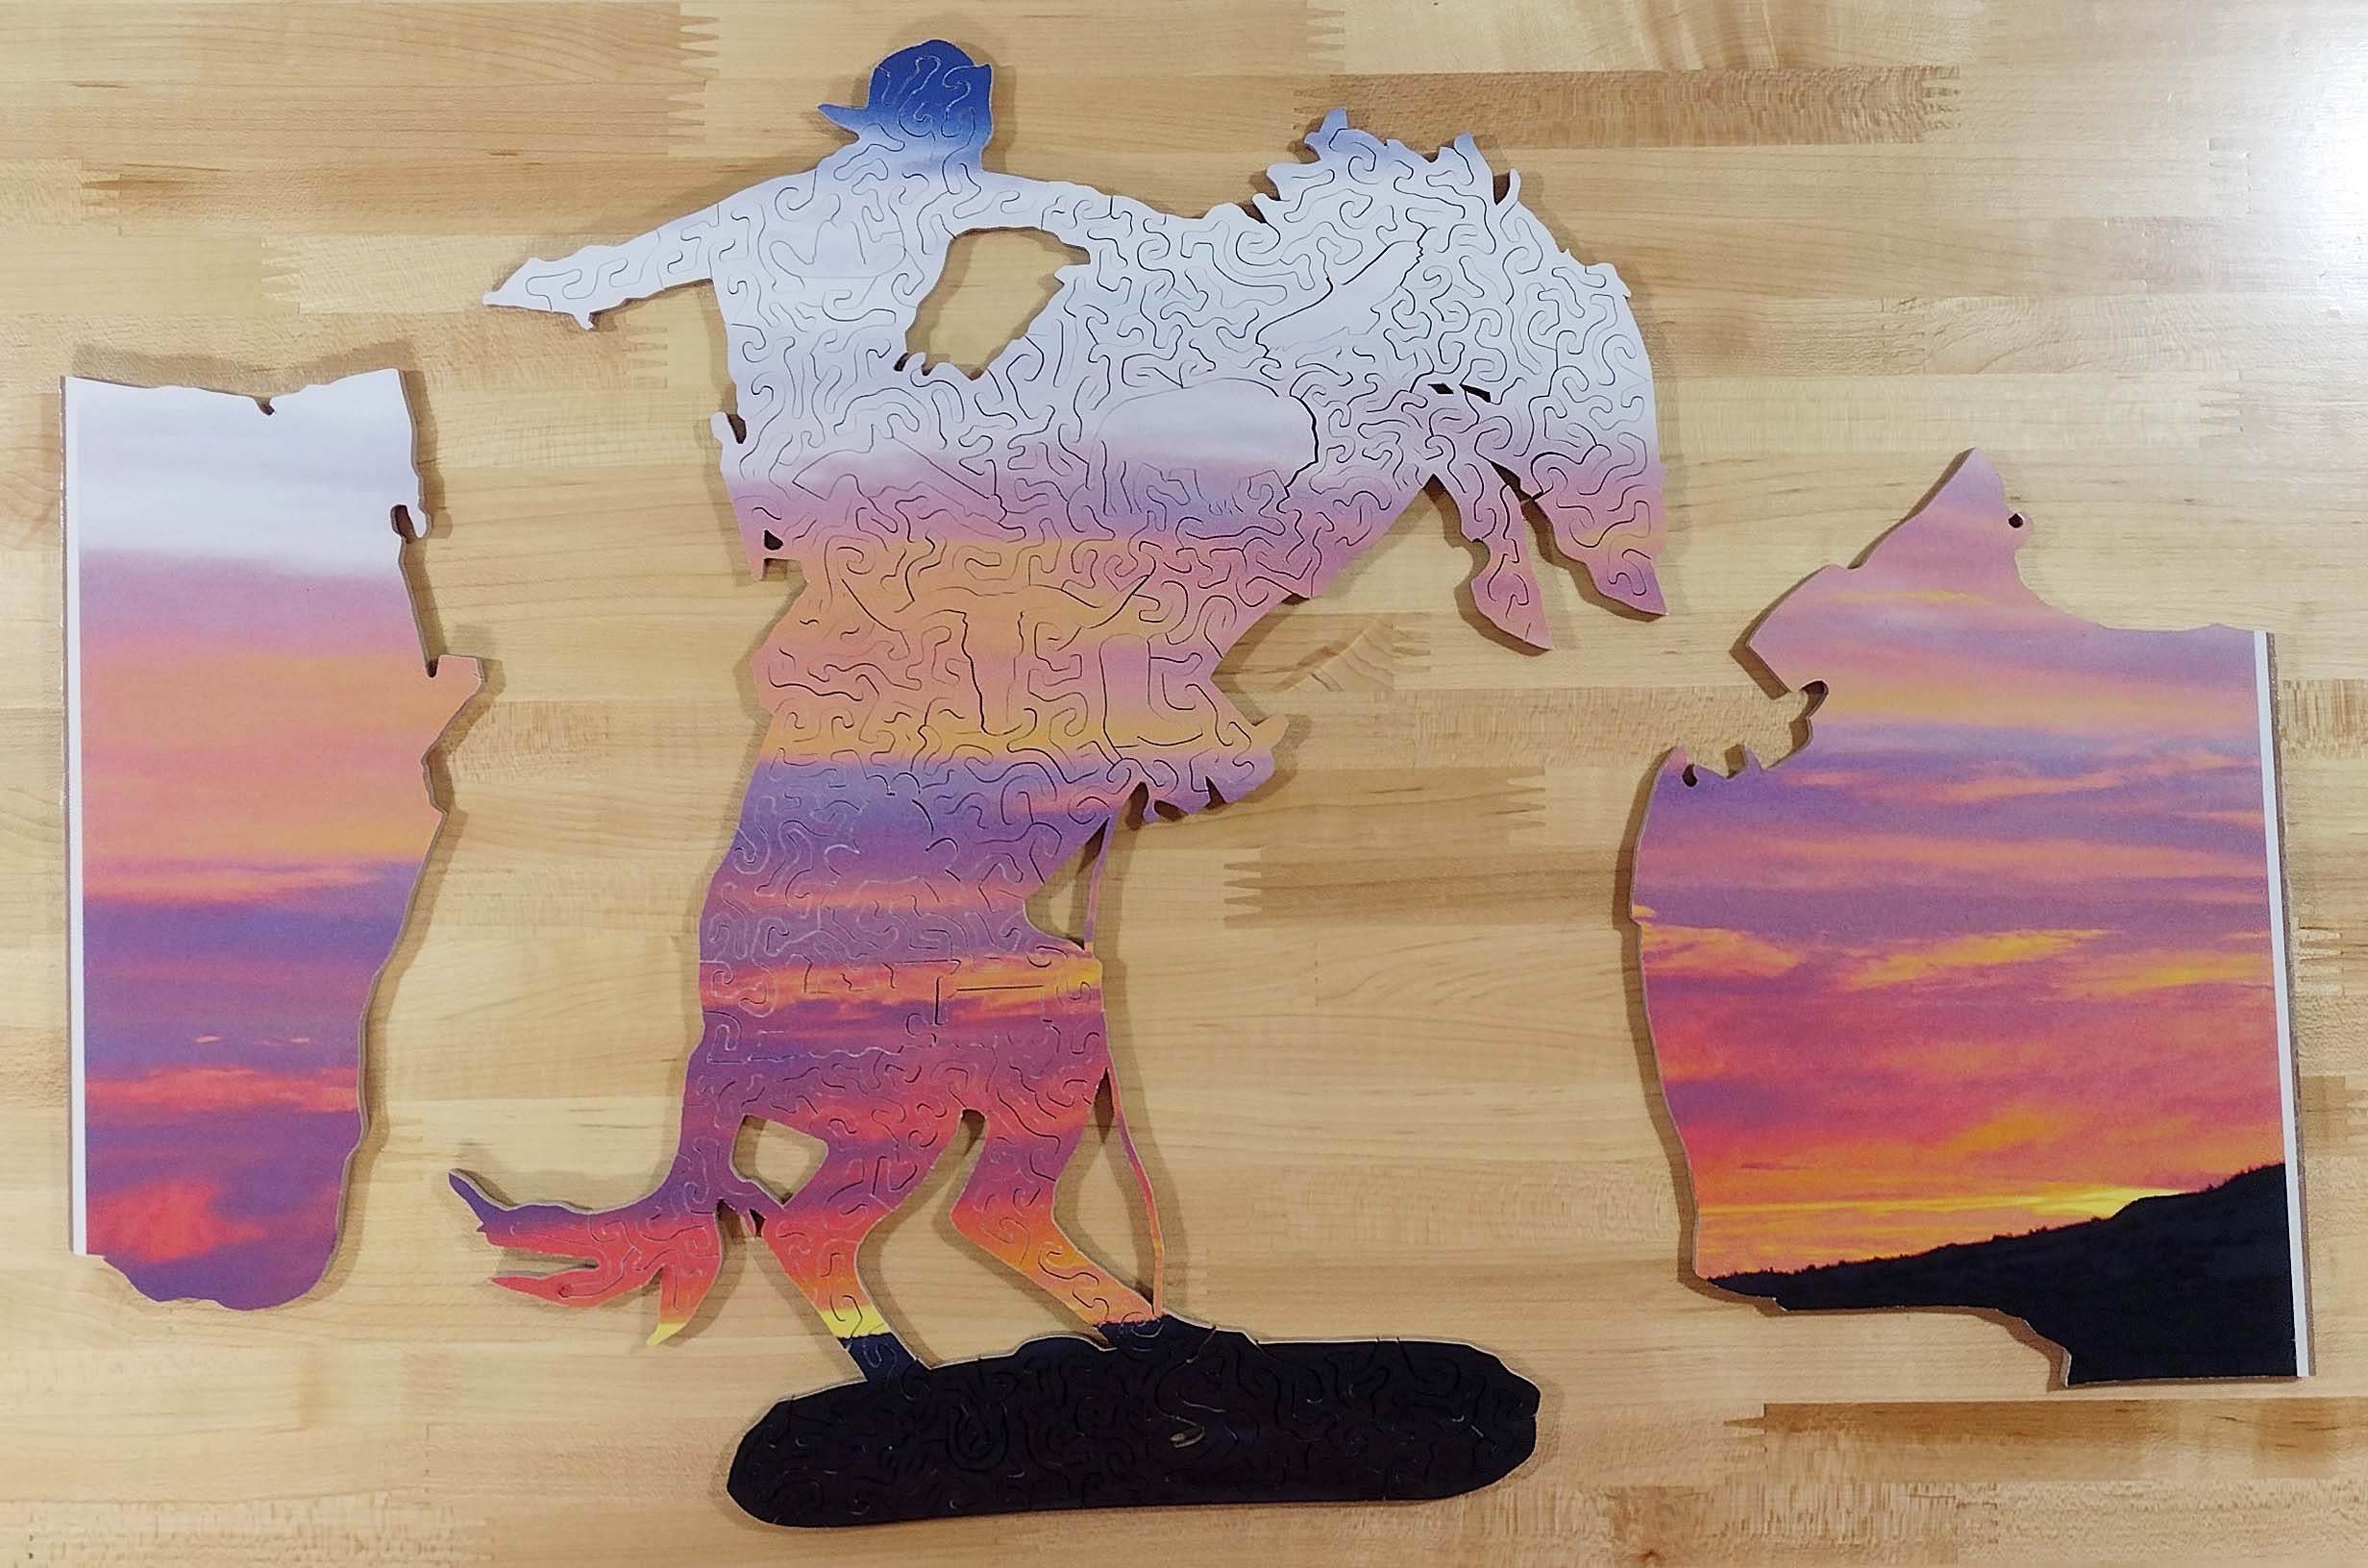
The widest width of the puzzle is about 12.5 inches, and the height is 14.5 inches. It ended up having 123 pieces. You can tell there is a lot of scrap material cut away for this. I cut a smaller version of this puzzle a year or so ago from an 8.5″ x 11″ print. I traced that smaller puzzle on a sheet of graph paper and counted squares to determine the area. That smaller puzzle had roughly 24.5 square inches. Scaling up to this size, this puzzle has roughly 79 square inches. A 13″ x 19″ print has 247 square inches of area, so almost 70% is waste material.
I have a couple of larger pieces of scrap from this. I have a customer who wants me to use them to make her some small puzzles. The longer skinny piece (about 3″ x 8″) will be a beach flip flop, and the squarish piece (about 6″ x 6″) might be a flower of some sort.
This is the first puzzle I have cut using my new scroll saw. I recently purchased a Seyco ST-21 to replace my broken DeWalt. Well, I guess this may technically be the second puzzle I have finished with the new scroll saw. The DeWalt failed in the middle of my last project. I ended up cutting that puzzle with three different saws: the DeWalt, my Hawk, and finally the new Seyco. So, this is the first puzzle entirely cut with the new Seyco. I will have an upcoming blog post to discuss the Seyco and how it compares to my other saws, but that will be after I do more cutting on it.
Thanks for reading, and Happy Puzzling!
Bob